
custom mcp
The Custom MCP tool lets your AI agent use the tools of your own MCP server. You add it on the Prompt & Tools page, choose which actions the agent may use, and tell the agent when to use it.
Prerequisites
An AI agent. See Create your first AI Agent.
The integration must be turned on by your partner. If it is not, the tool is not shown to you. [CHECK: confirm how a customer can tell, and who to ask.]
An MCP server.
Edit access to AI Agents. [CHECK: permissions are not part of the PRD. Confirm the role needed.]
Key definitions
Tool
Something your agent can use to take an action.
Action
One thing a tool can do. You turn each action on or off with Allowed.
Usage instructions
Your words that tell the agent when to use the tool and what to do.
Connected account
The account of the other service. You connect it once and reuse it for other agents.
What the Custom MCP tool can do
Create or select an MCP server
Picks the server your tools come from.
Add its tools
Chooses which tools of the server the agent may use.
View added tools
Shows the tools you already added.
You fill in these fields when you set up the tool:
MCP server (create a new one or pick one)
Tools to add
Steps
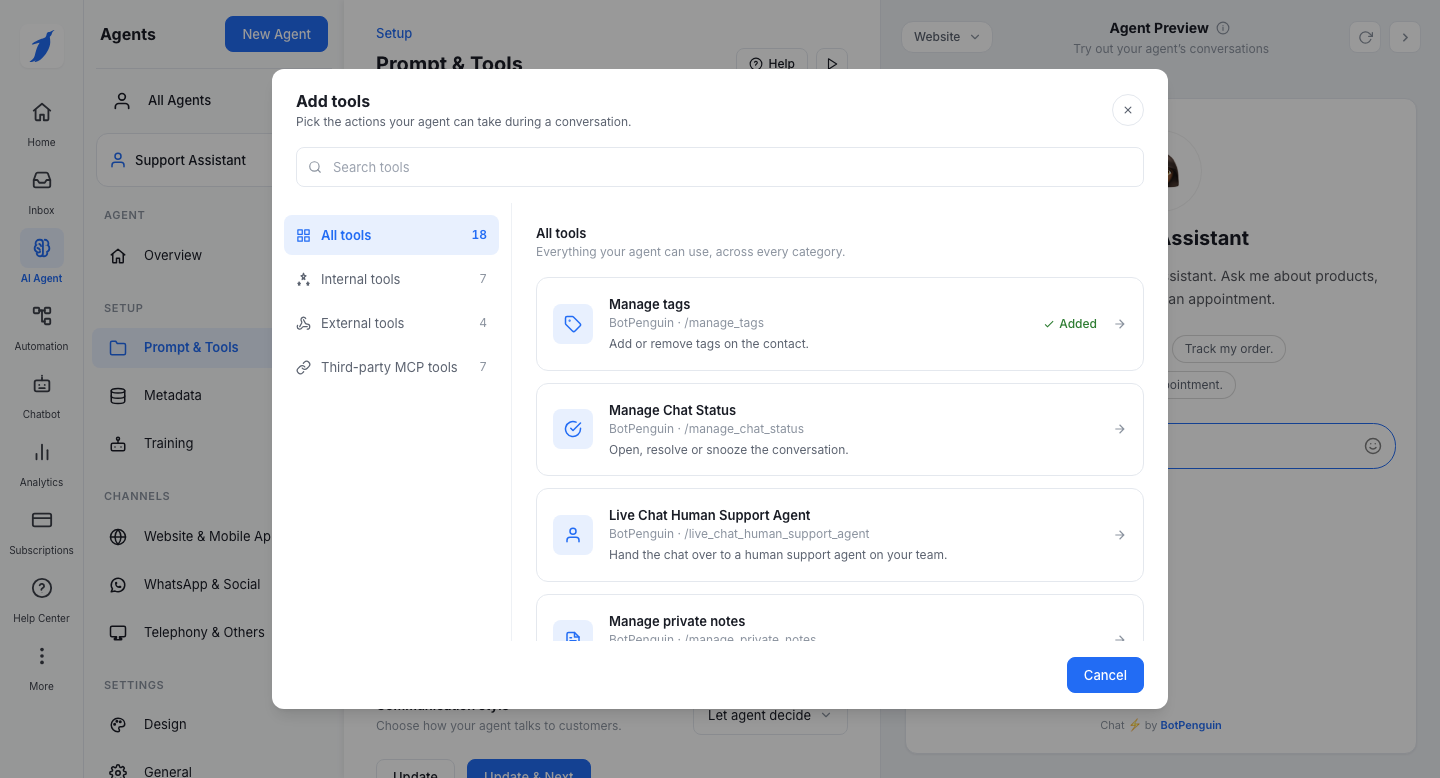
Open Prompt & Tools under Setup in the AI Agent sidebar. Click Add tool. In the Add tools window, find Custom MCP. You can search for it, or look under Third-party MCP tools. Click it.
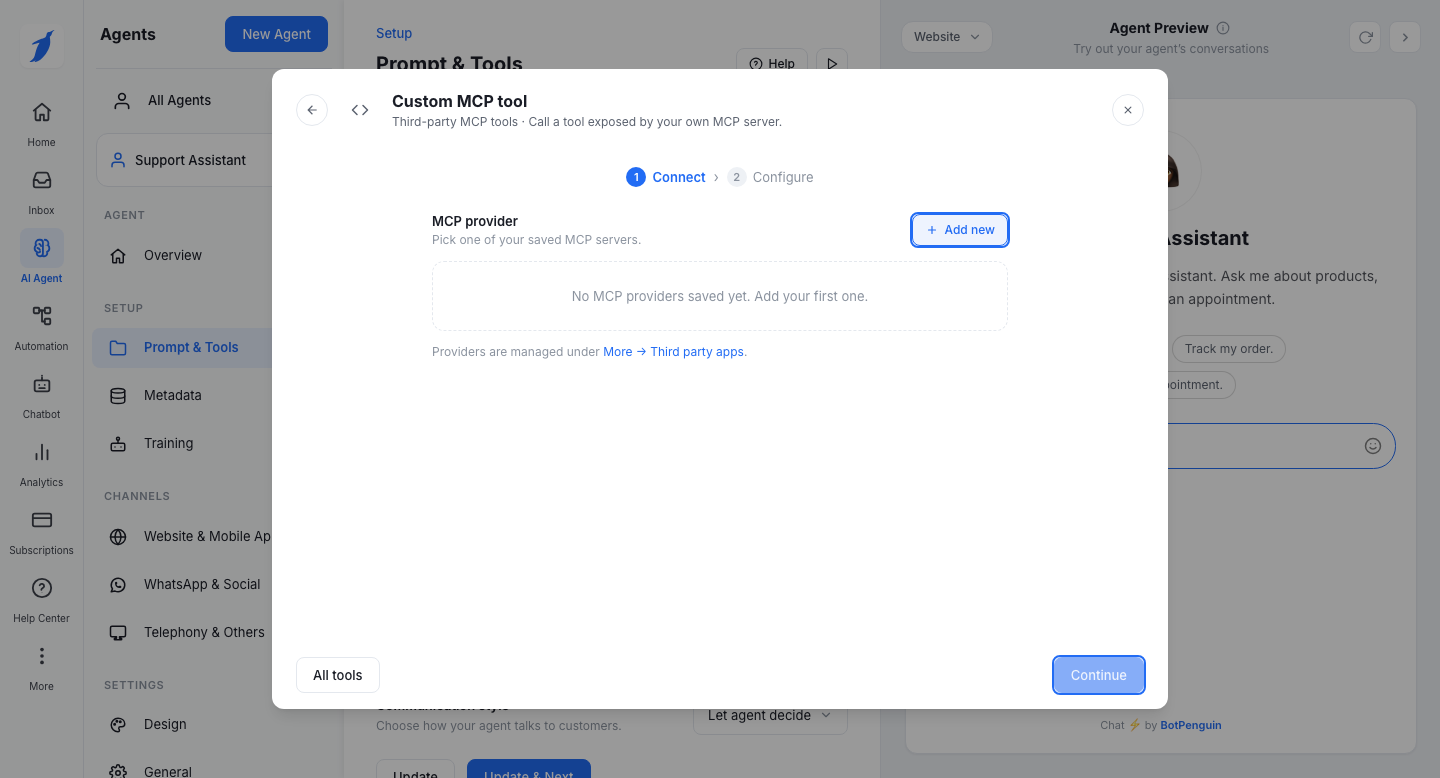
On the MCP provider step, choose your MCP server, or click Add new to add one. Click Continue.
On the Configure step, fill in: MCP server (create a new one or pick one); Tools to add. Turn on the actions you want the agent to use. Under "How should the agent use Custom MCP?", write when the agent should use the tool and what it should do. This is required.
Click Add tool. The button stays grey until the required fields are filled. The tool now shows under Connected tools with an Active label. Click Done, then click Update to save the page.
Example usage instructions
Use this when the customer asks for an order status. Look up the order by its number.
Write your own in the same way: say when to use the tool, then what to do.
Change or remove the tool
Under Connected tools, click the gear icon to open the tool's settings again. Click the delete icon to remove it. You are asked to confirm. Deleting removes the tool and its usage instructions from the agent. The connected account stays, so other agents can still use it.
Common errors
[CHECK: the PRD lists the actions and inputs of this tool but not its screen text, limits or error messages. Confirm these with the dev team before publishing.]
[CHECK: existing customers have the old settings of this tool moved into the agent prompt, with the right action turned on. Confirm what customers should know about this move.]
Support
Still not working? Write to us at support@botpenguin.com. We will reach out to you within 24 hours.