> For the complete documentation index, see [llms.txt](https://help.botpenguin.com/llms.txt). Markdown versions of documentation pages are available by appending `.md` to page URLs; this page is available as [Markdown](https://help.botpenguin.com/bots/whatsapp-bot/manage-chatflow/components-in-chatflow/integrations-component/google-calendar-appointment.md).
# Google Calendar Appointment
Step by Step Guide to Configure the Google Calendar Component in your Chatflow
### What is the Appointment Component?
The Appointment Component enables end-to-end appointment scheduling inside a chat flow. Once configured, users can select a date/time, and the system creates or updates events in the connected calendar automatically.
* **Google Appointment** – Direct Google Calendar–based booking
***
### When to Use It
Use the Appointment Component when you want to:
* Let users **book appointments via chat**
* Sync appointments with **Google Calendar**
* Allow **reschedule or cancellation** without agent involvement
* Send **automatic confirmation emails**
***
### How It Works (Flow Overview)
1. Ask the user for appointment date/time
2. Collect required details (email, phone, etc.)
3. Configure the Appointment Component
4. Create/update the event in Google Calendar
5. Send confirmation to the user
***
### How to Add the Appointment Component
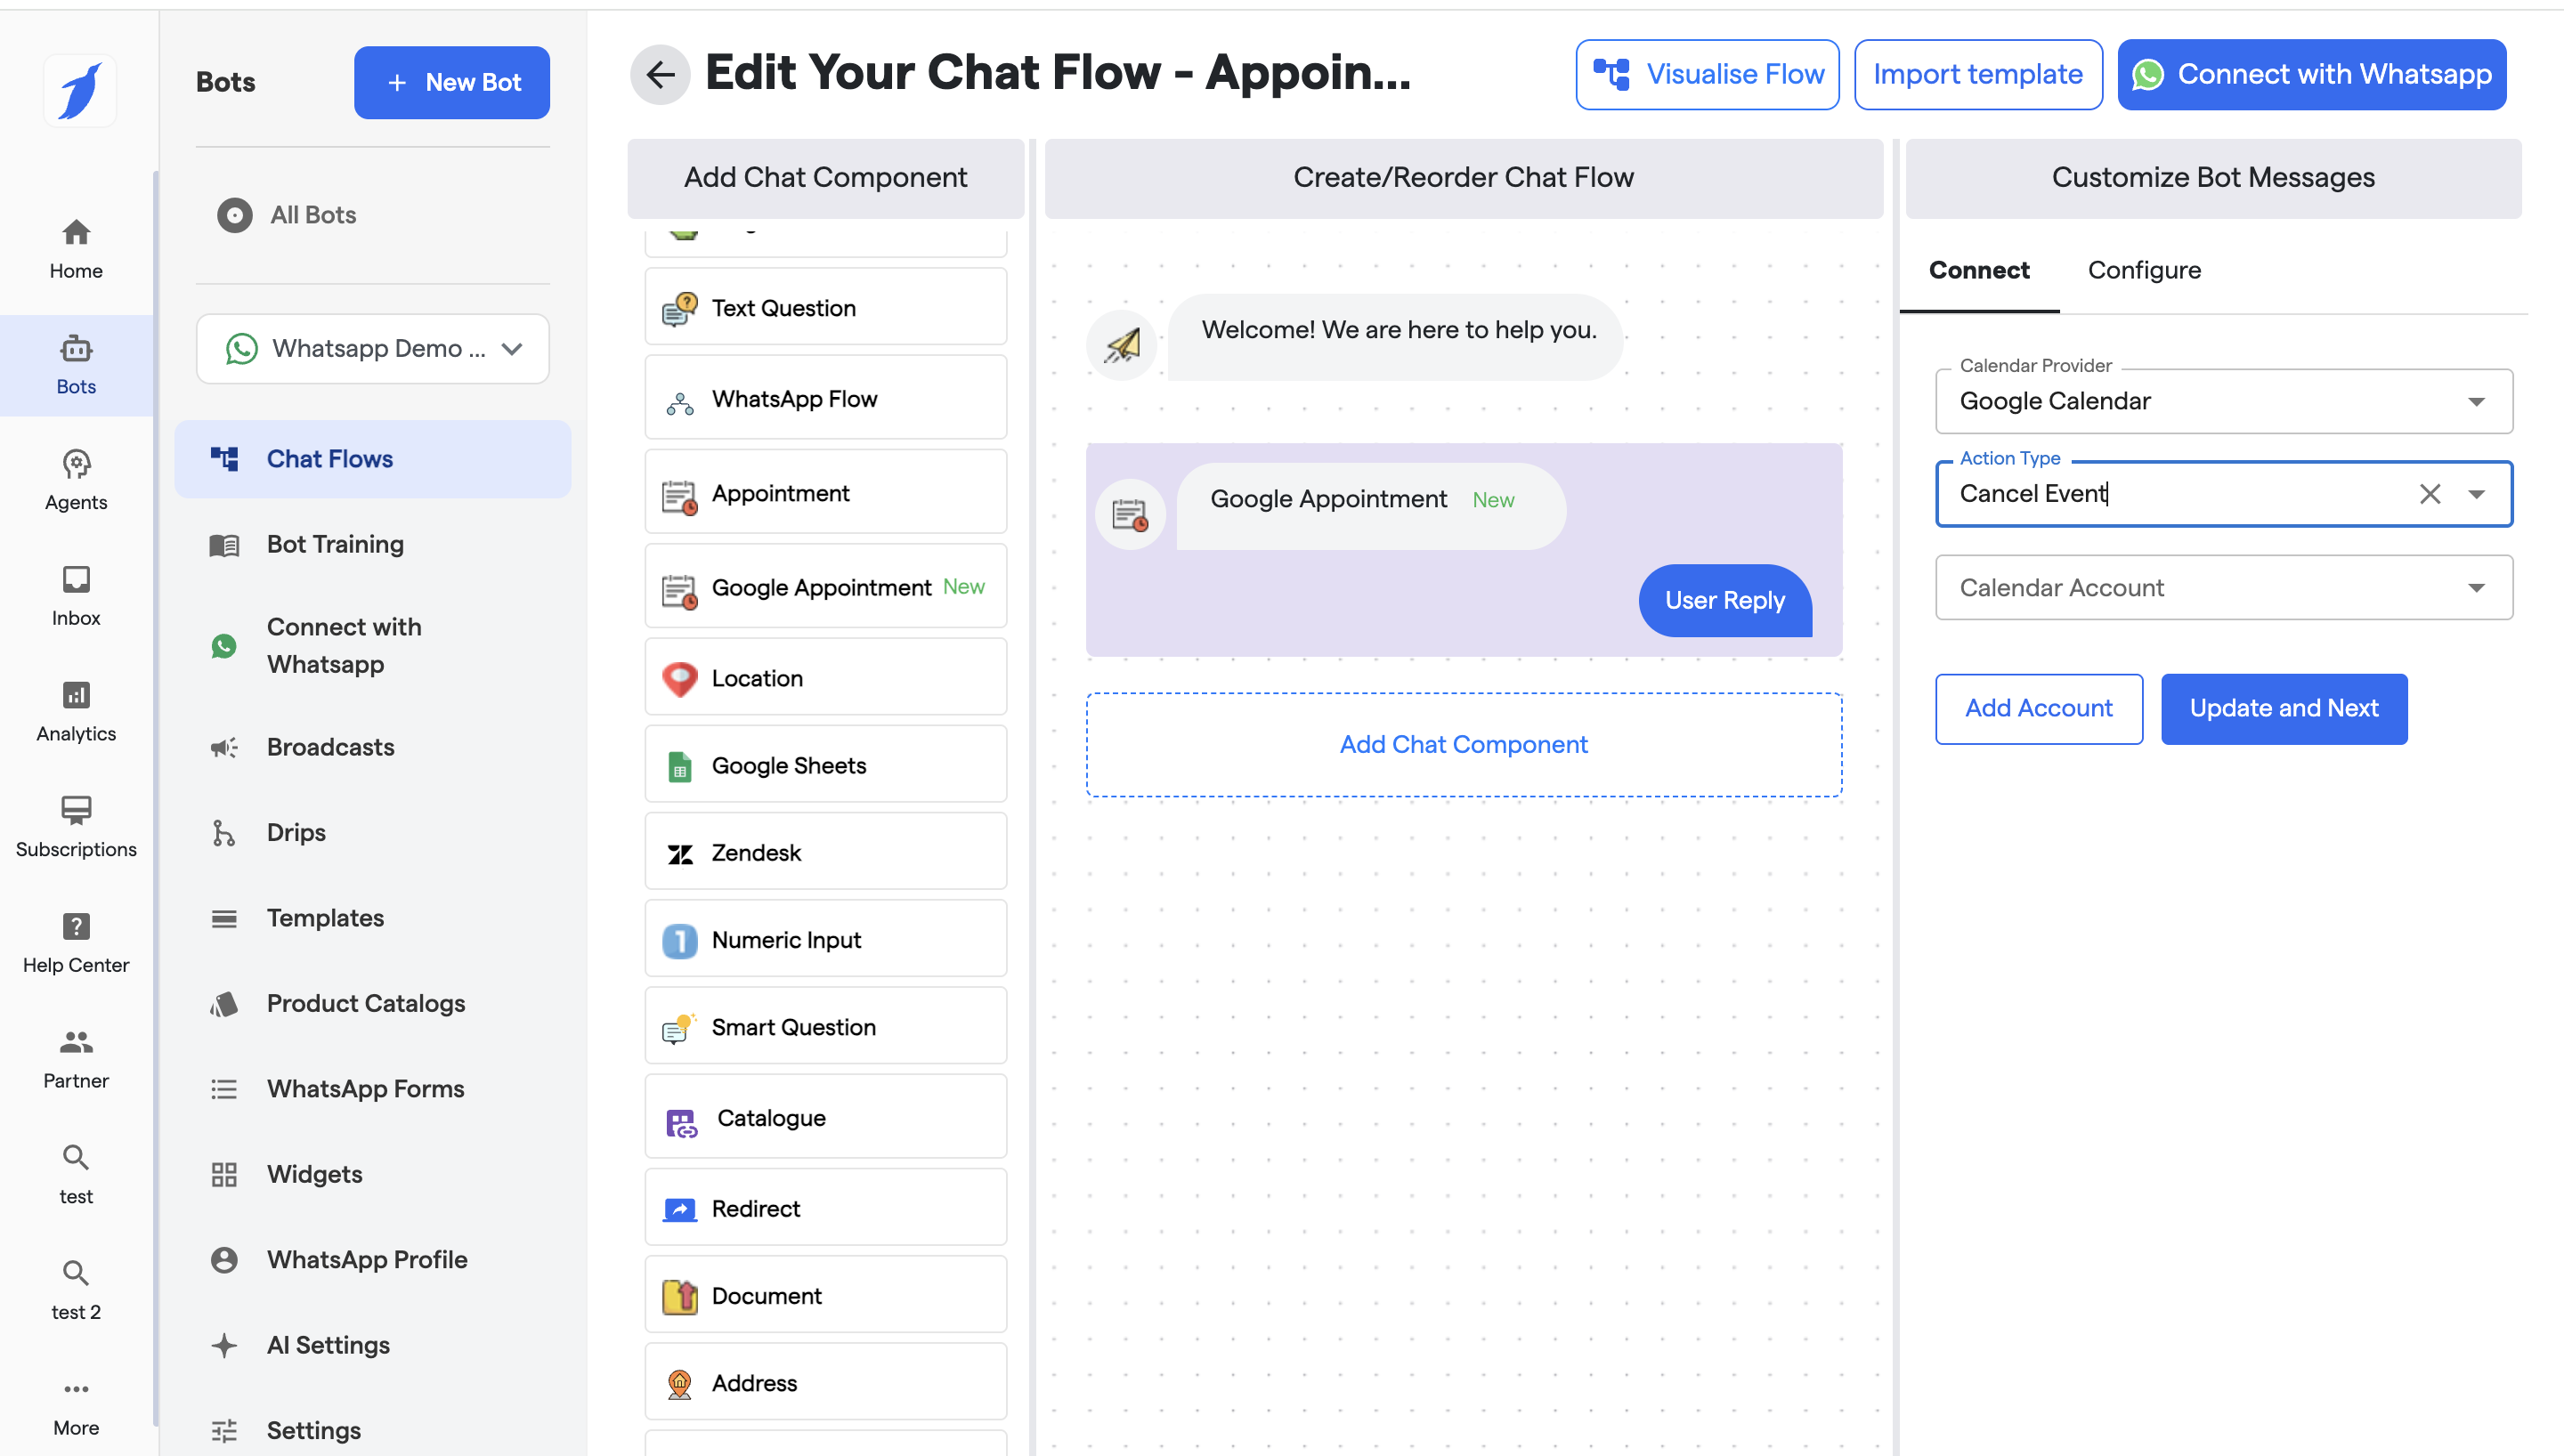
1. Open **Bot → Select your bot and Go to Chat Flows**
2. Click **Add Chat Component**
3. Select **Google Appointment**
4. Drag and drop it into the desired position in the flow
***
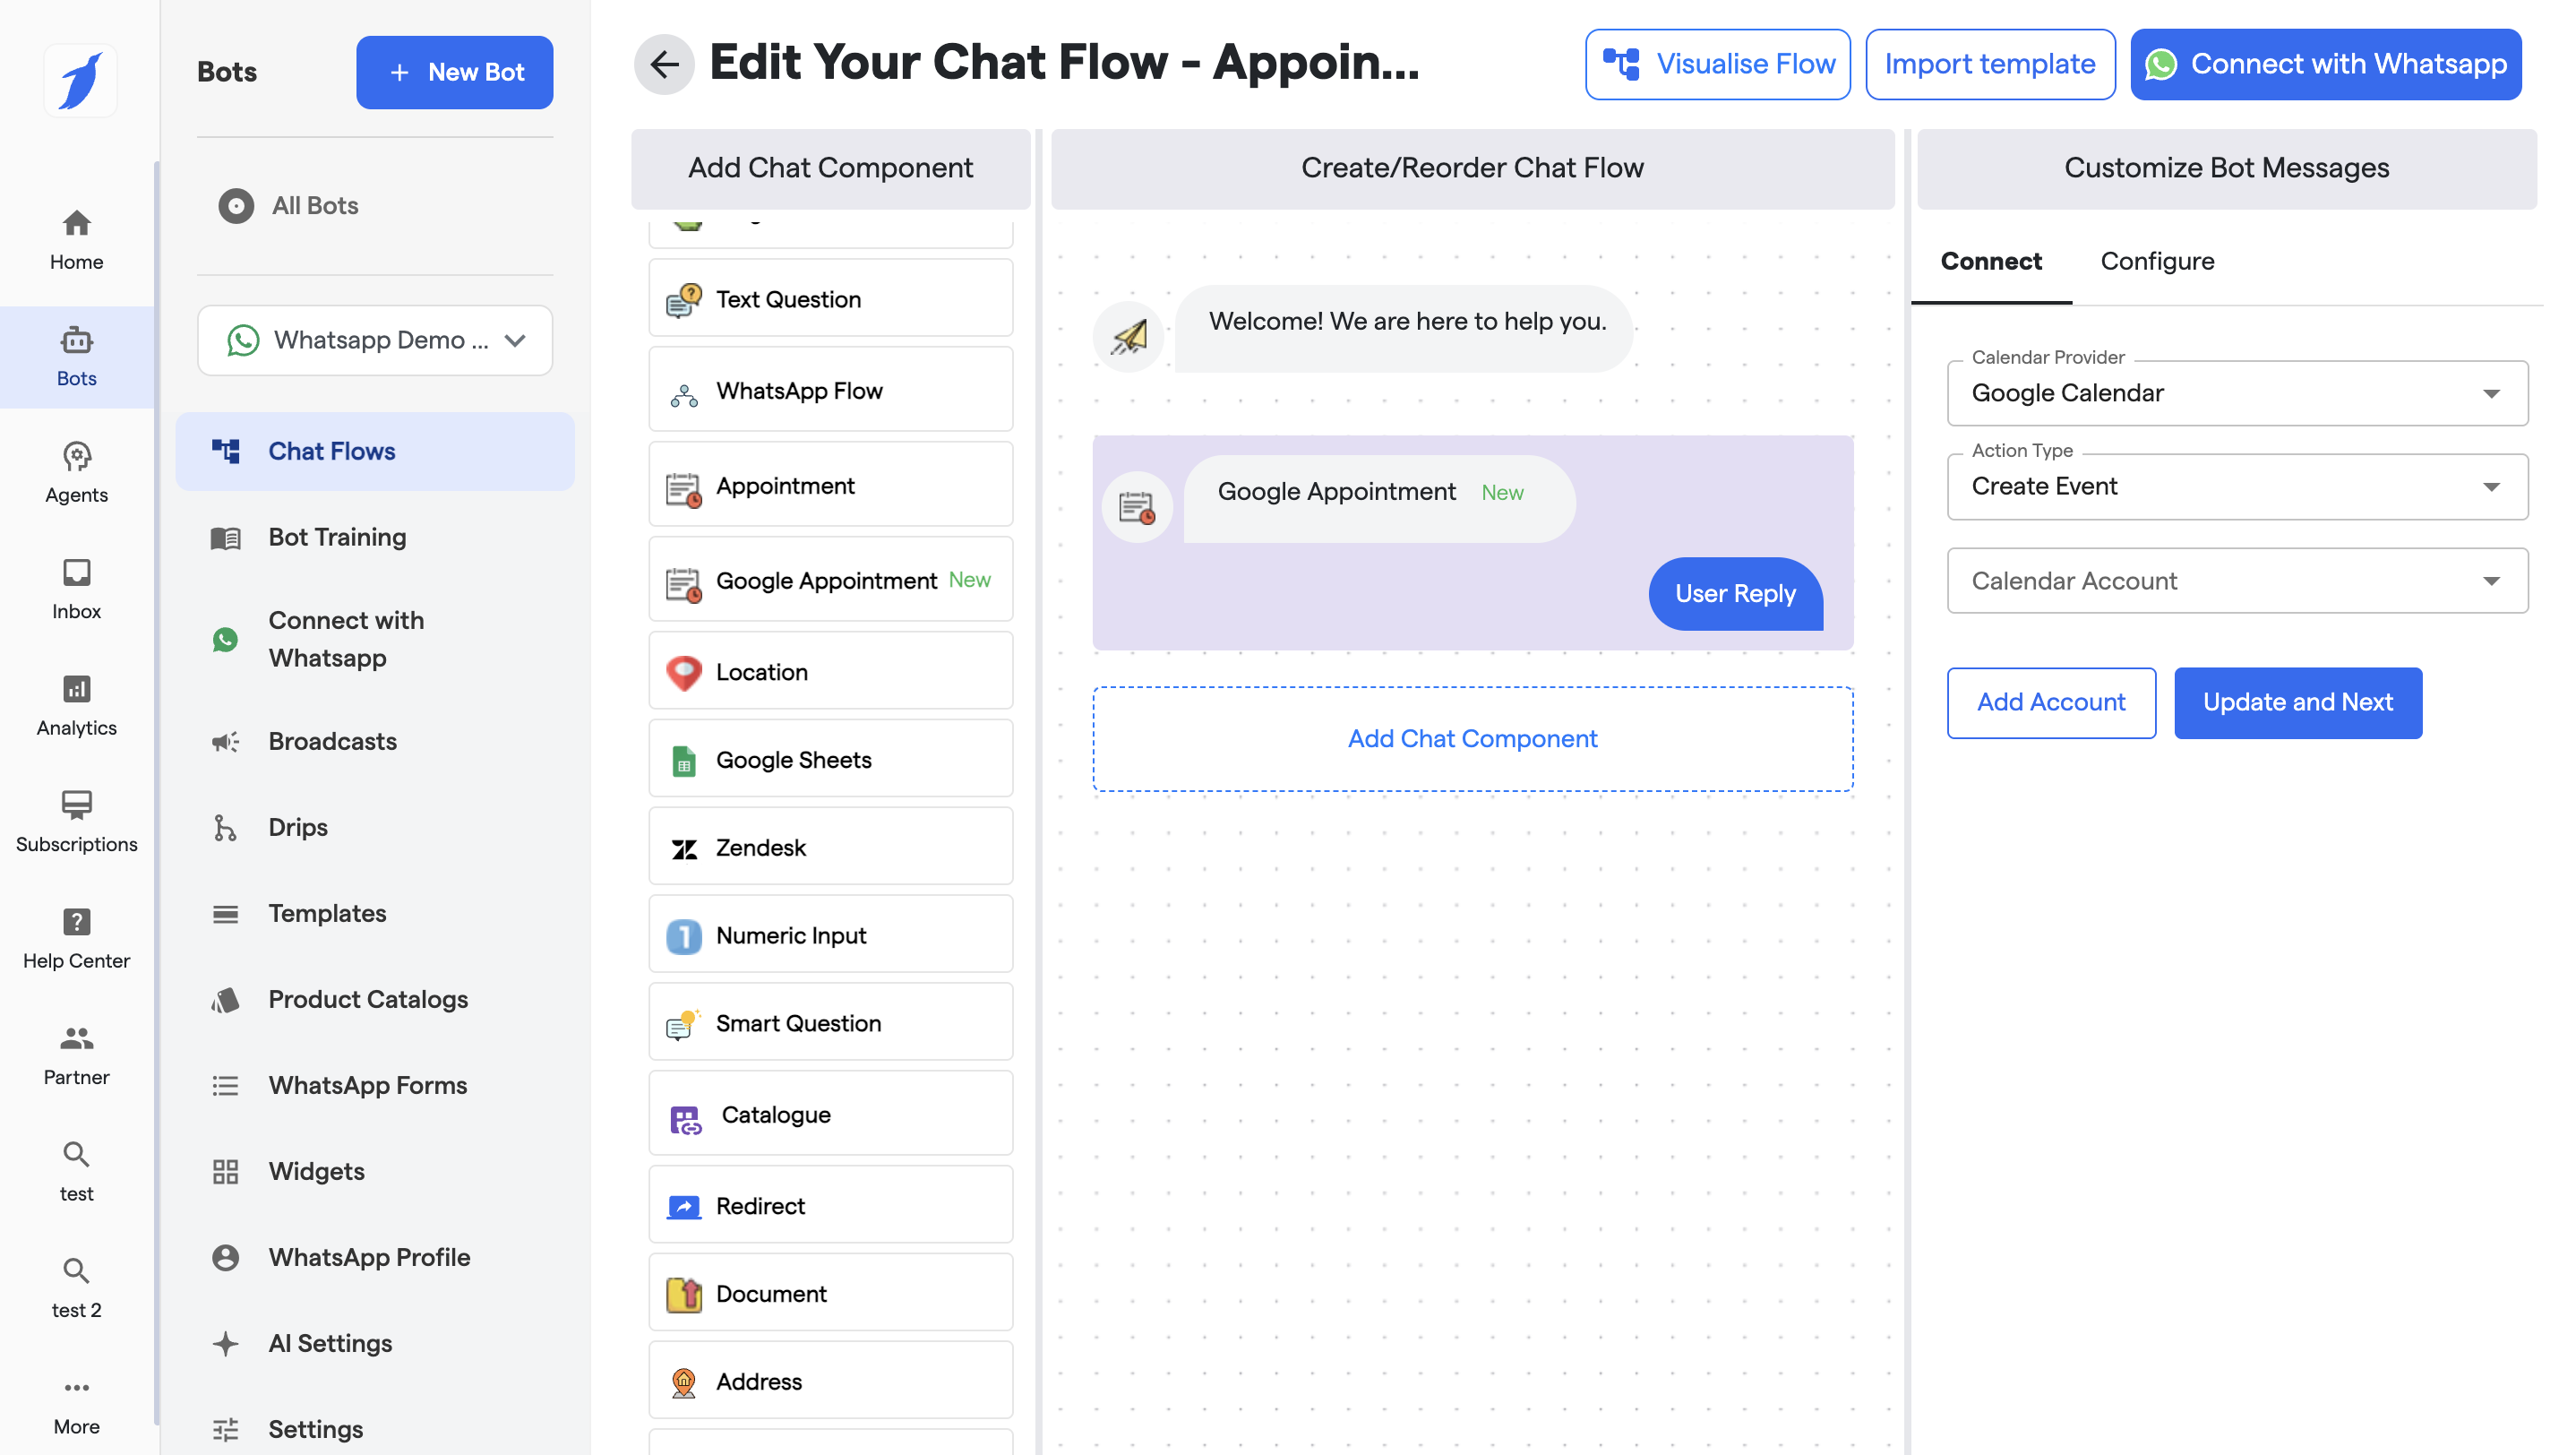
### 1. Create Event Flow
### Configuration Options (Right Panel)
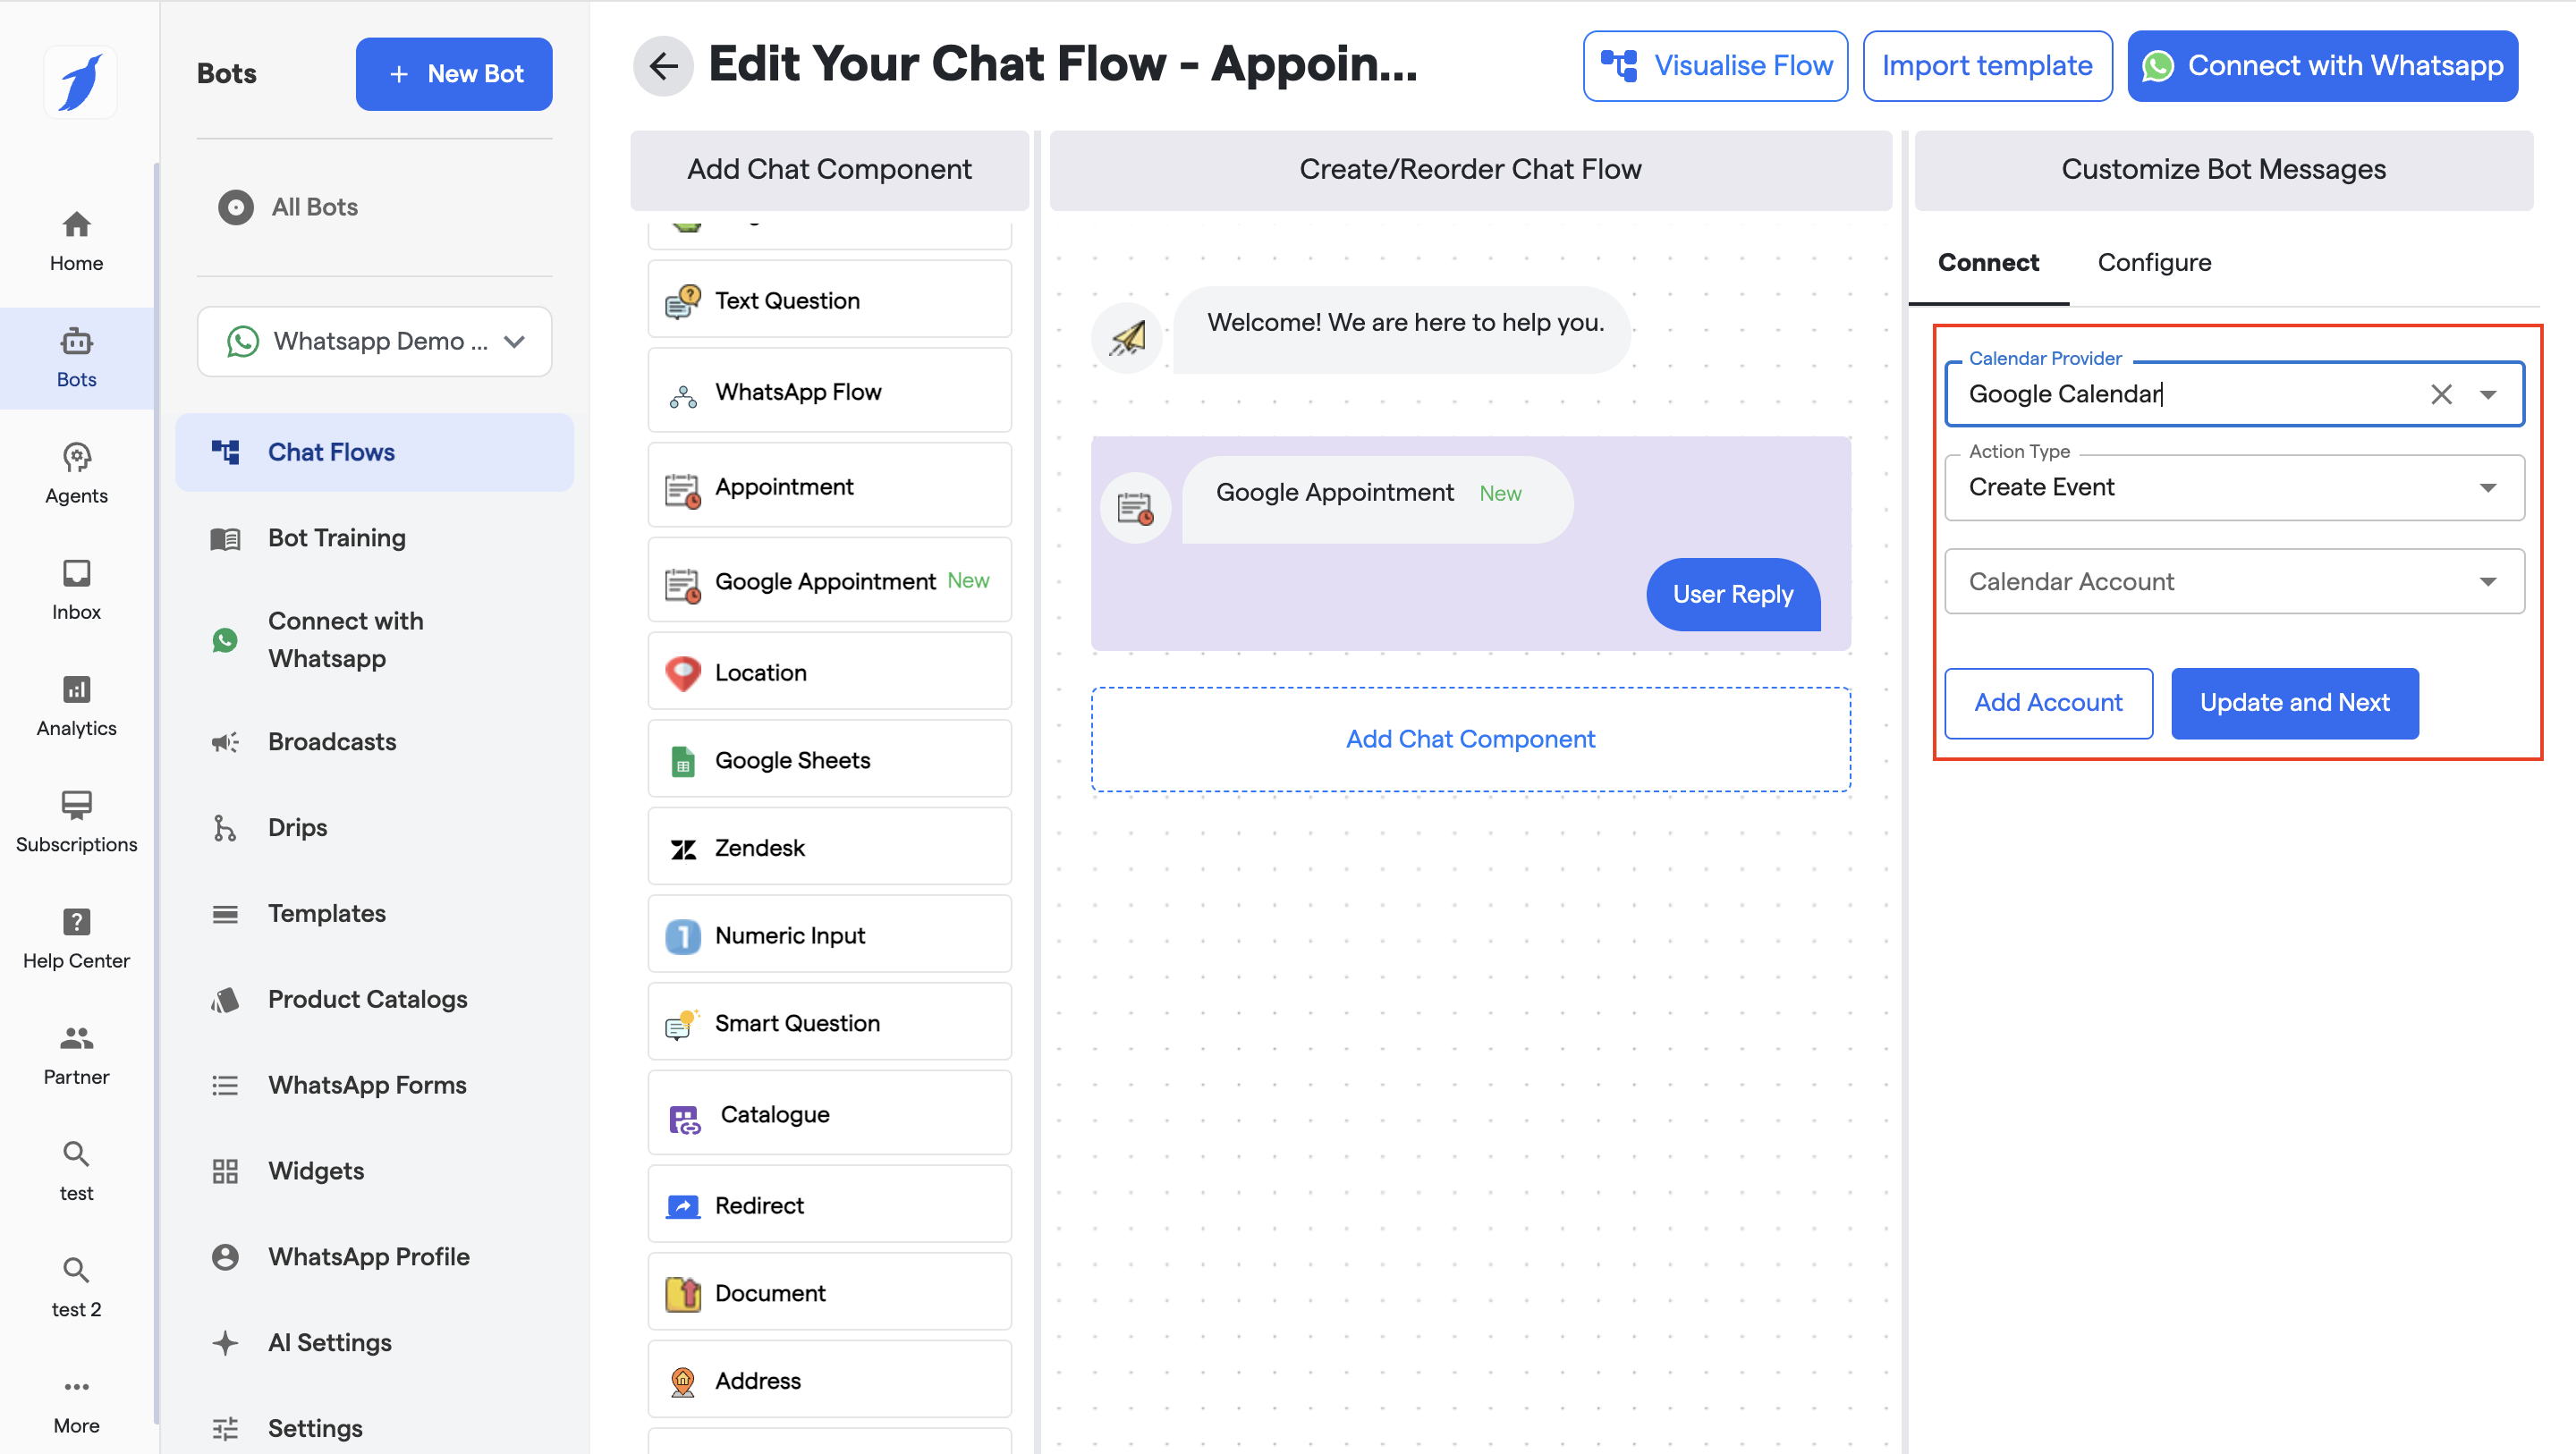
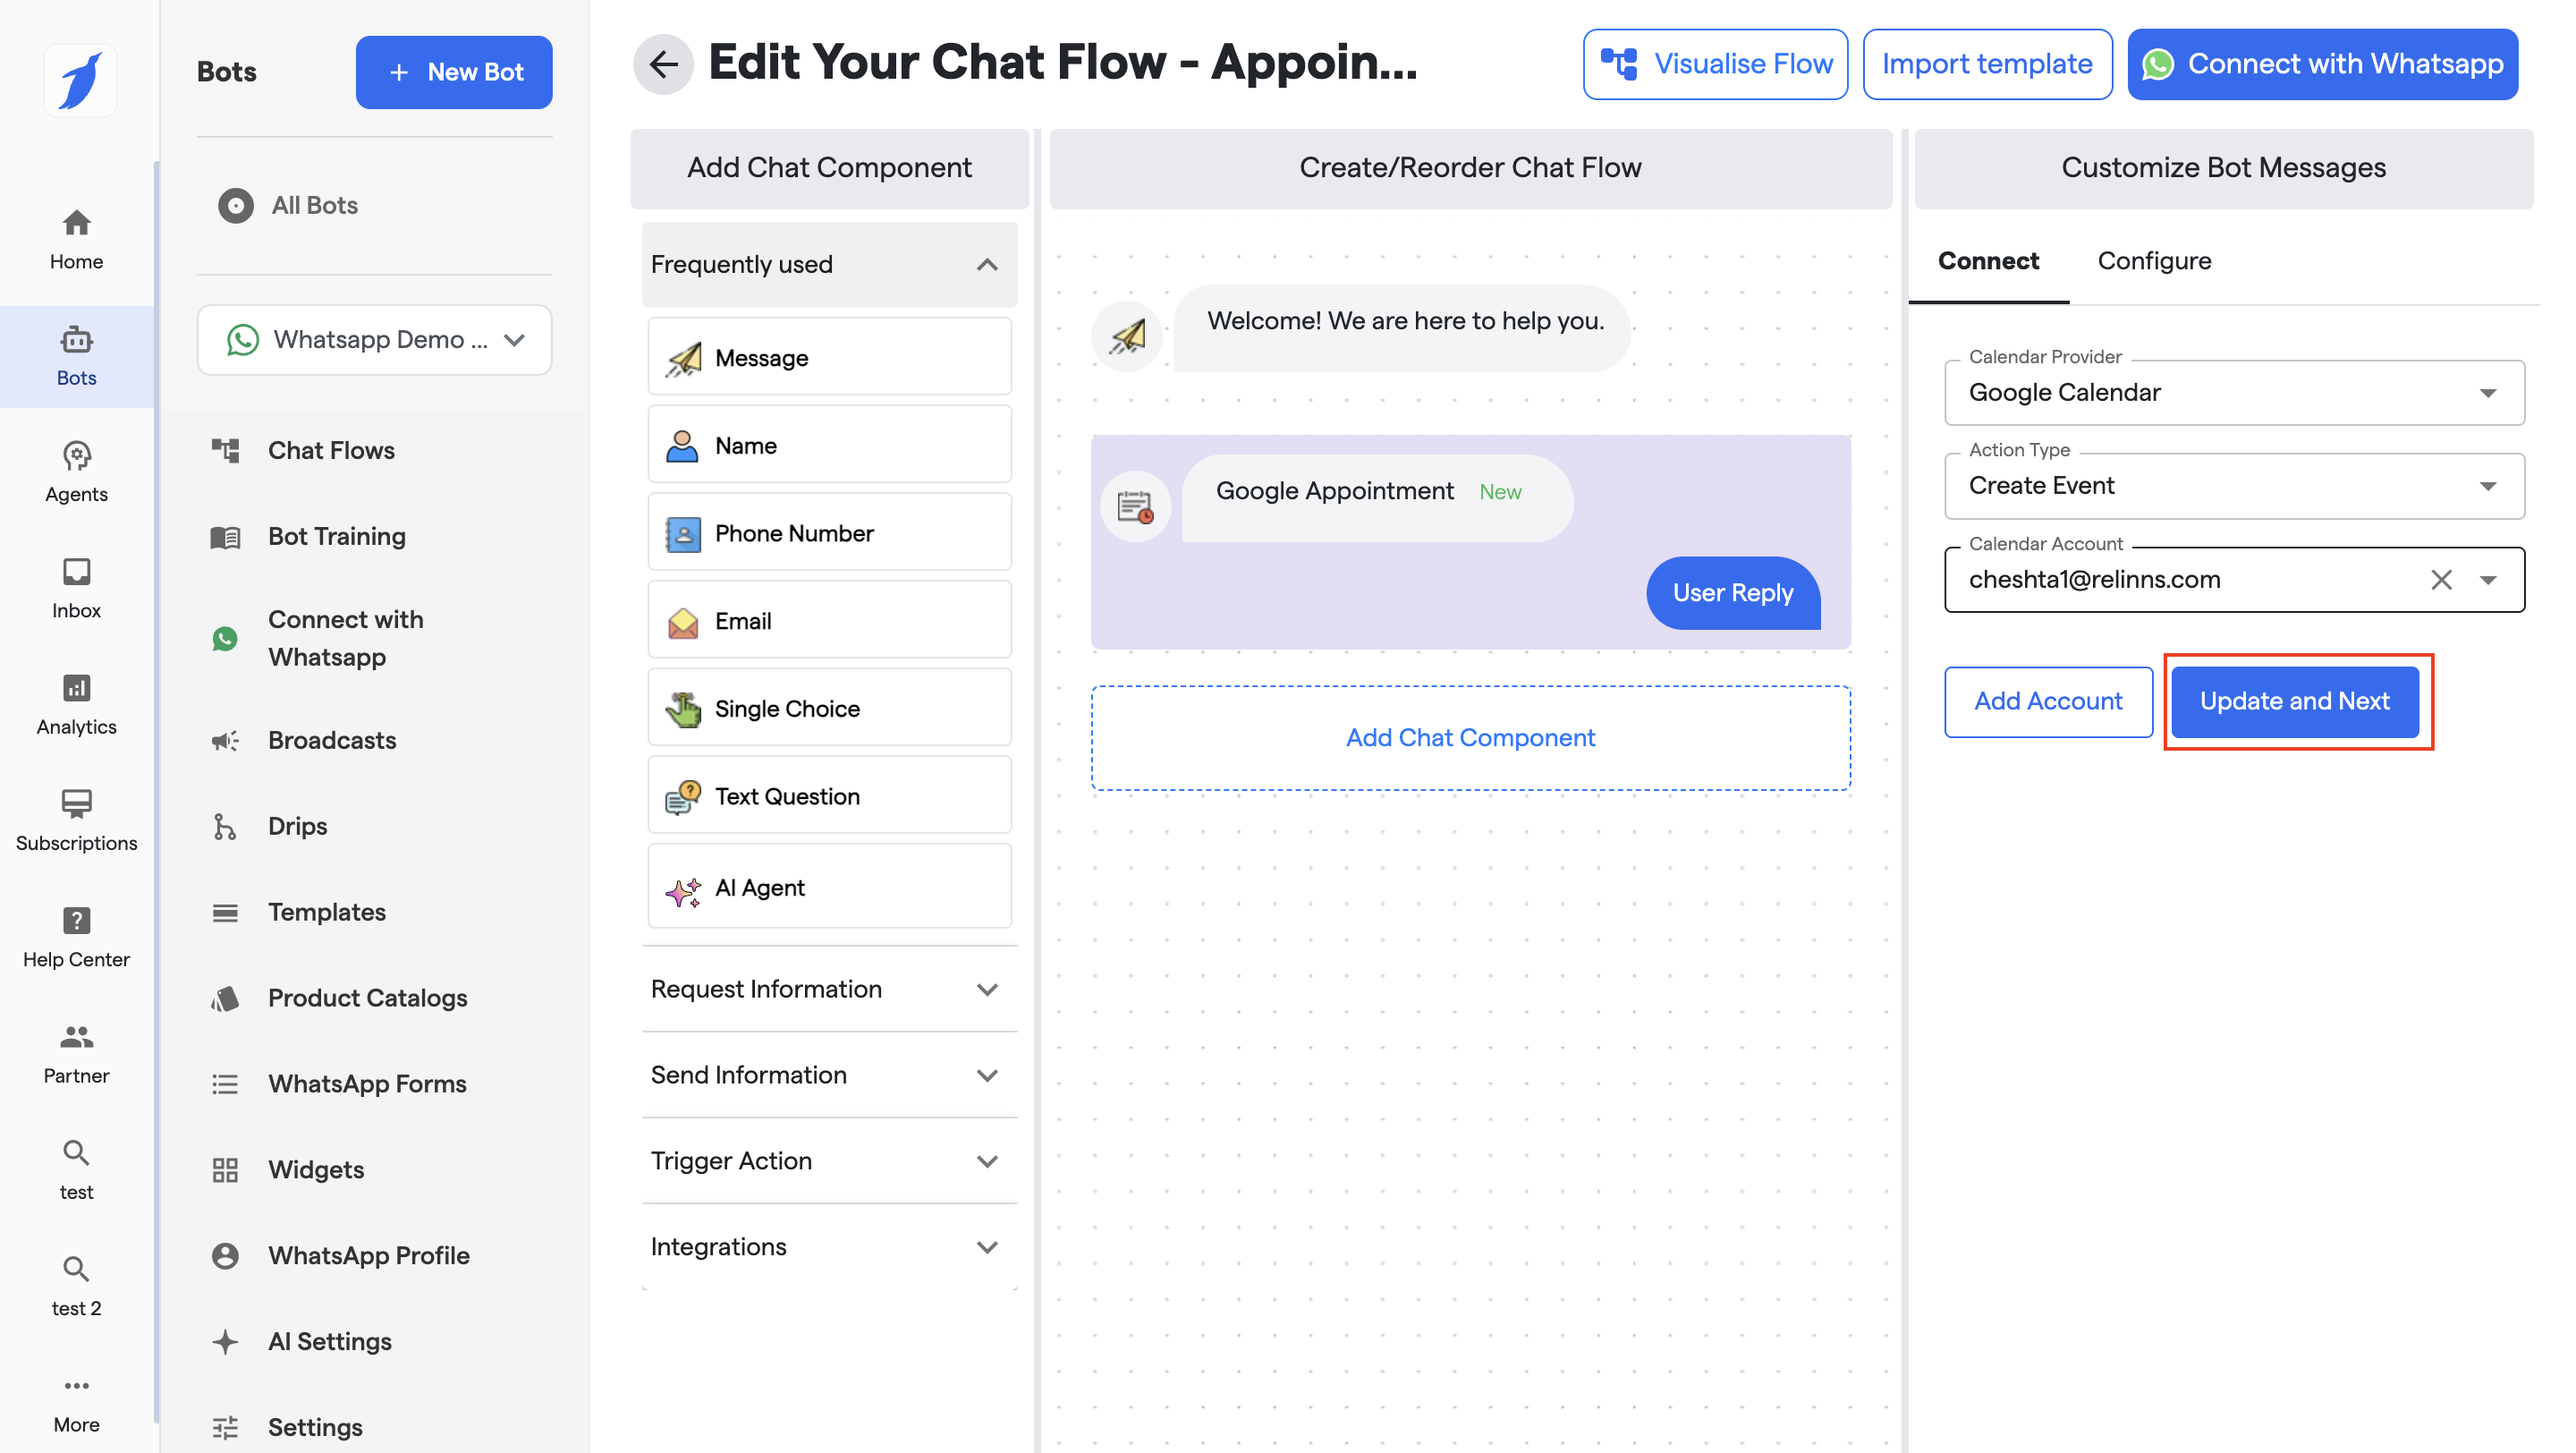
#### 1. Calendar Provider
* Select **Google Calendar**
* Required for Google Appointment component
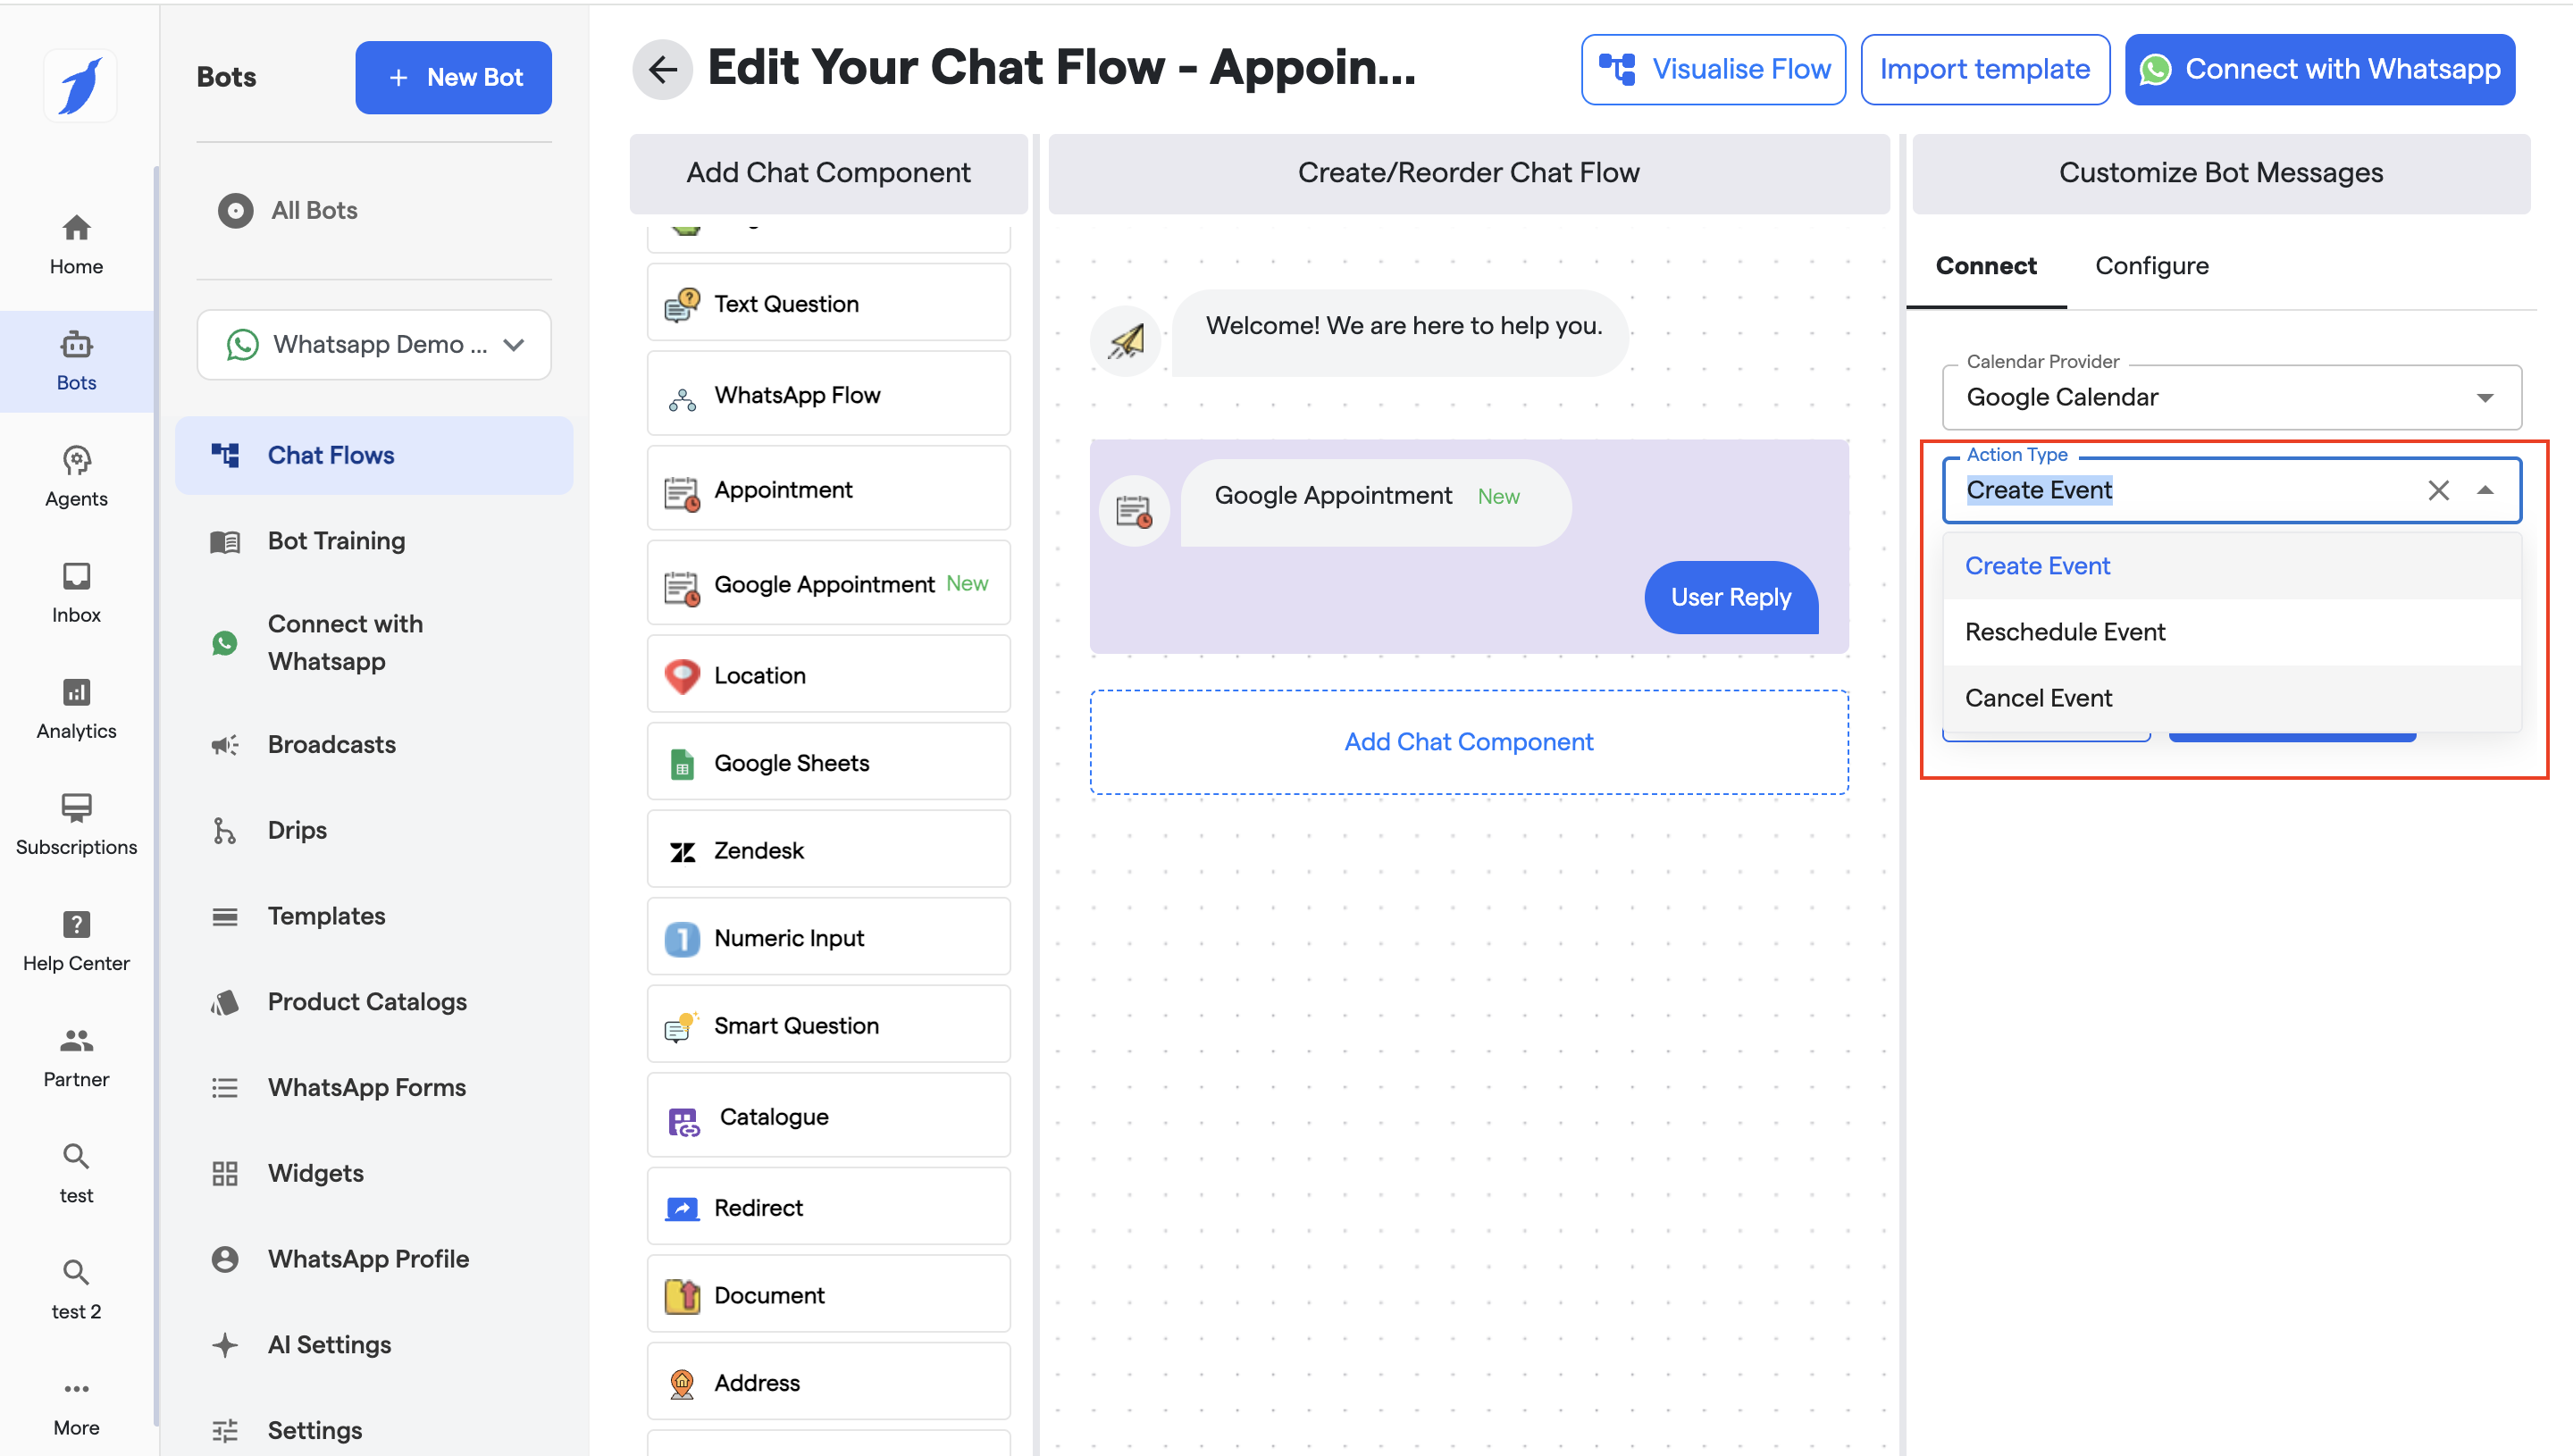
#### 2. Action Type
Choose what action the bot should perform:
* **Create Event** – Book a new appointment
* **Reschedule Event** – Modify an existing booking
* **Cancel Event** – Cancel an appointment
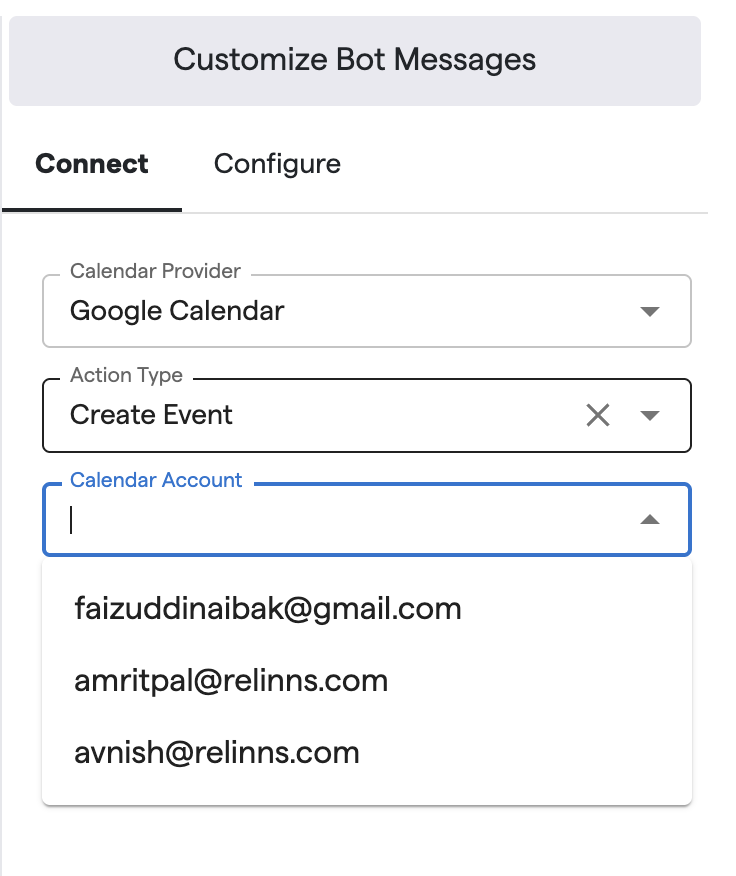
#### 3. Calendar Account
* Select the connected Google account from the dropdown if already connected
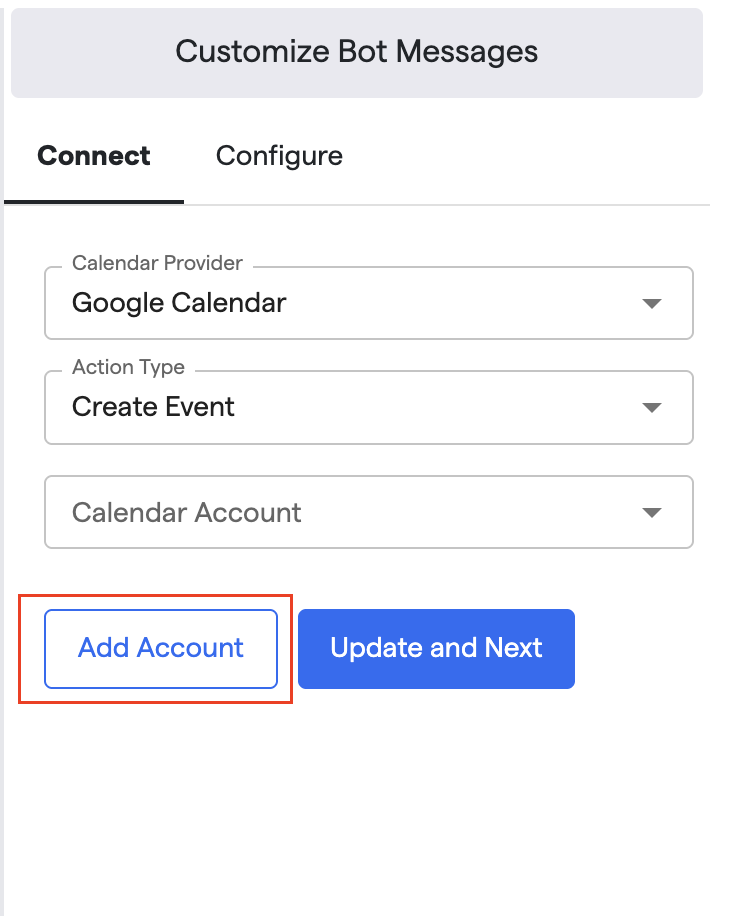
* If your calendar is not connected:
* Click on Add Account Button
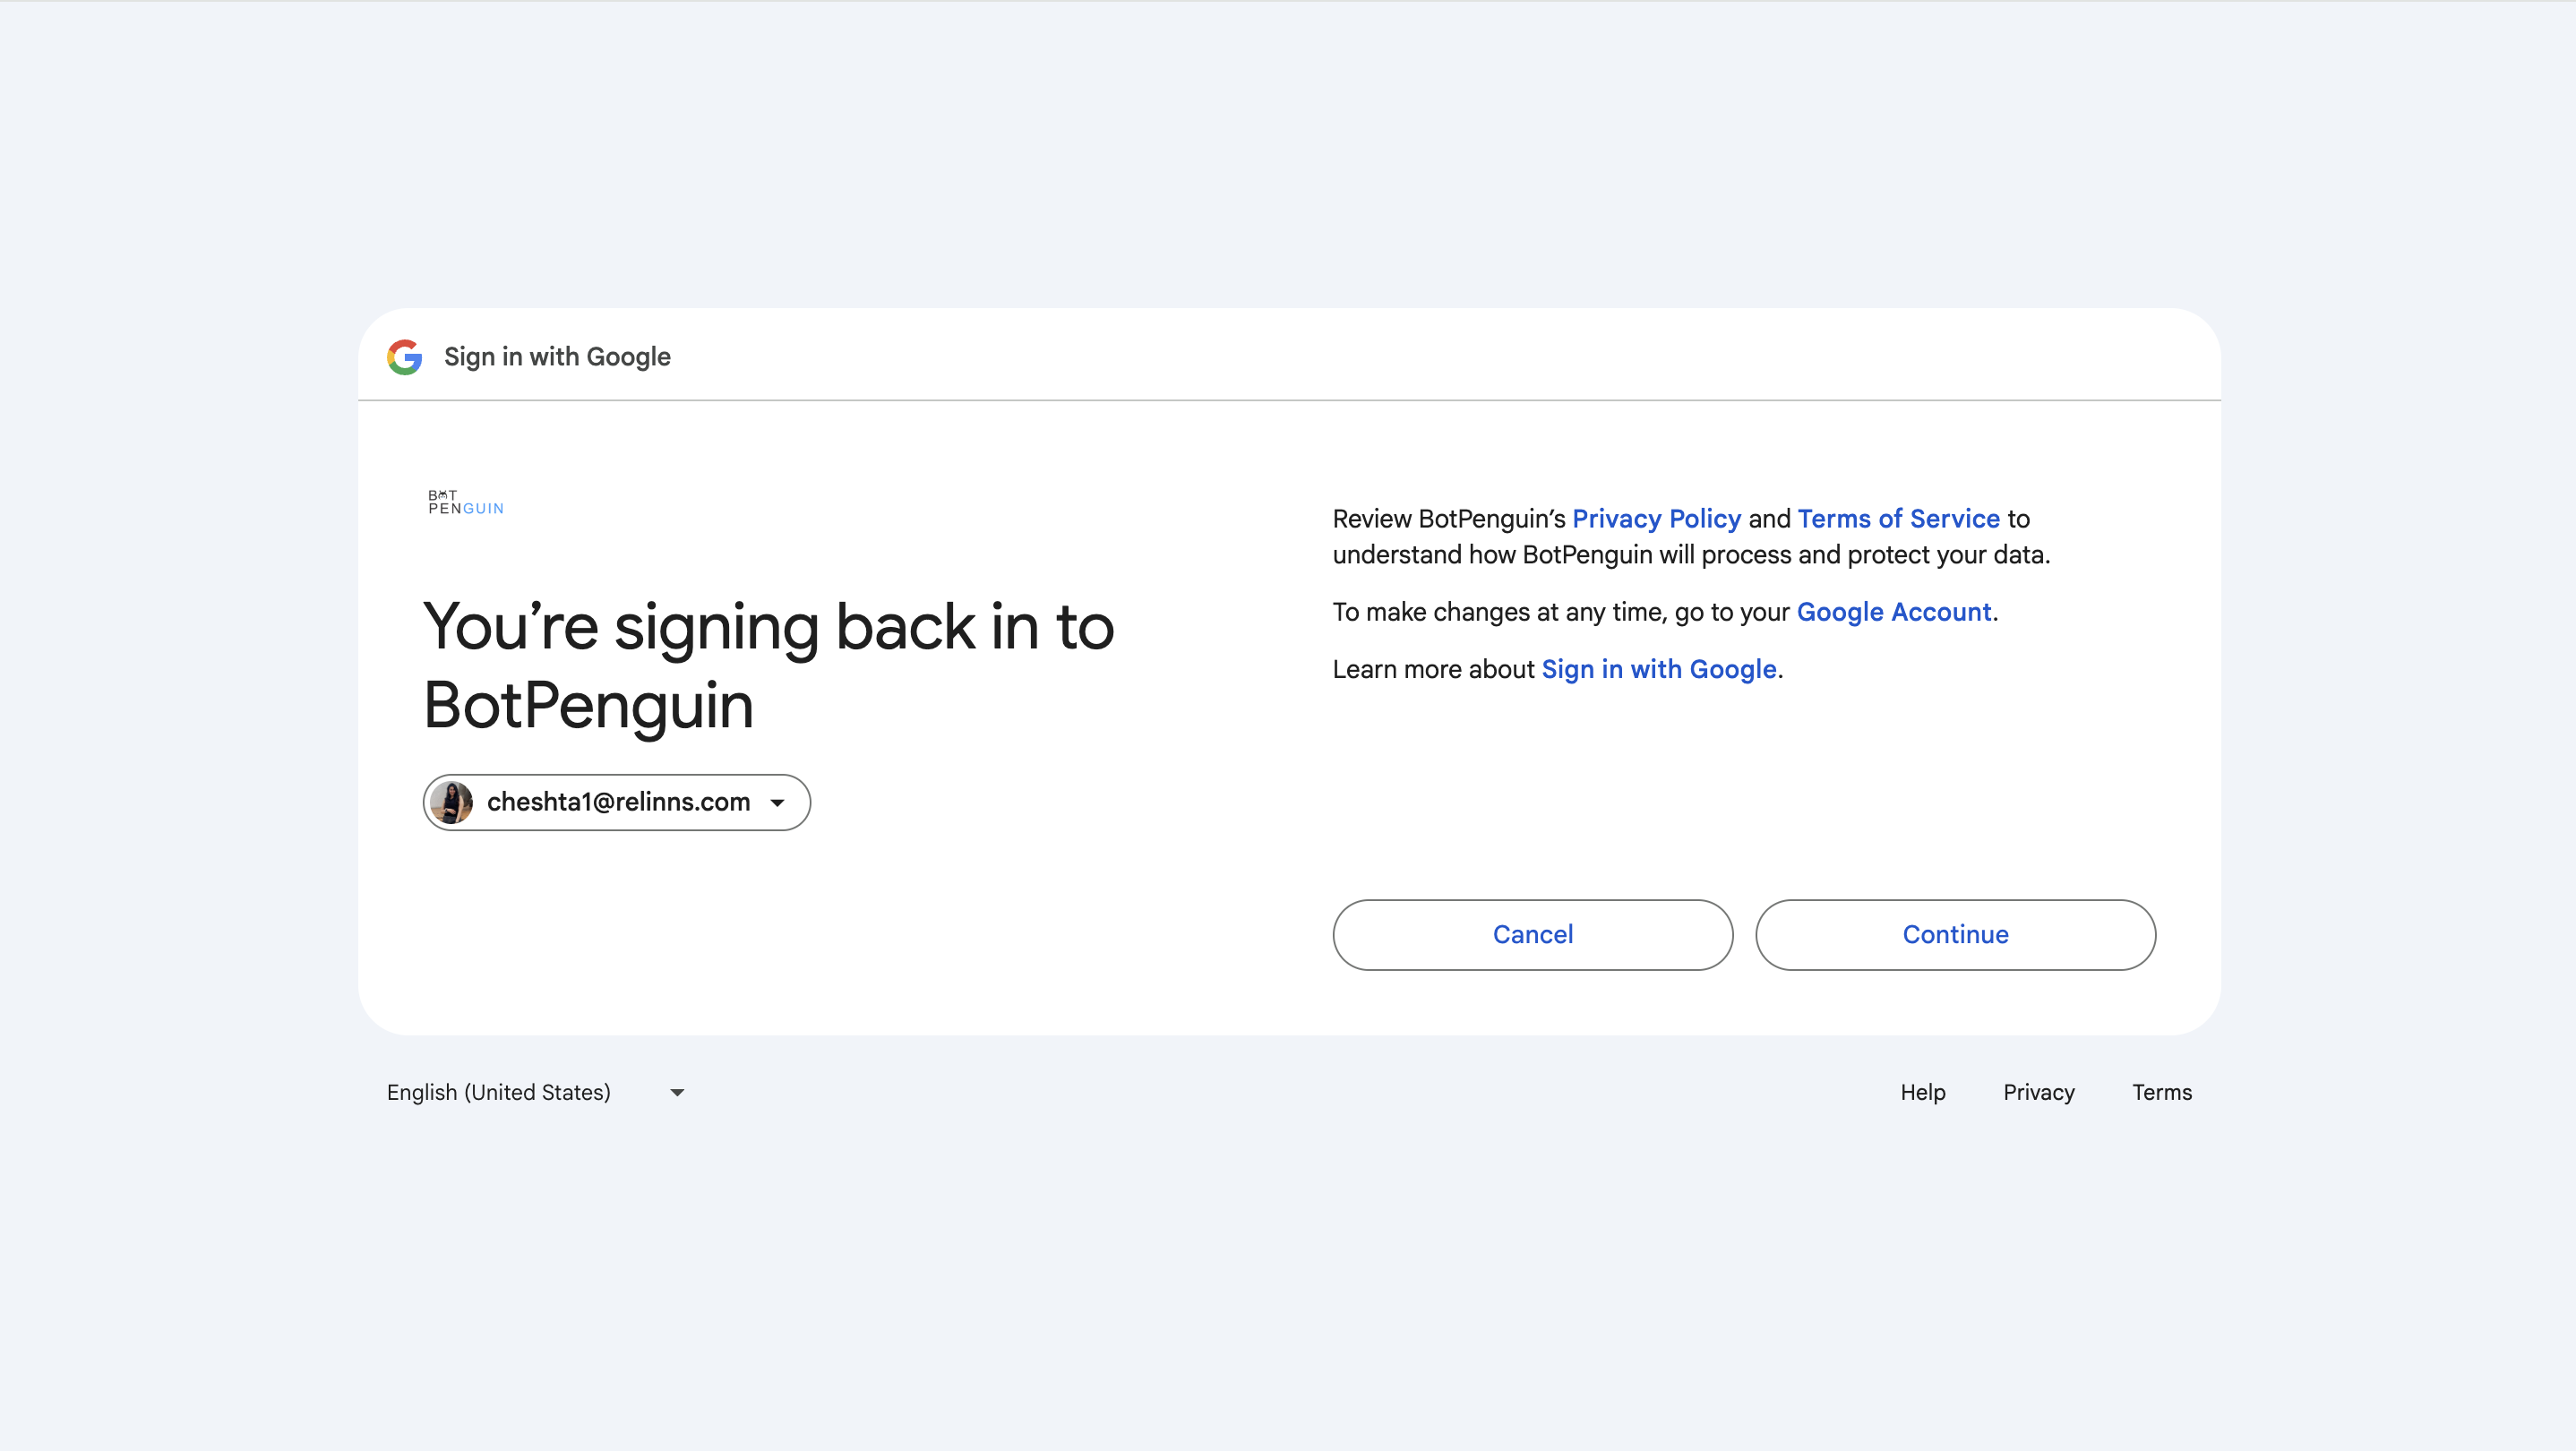
* Choose your Google account
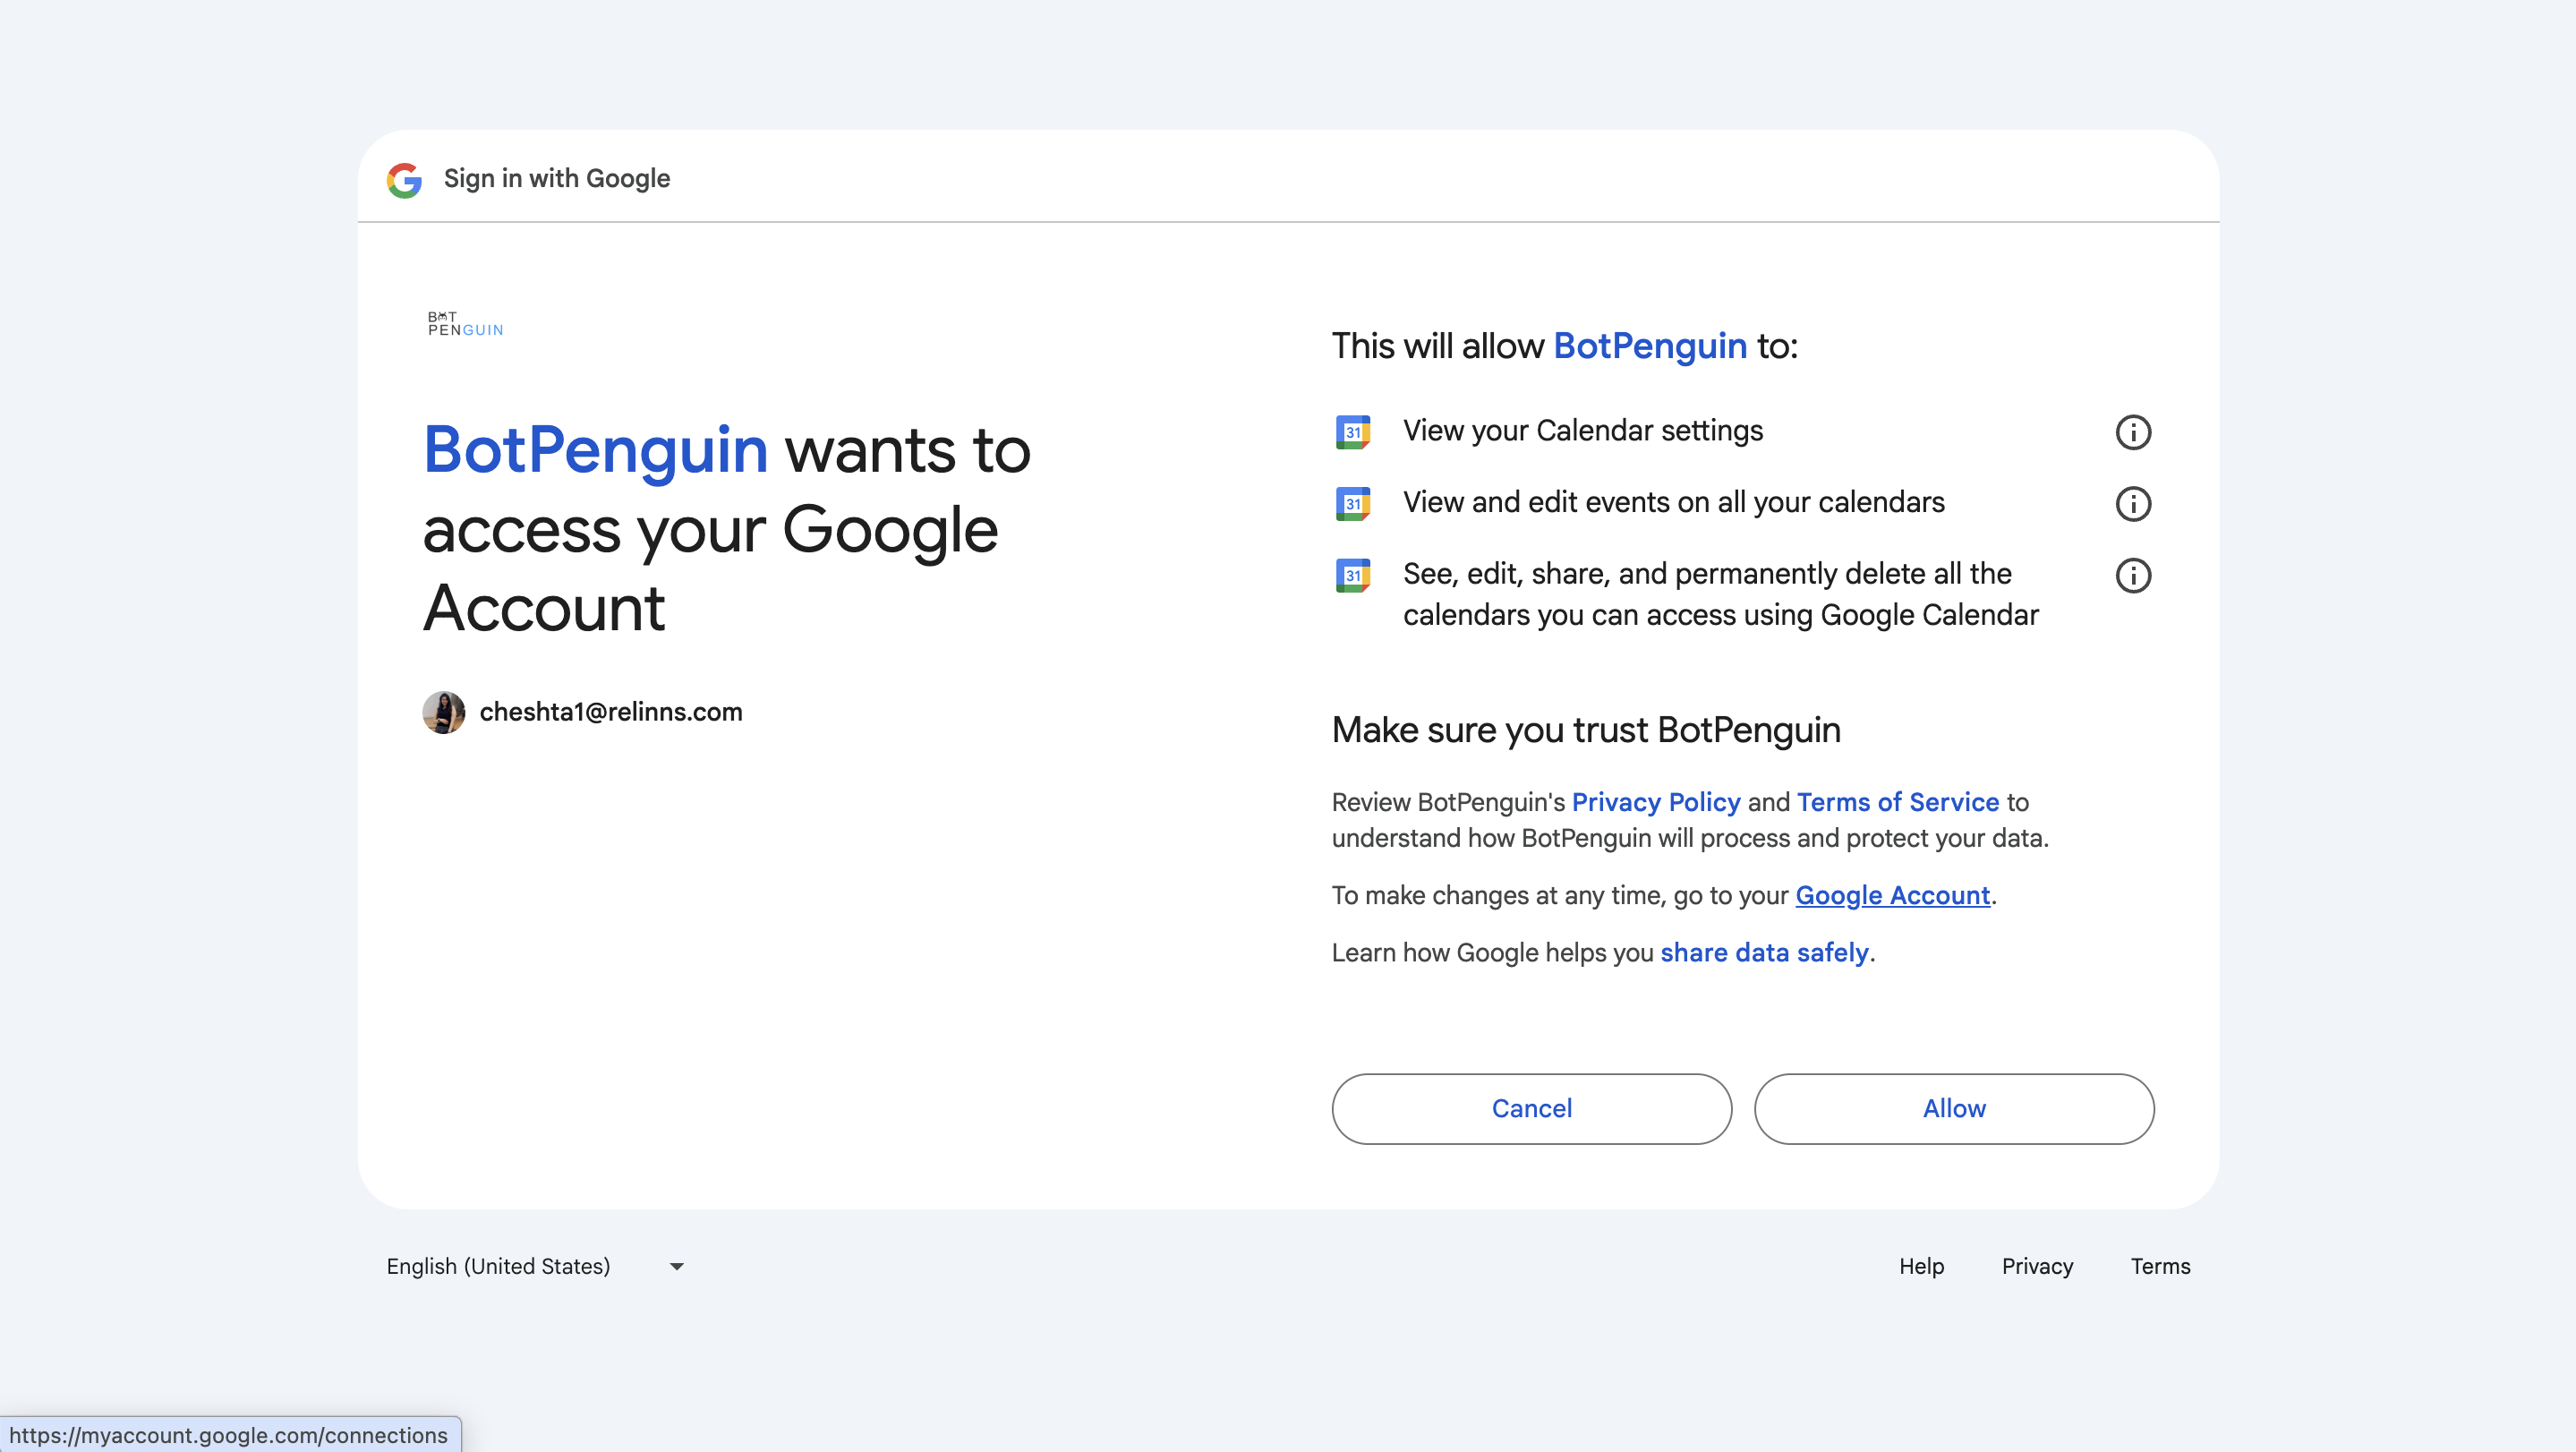
* Review all the permissions and policies and click on continue.
* Click on allow to give the access of your calendar.
* So the account is connected and mentioned in the dropdown.
\

* Select your account and click on update and Next button.
* Appointments will be created in this calendar
* Make sure the account has **calendar write permissions**
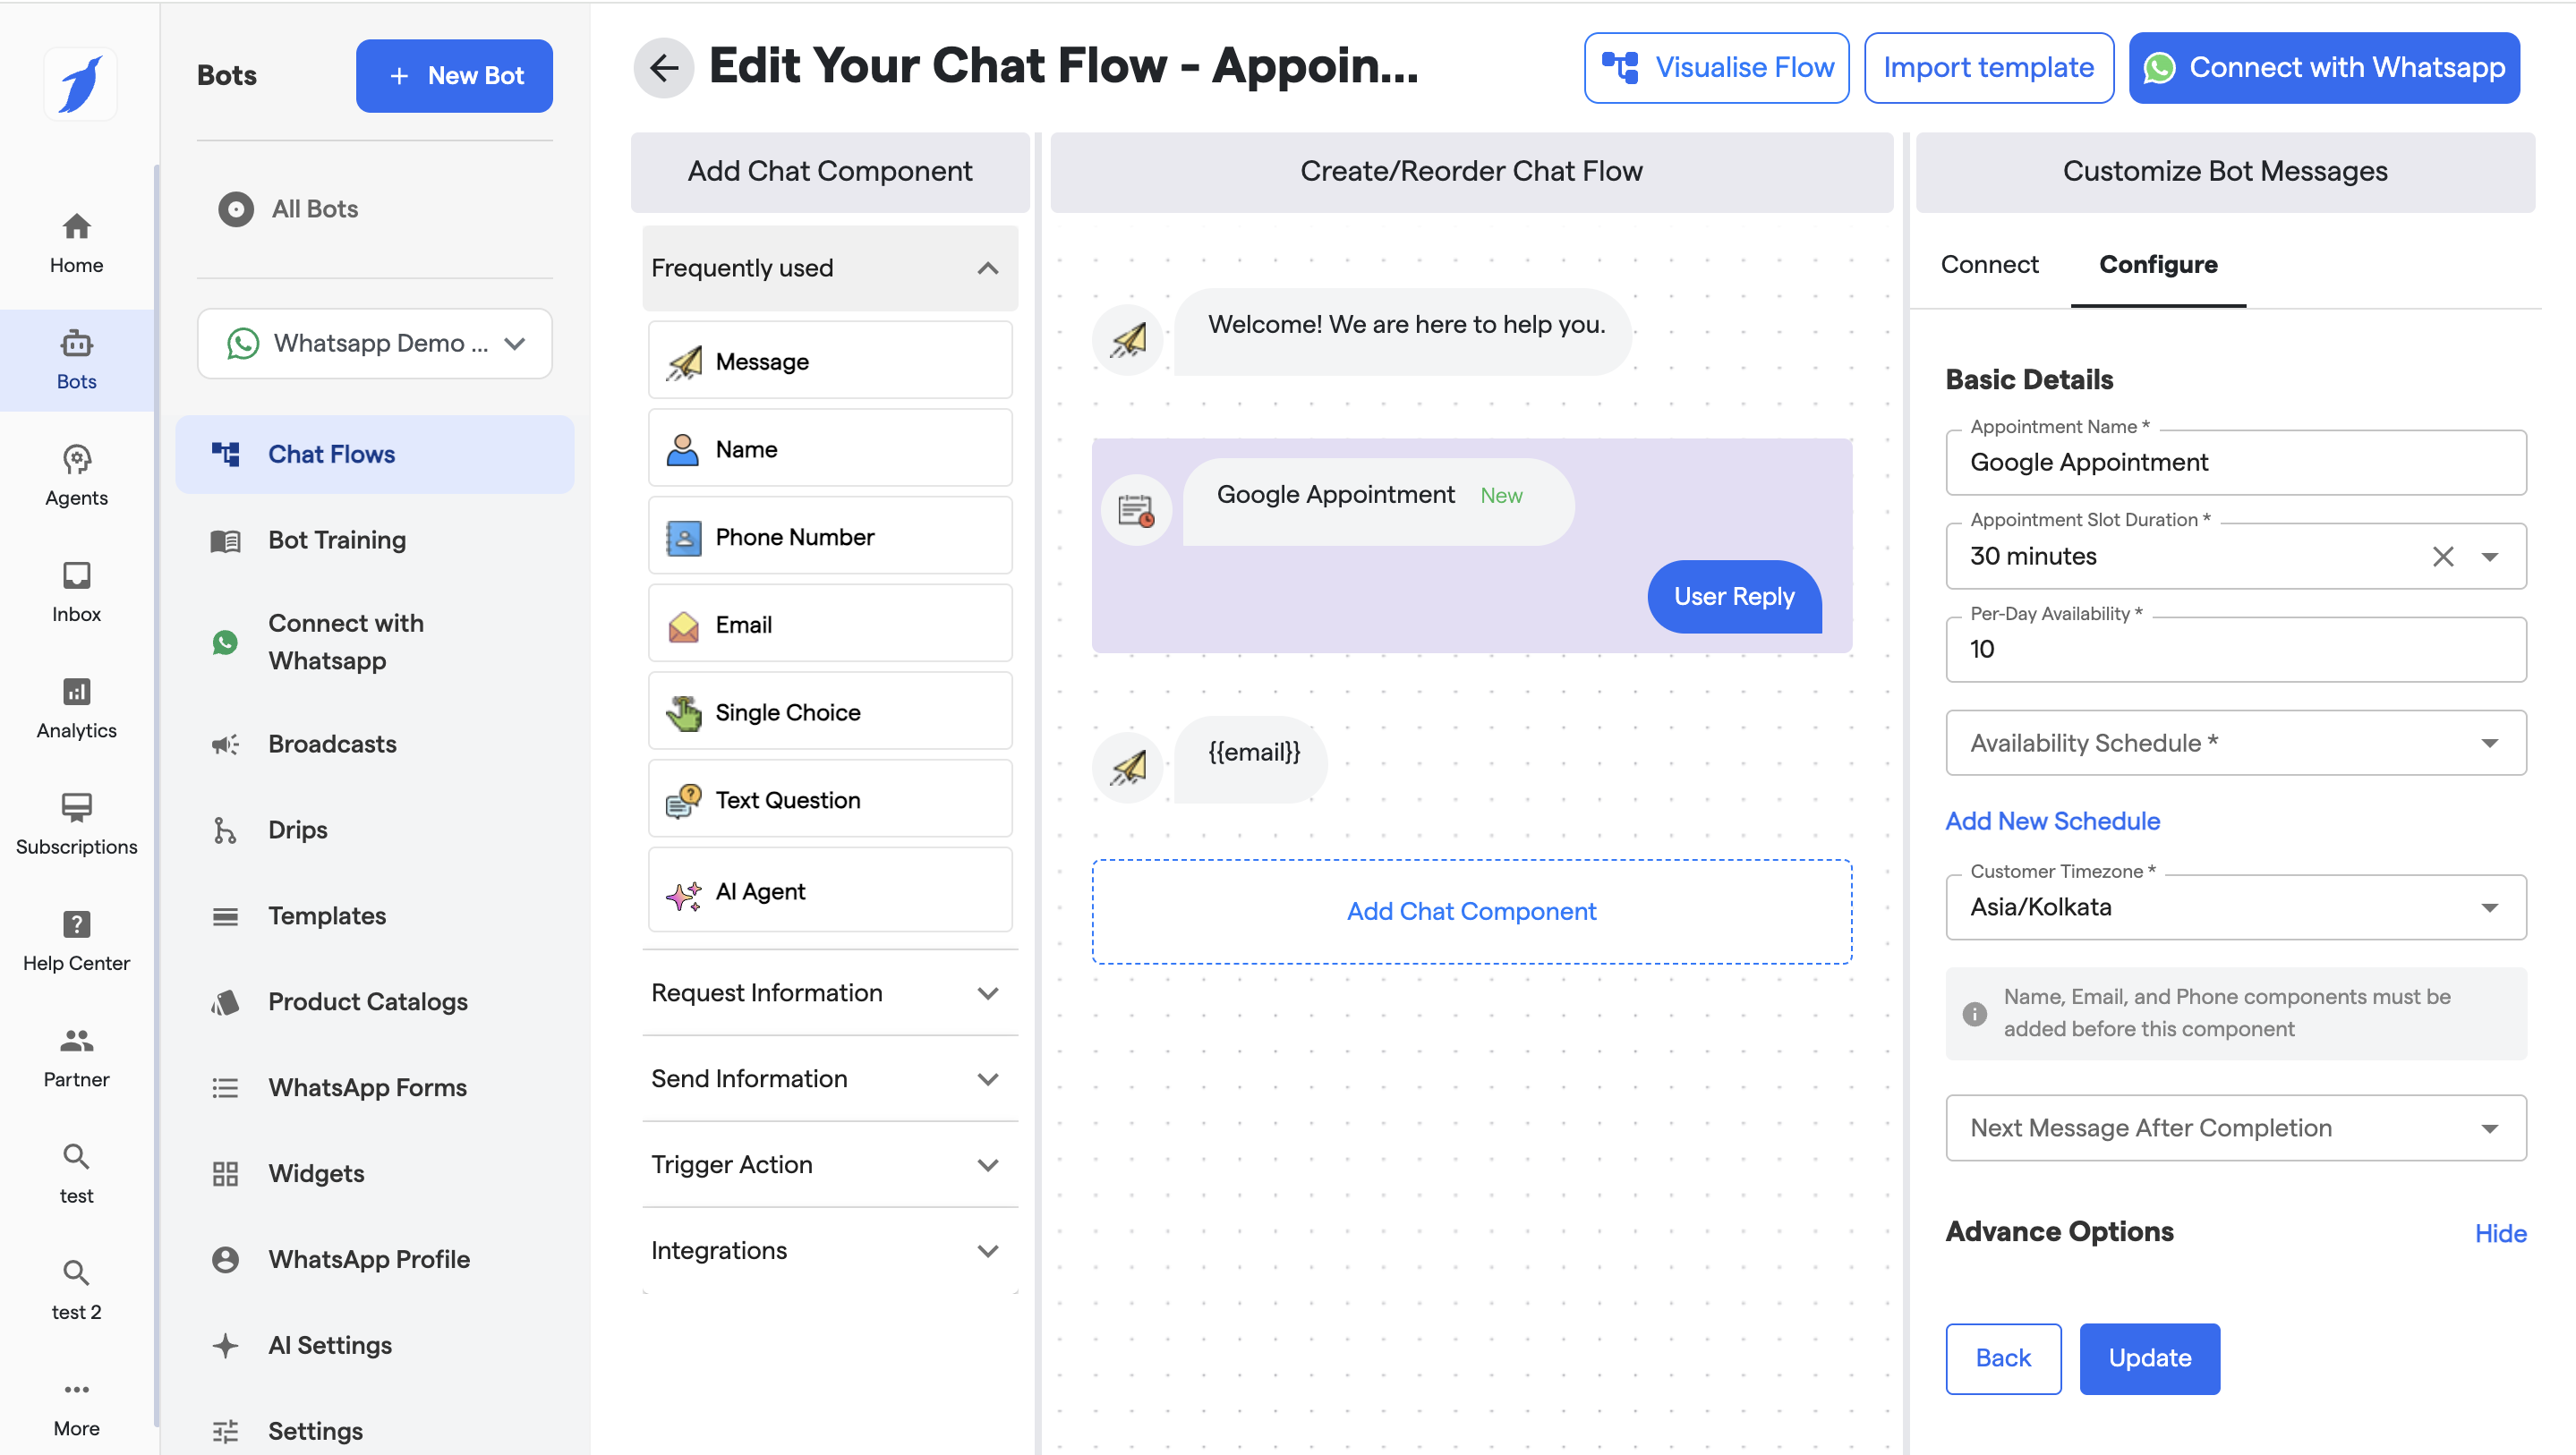
### **Configure your Appointment Details:**
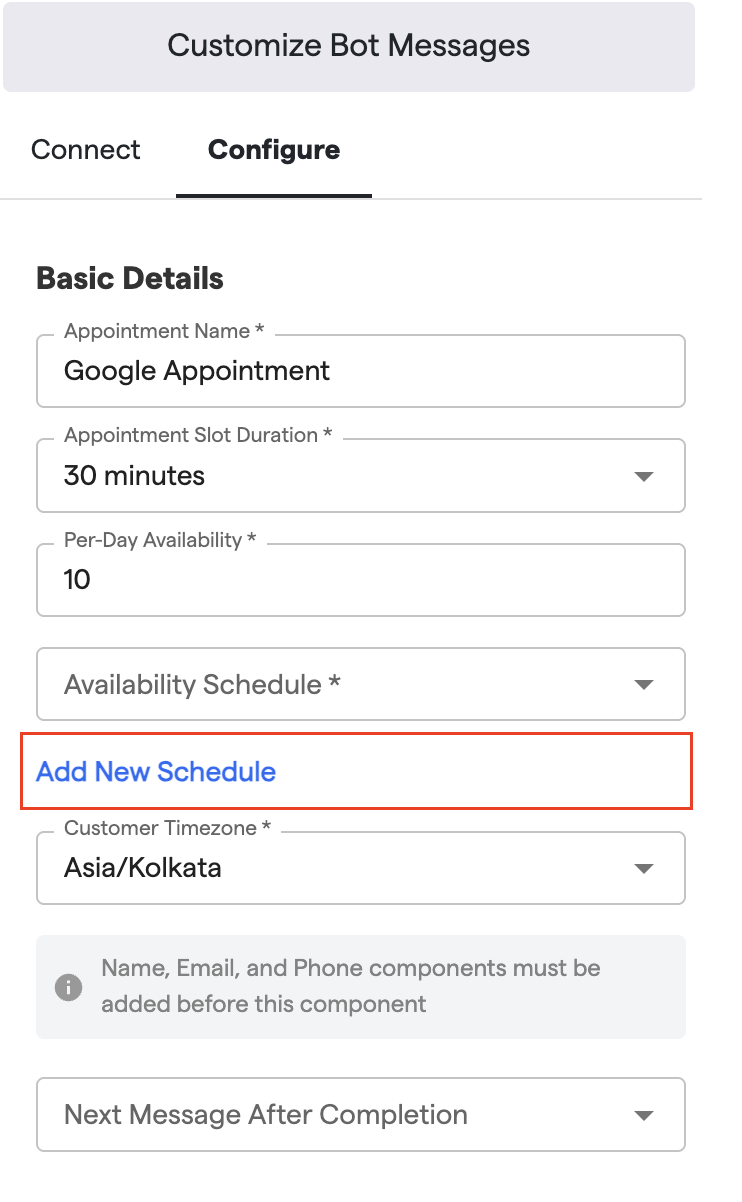
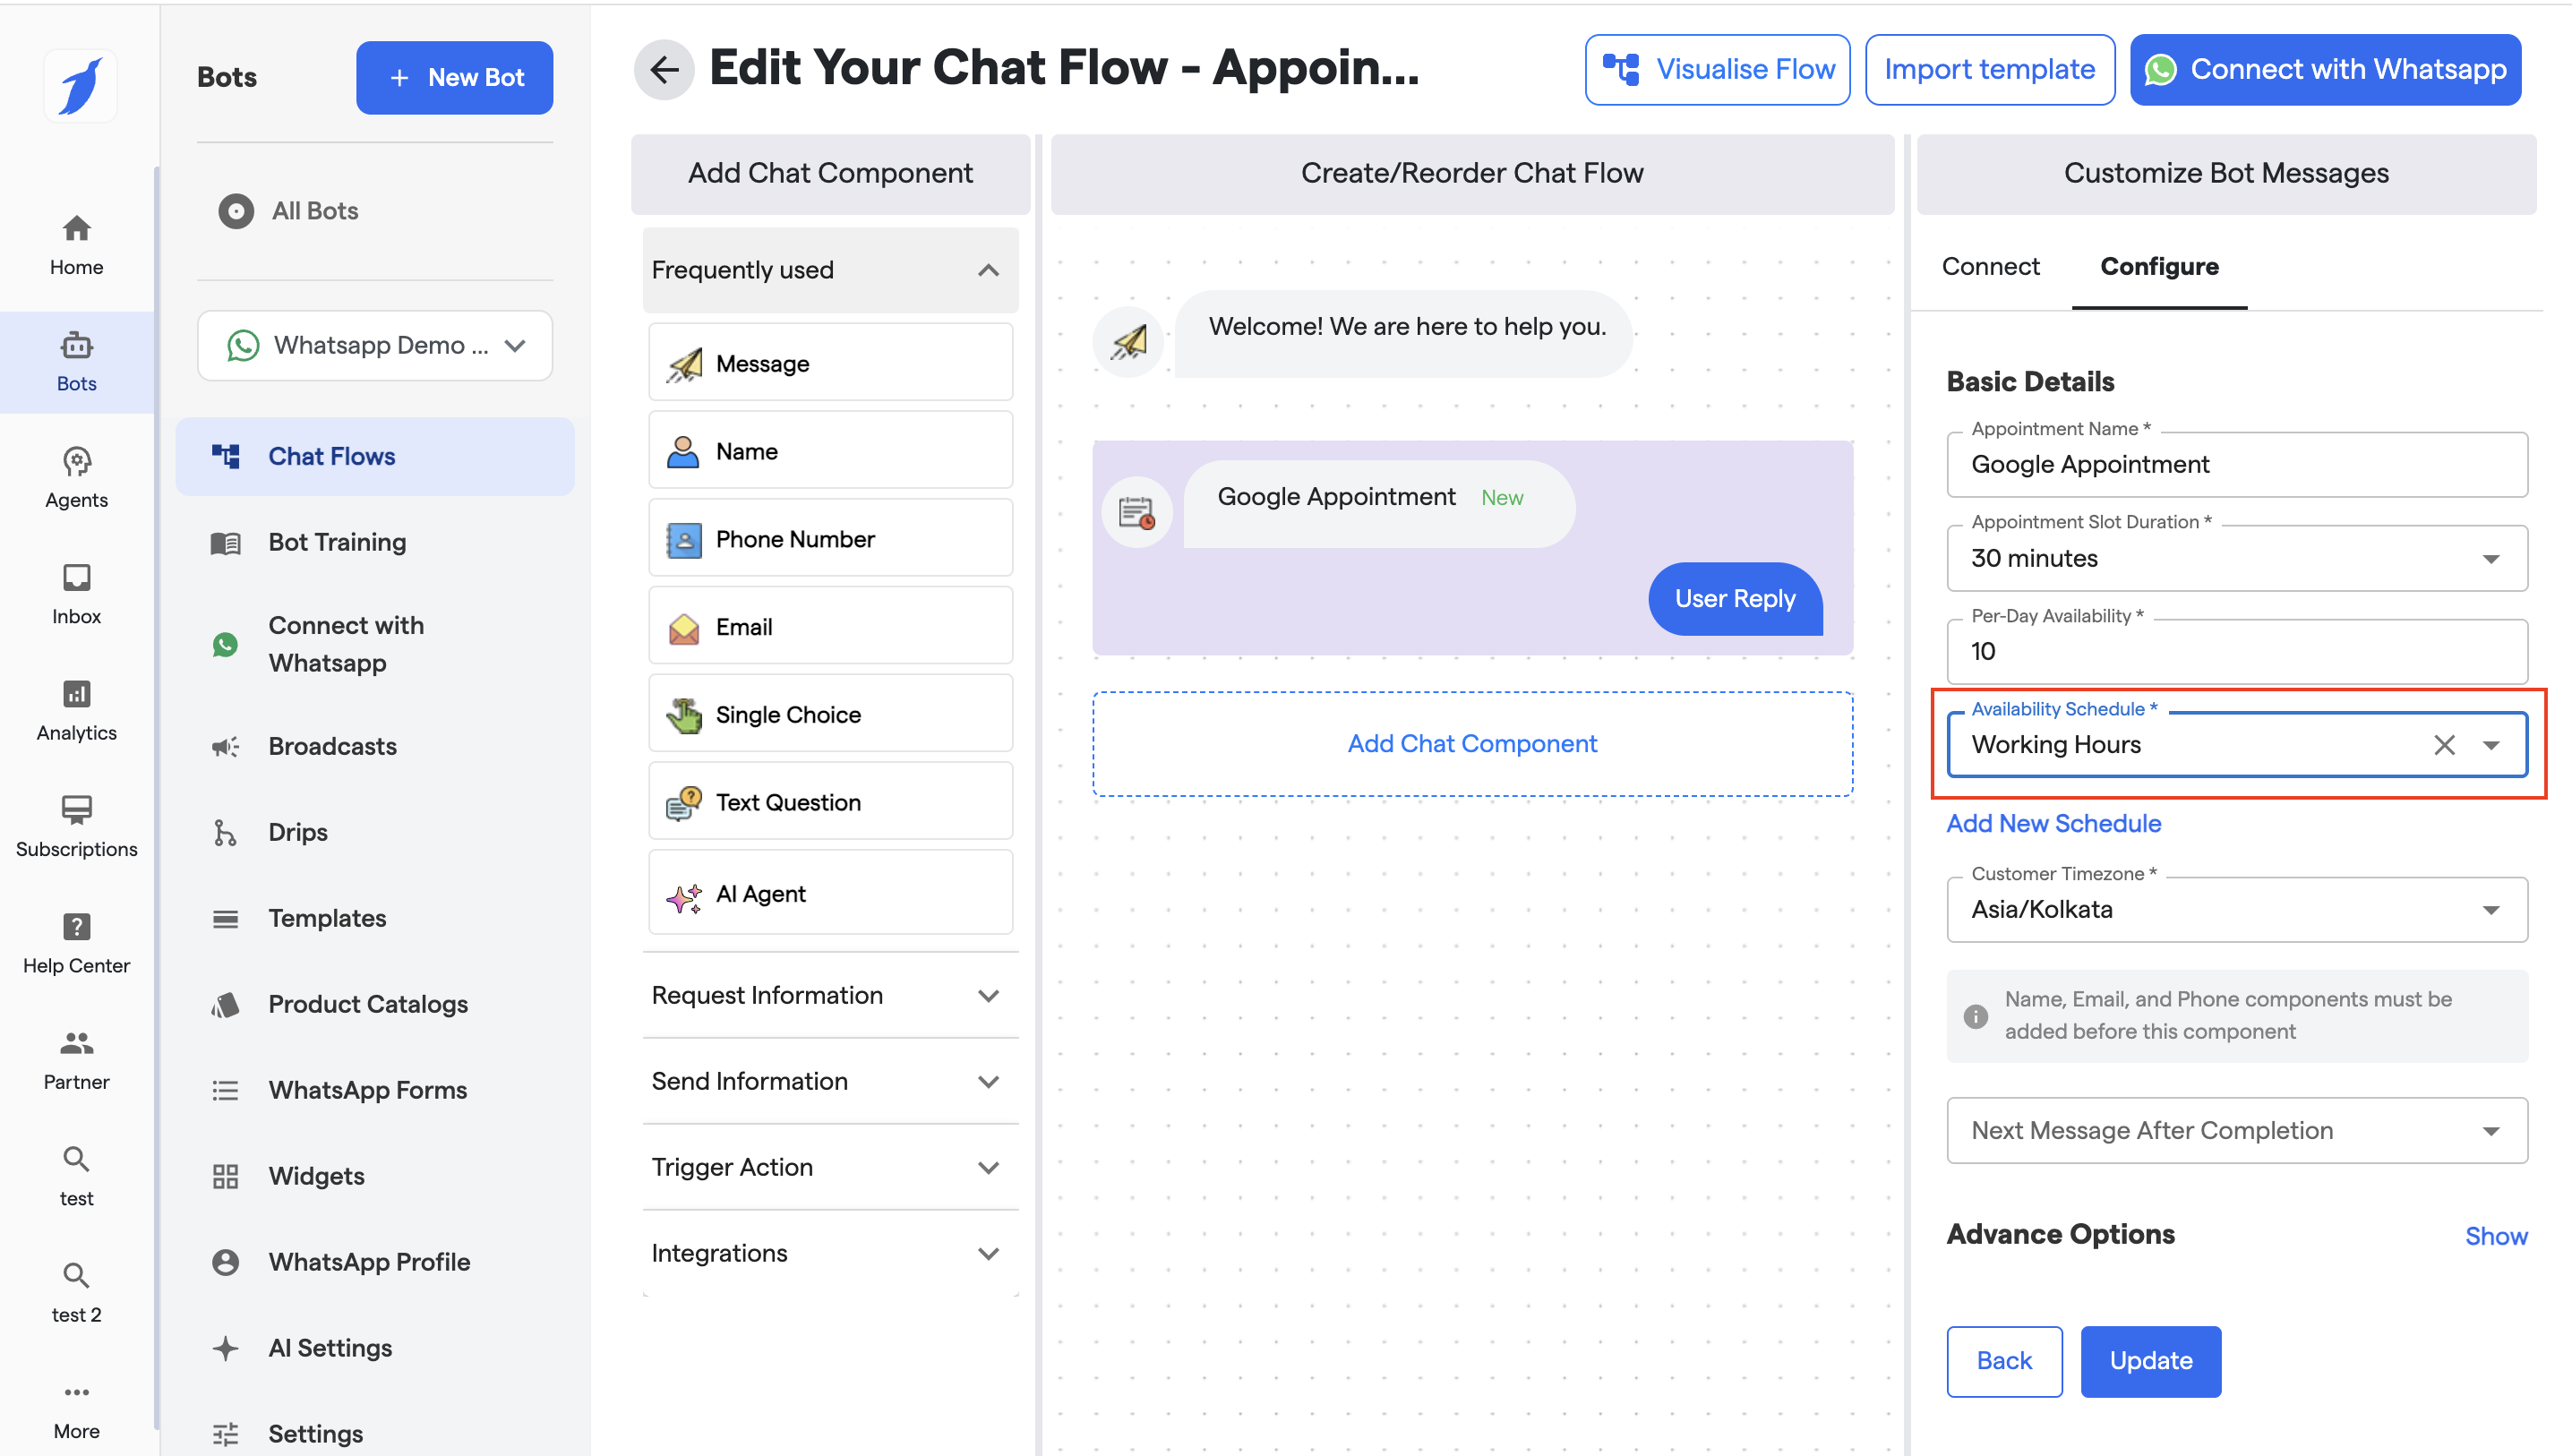
### 1. Basic Details (Live)
* **Appointment Name**: Custom name for the appointment (e.g., *Google Appointment*)
* **Appointment Slot Duration**: Slot length (e.g., 30 minutes)
* **Per-Day Availability**: Max number of appointments allowed per day
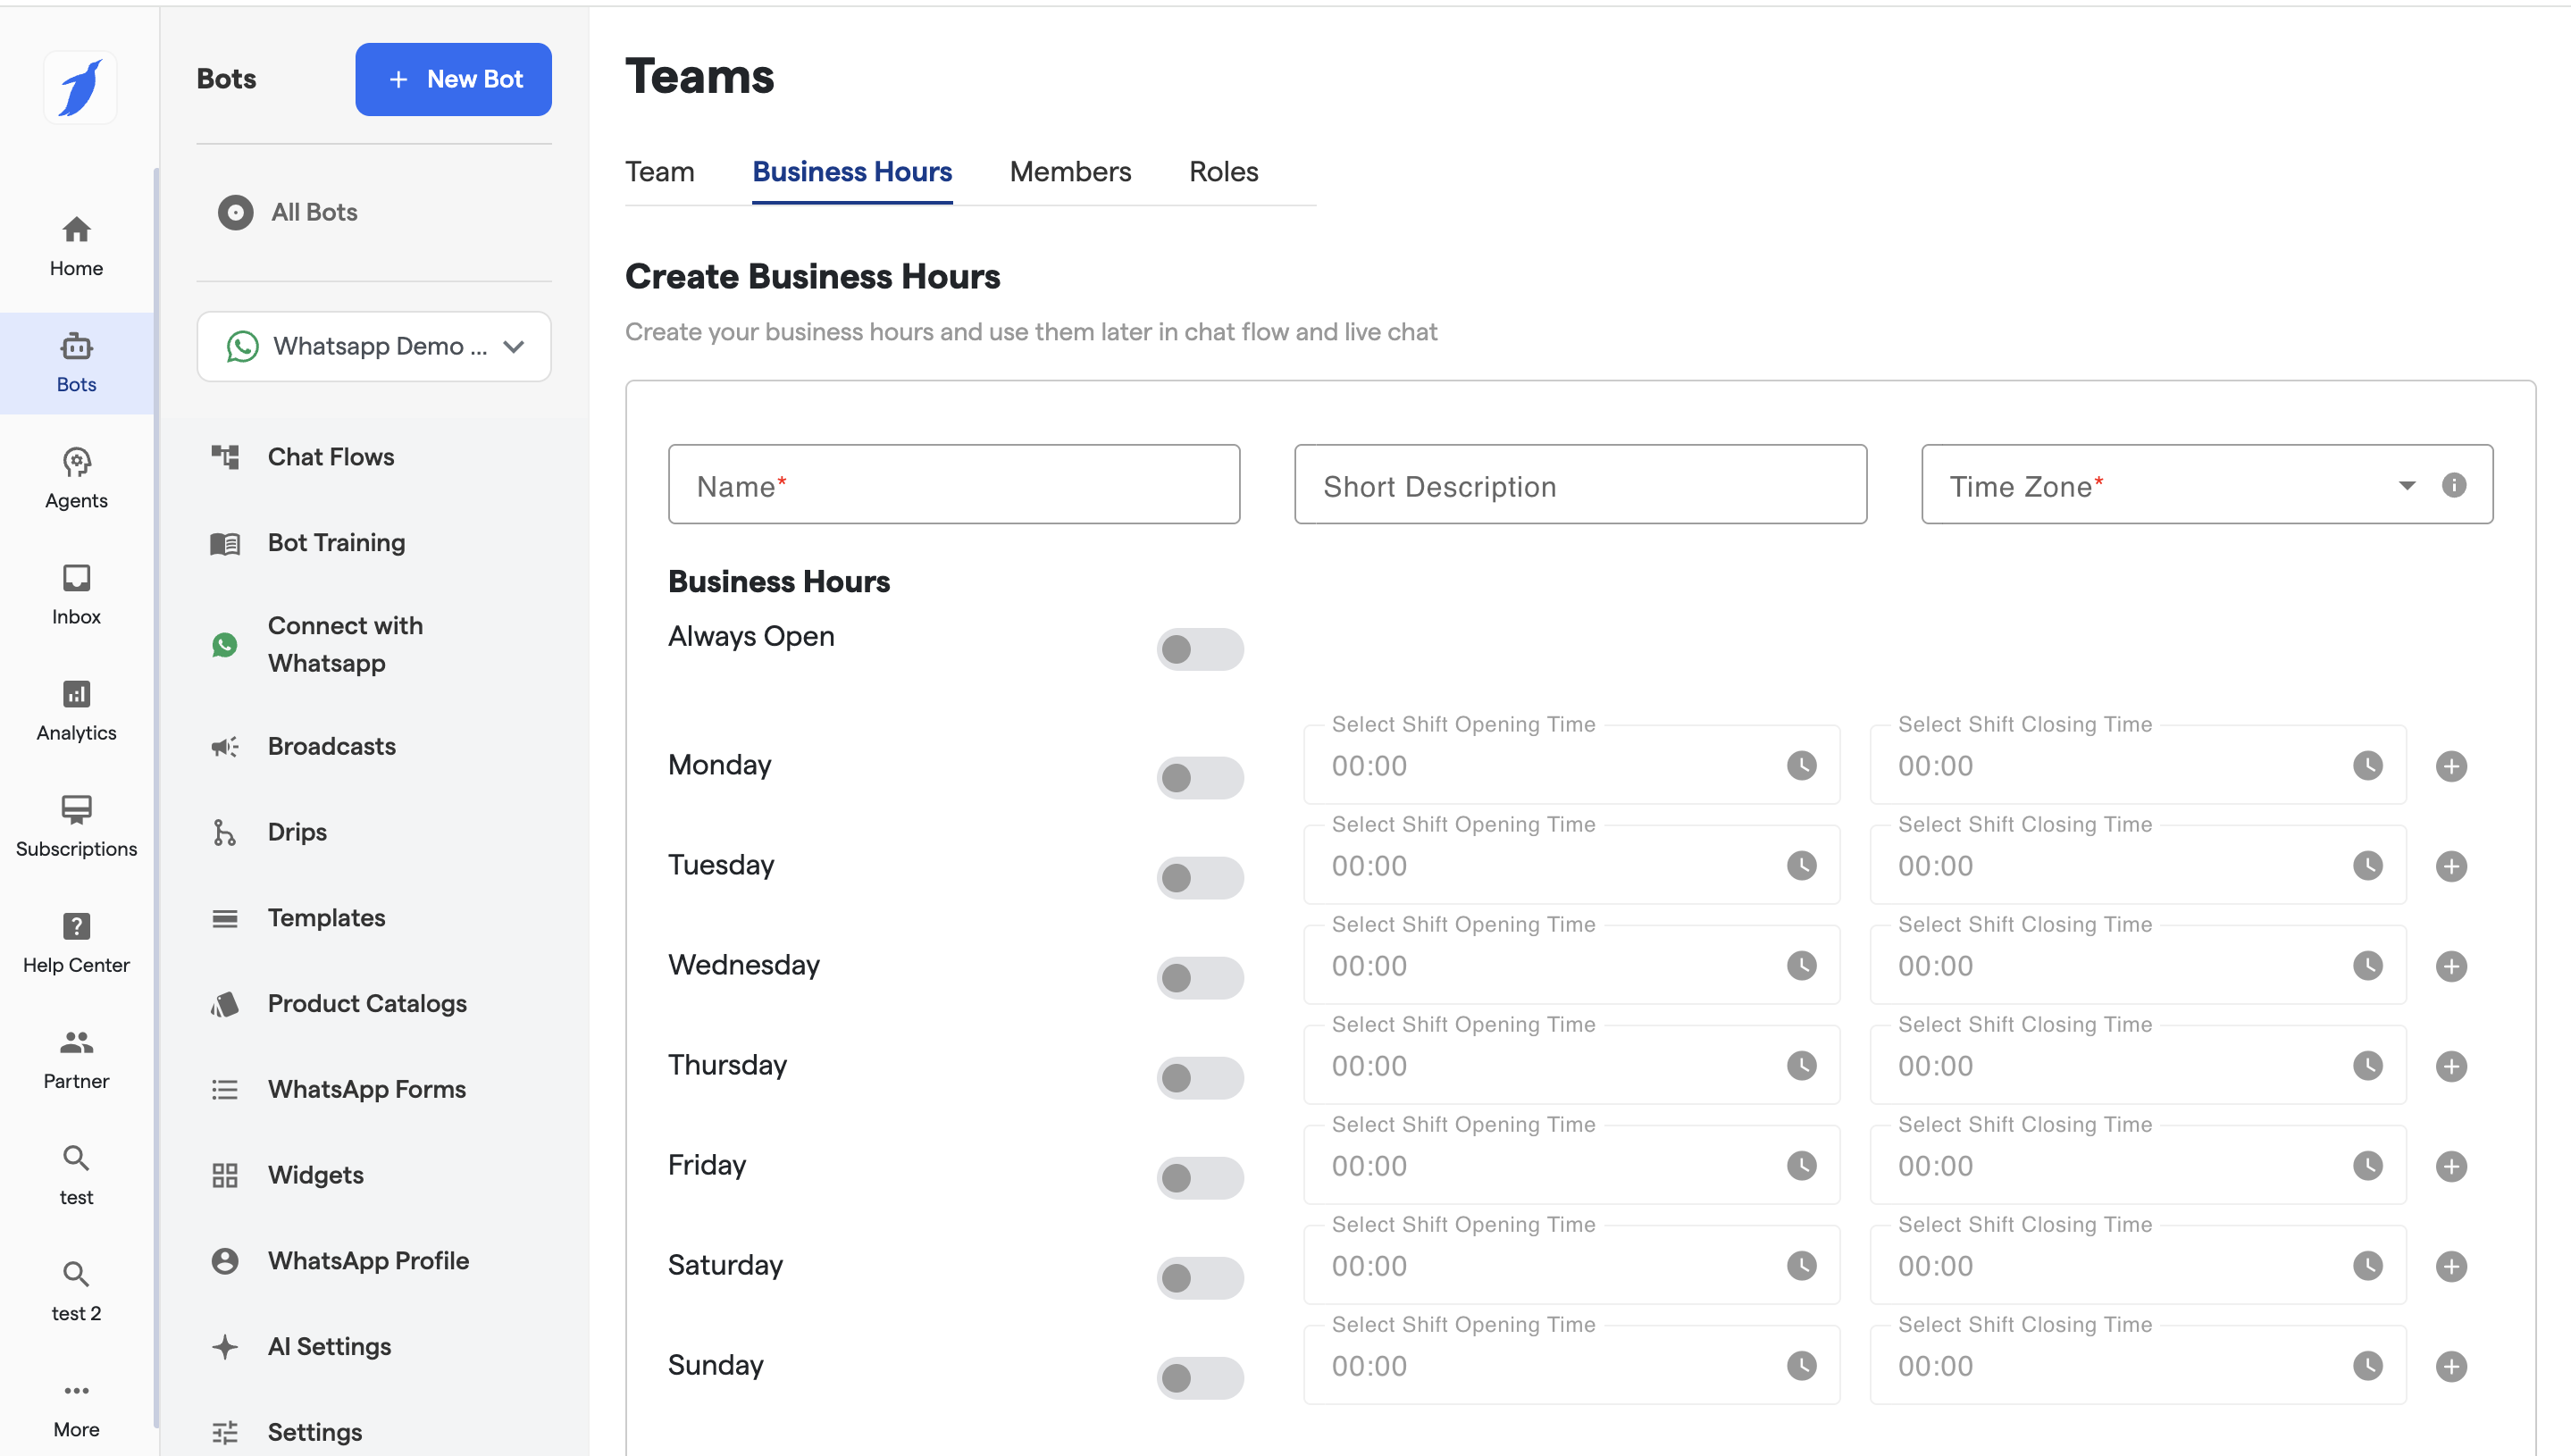
* **Availability Schedule**:
* Select existing schedule or **Add New Schedule**
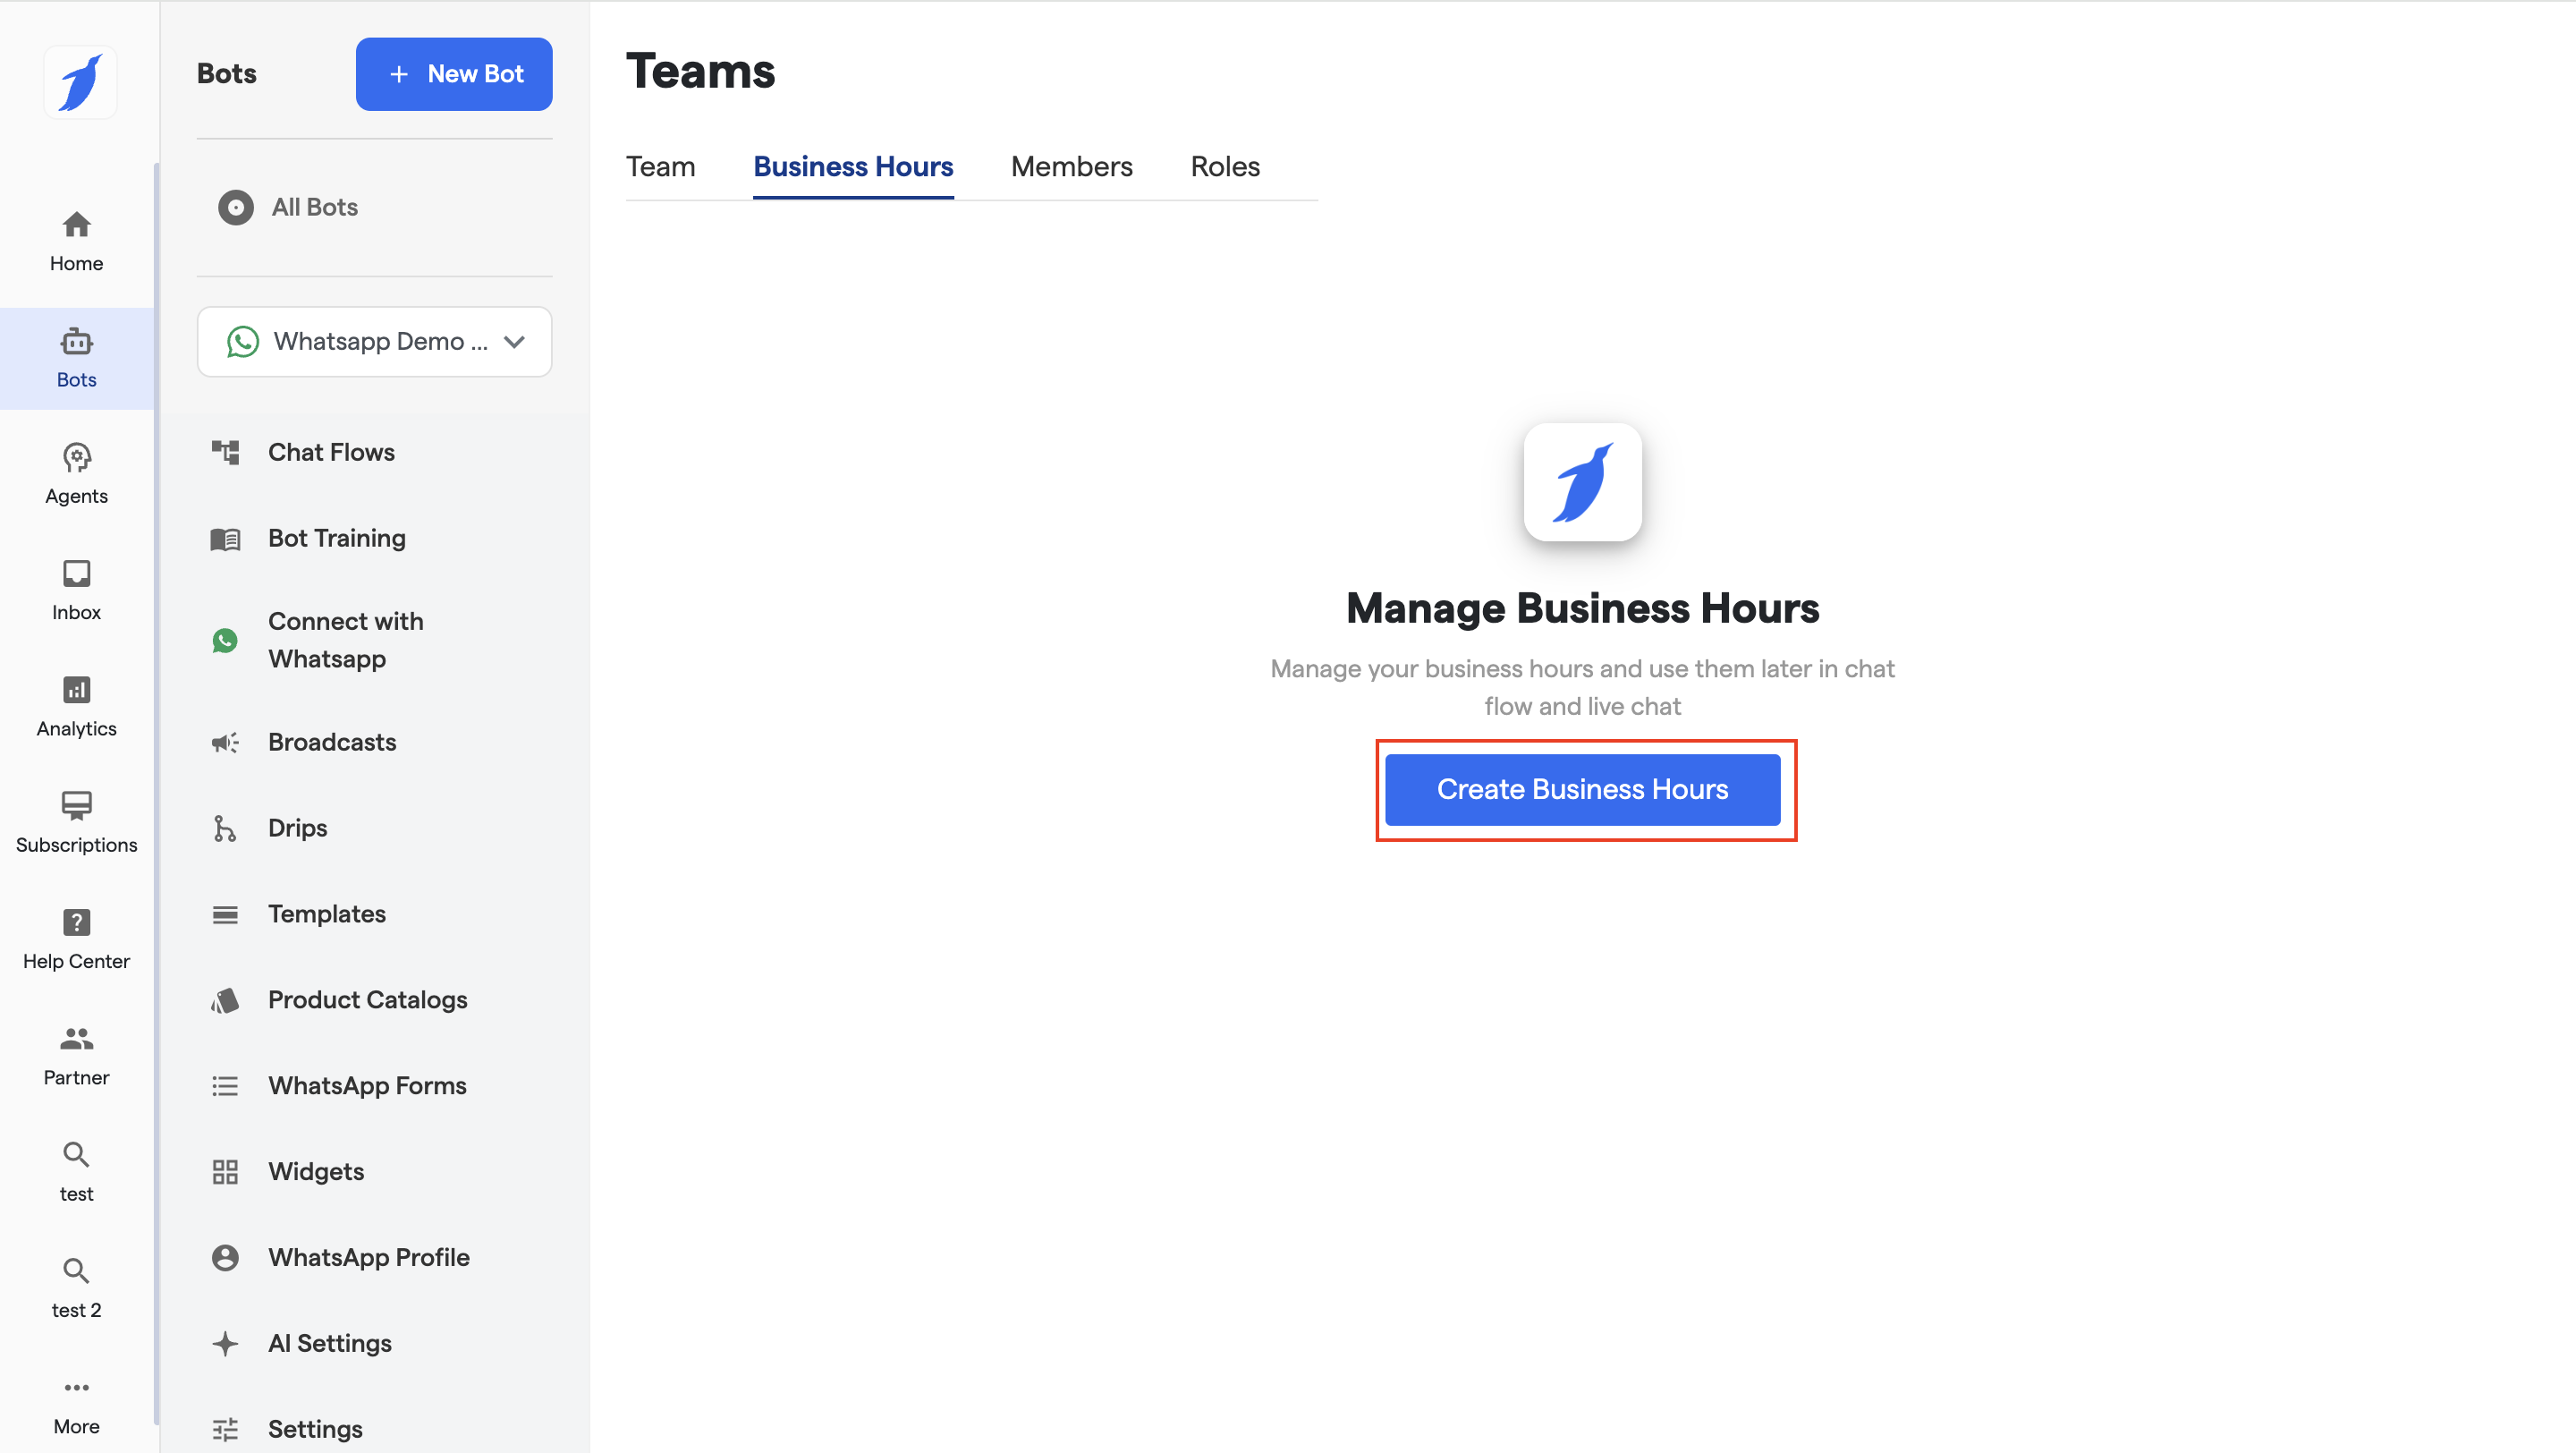
* Clicking on Add new schedule will allow to configure your working hours
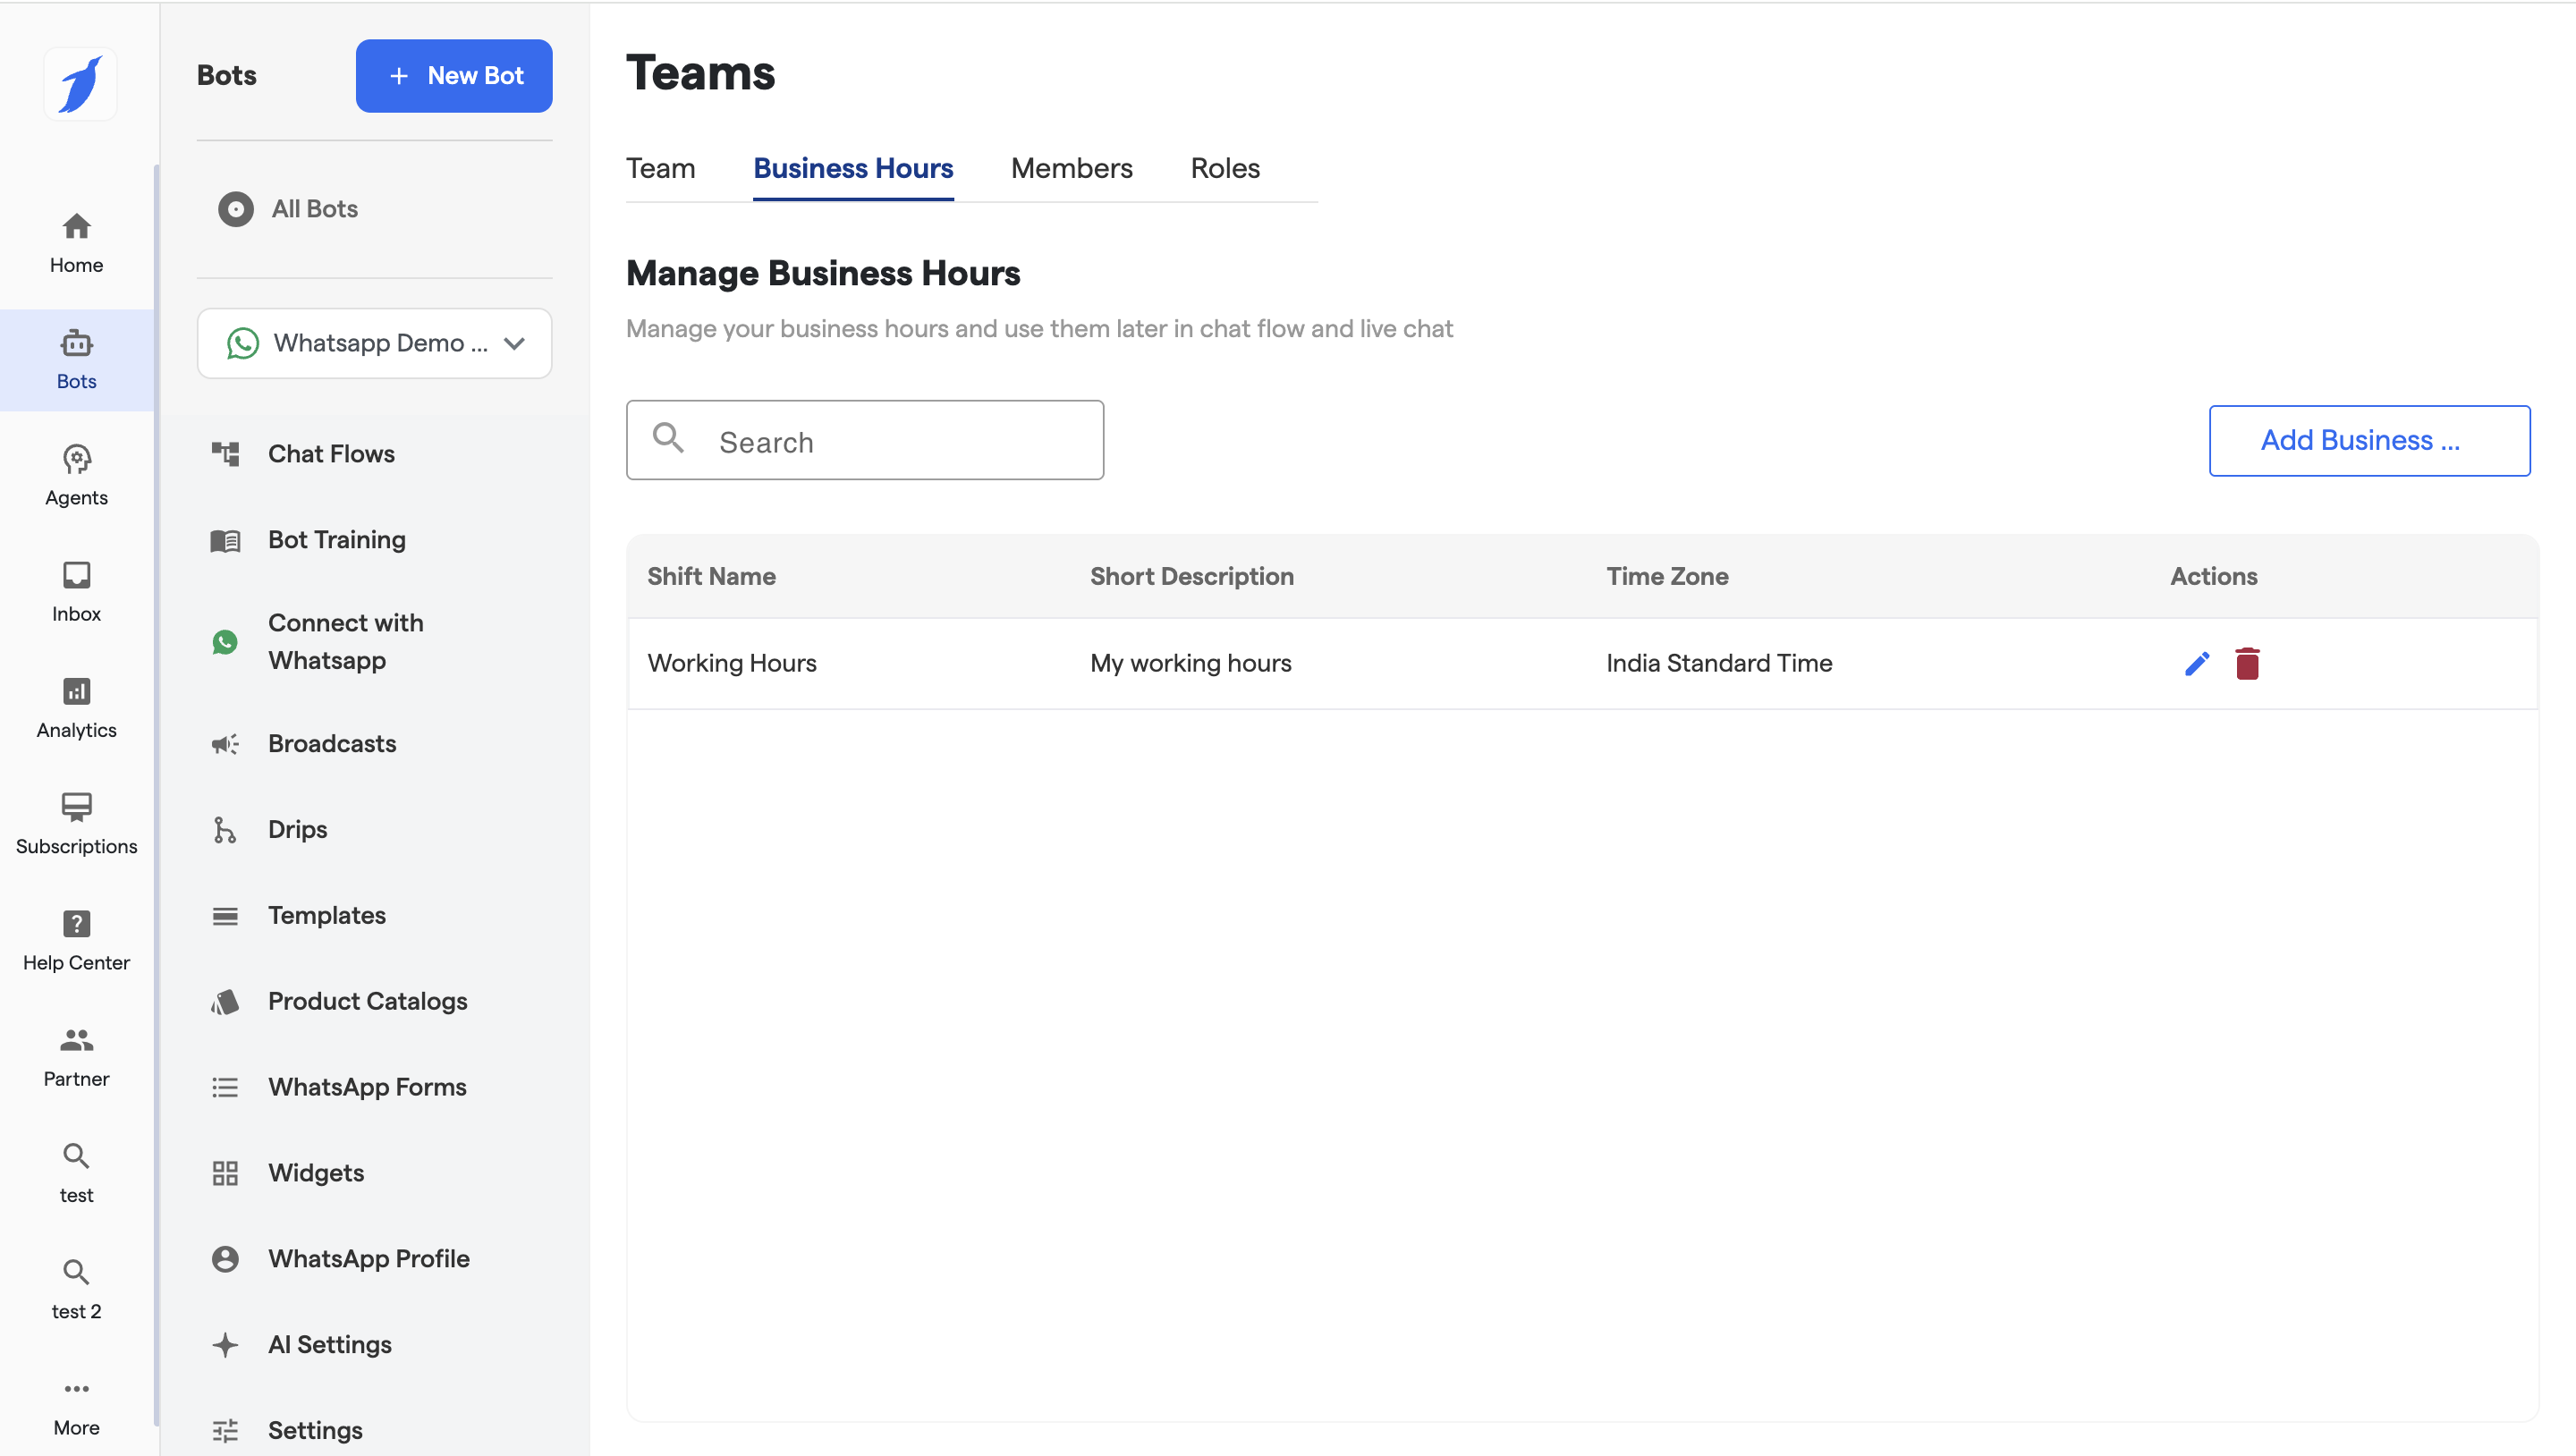
* Click on Add Business Hours button to add your business hours.
* Add your schedule here so that your calendar can show the availability accordingly by adding the following details:
* Name
* Short Description
* Select your Time Zone
* Add your Business Hours including your days and Timings.
* After adding it will be reflected in the list.
> Edit and Delete the working hours accordingly.
* Select your Added working schedule.
* **Customer Timezone**: Timezone used for slot display (e.g., Asia/Kolkata)
* **Dependency Check**:
* Name, Email, and Phone components must be added **before** this component
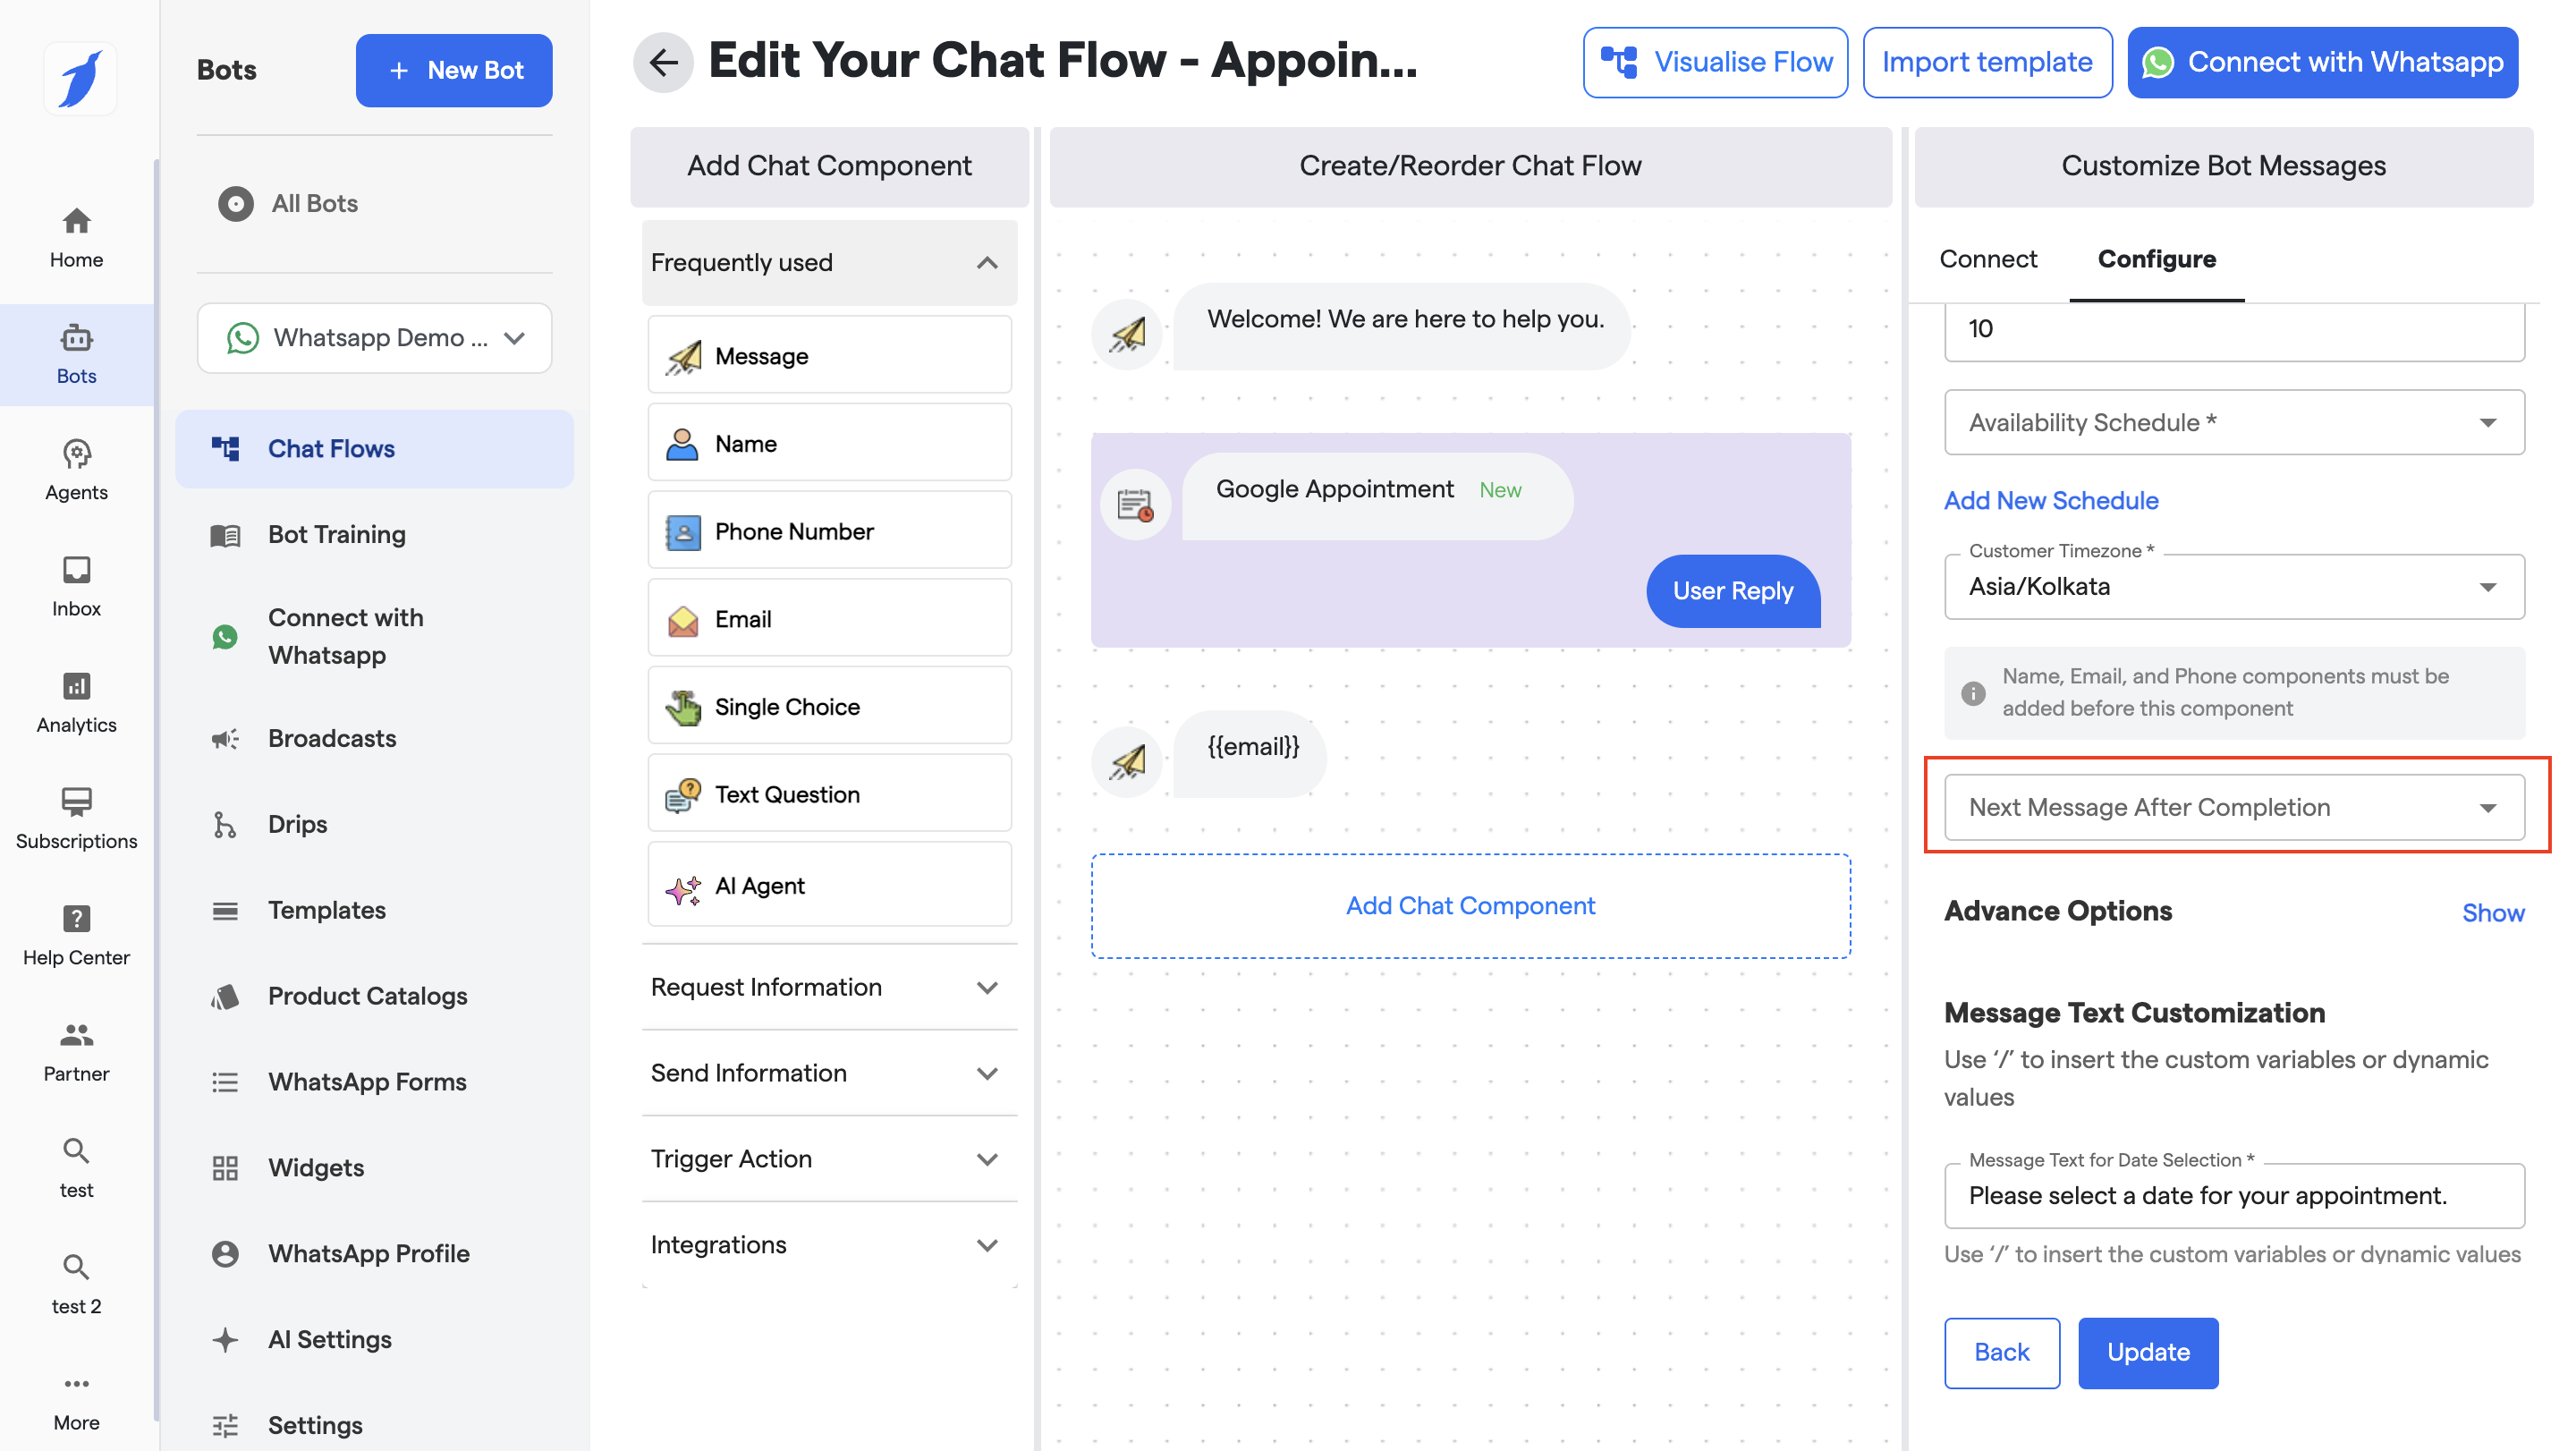
* **Next Message After Completion**: Route the flow after booking completes
***
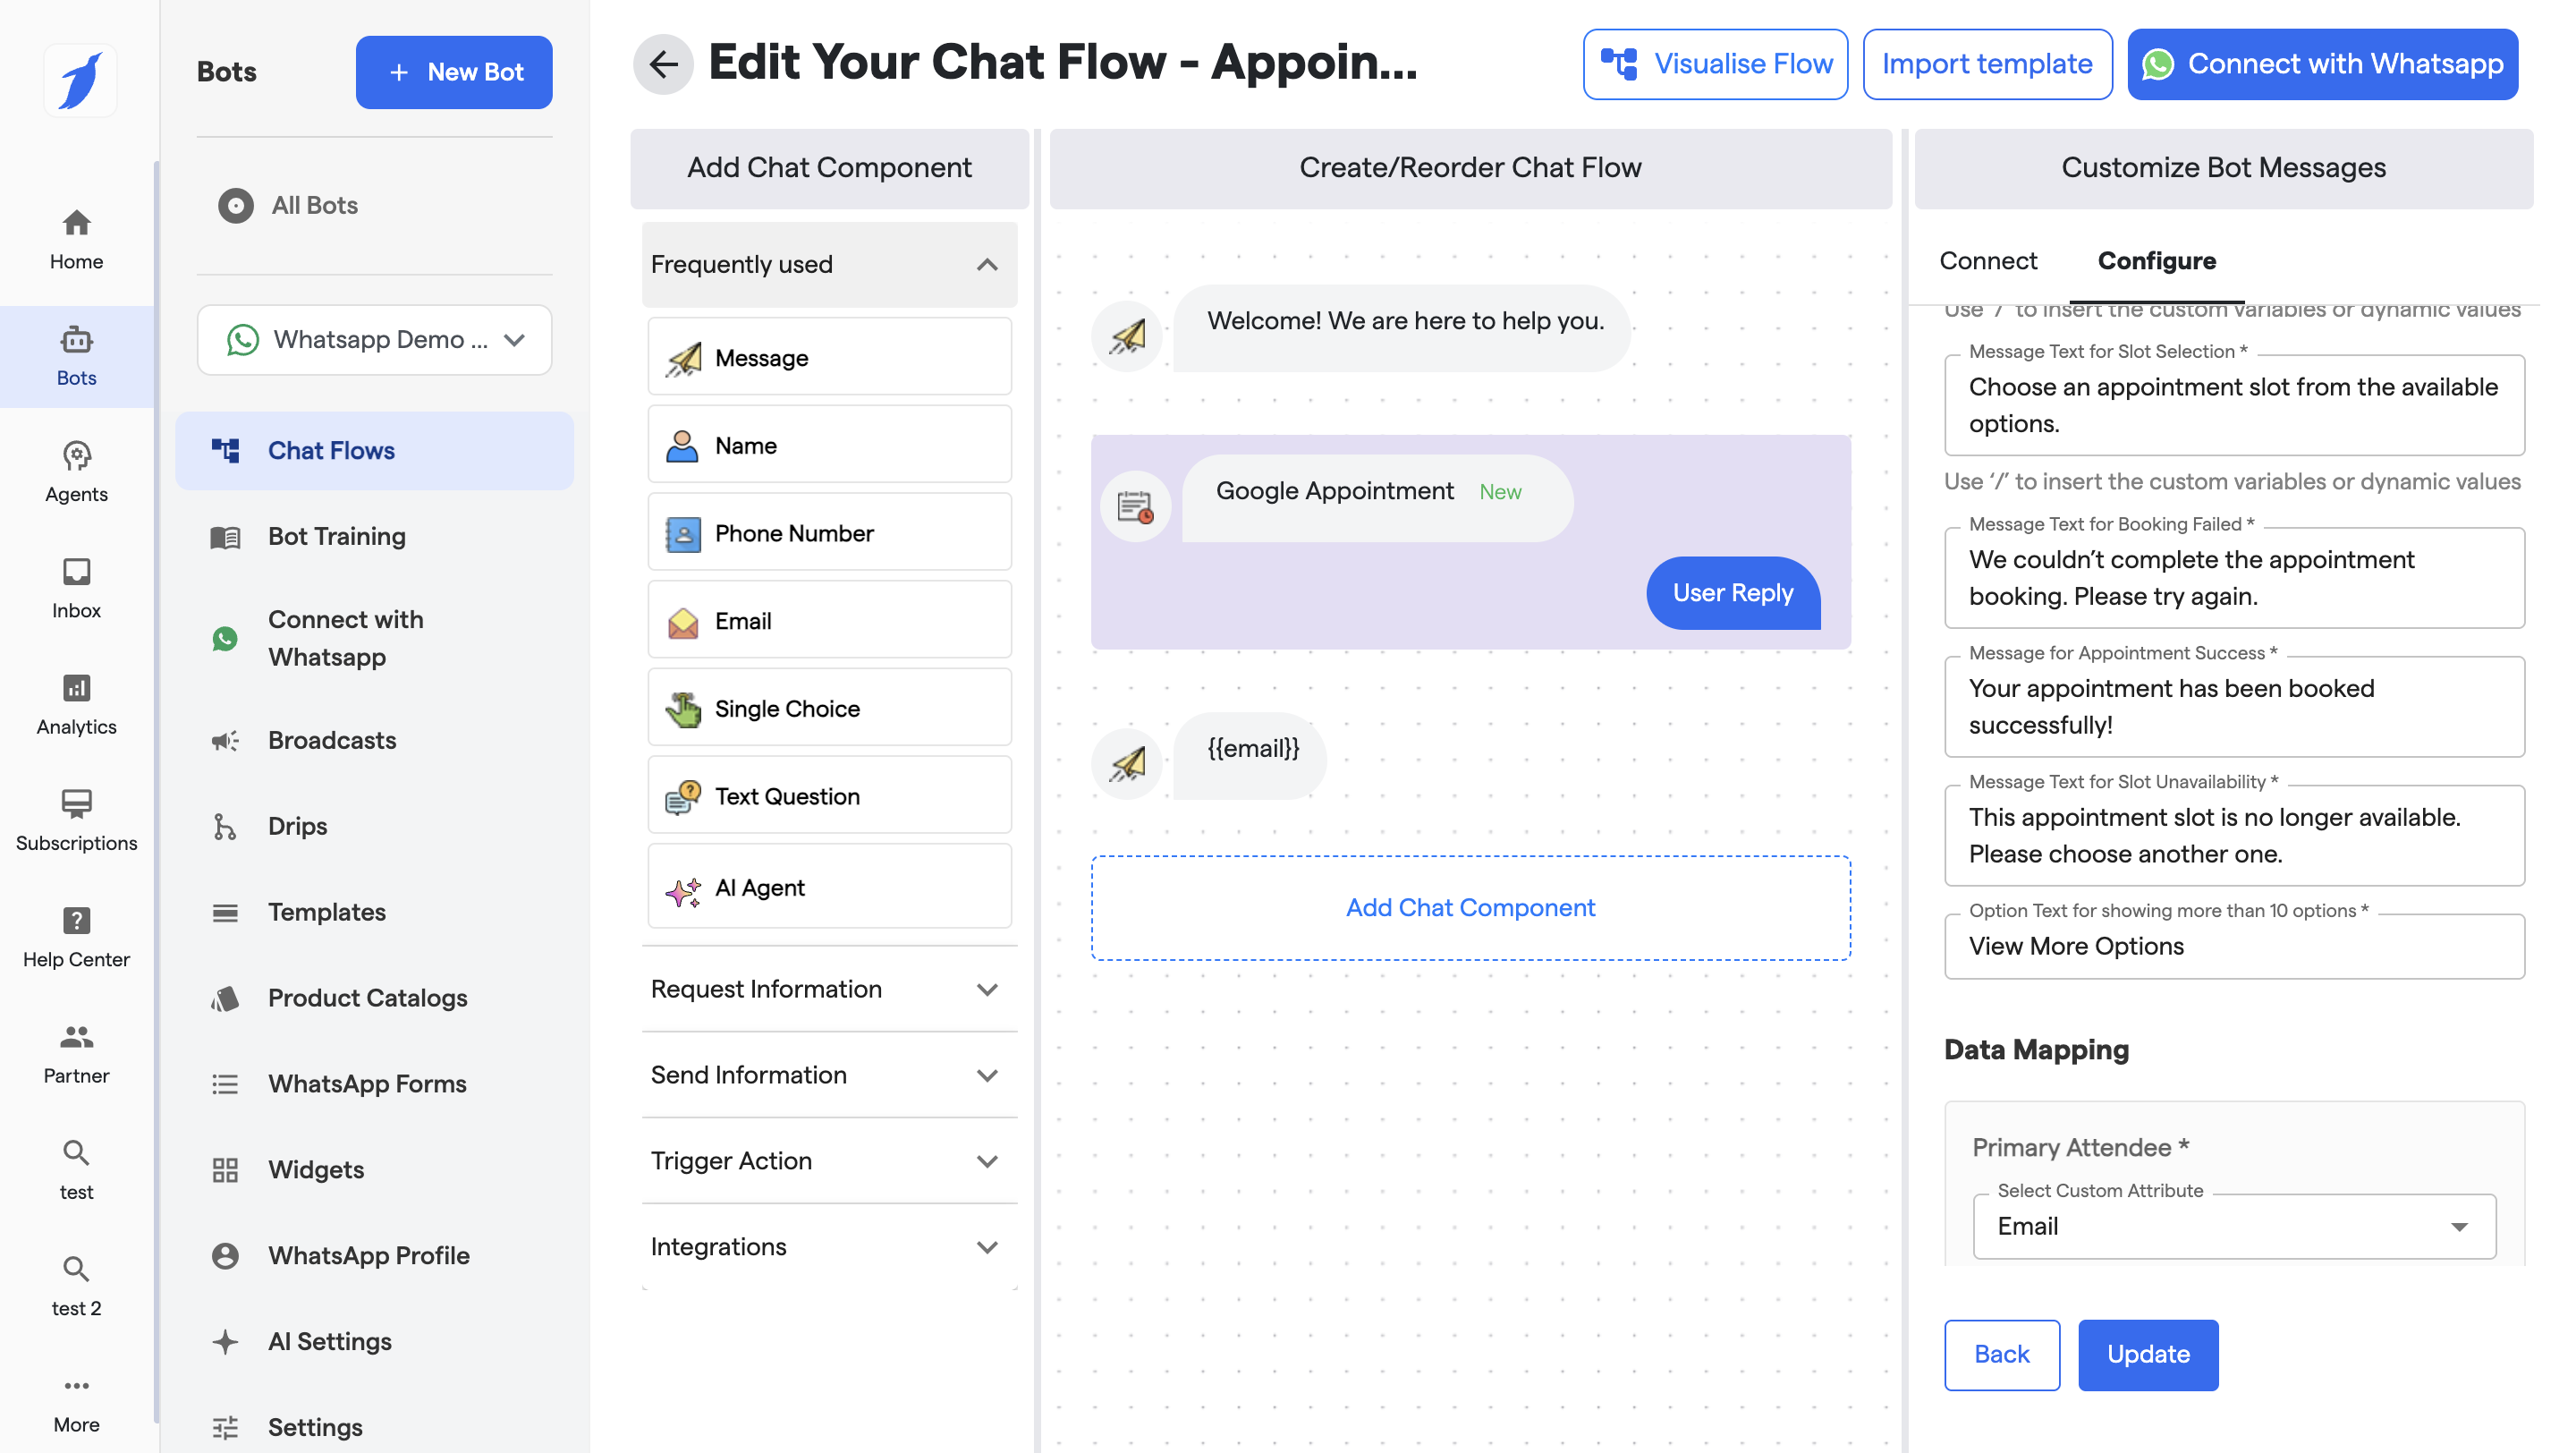
### 2. Message Text Customization (Live)
Fully configurable system messages:
* **Date Selection Message**\
*“Please select a date for your appointment.”*
* **Slot Selection Message**\
*“Choose an appointment slot from the available options.”*
* **Booking Failed Message**\
*“We couldn’t complete the appointment booking. Please try again.”*
* **Appointment Success Message**\
*“Your appointment has been booked successfully!”*
* **Slot Unavailability Message**\
*“This appointment slot is no longer available. Please choose another one.”*
* **View More Options Text** (when >10 slots)\
*“View More Options”*
➡️ Supports **dynamic variables** using `/`
***
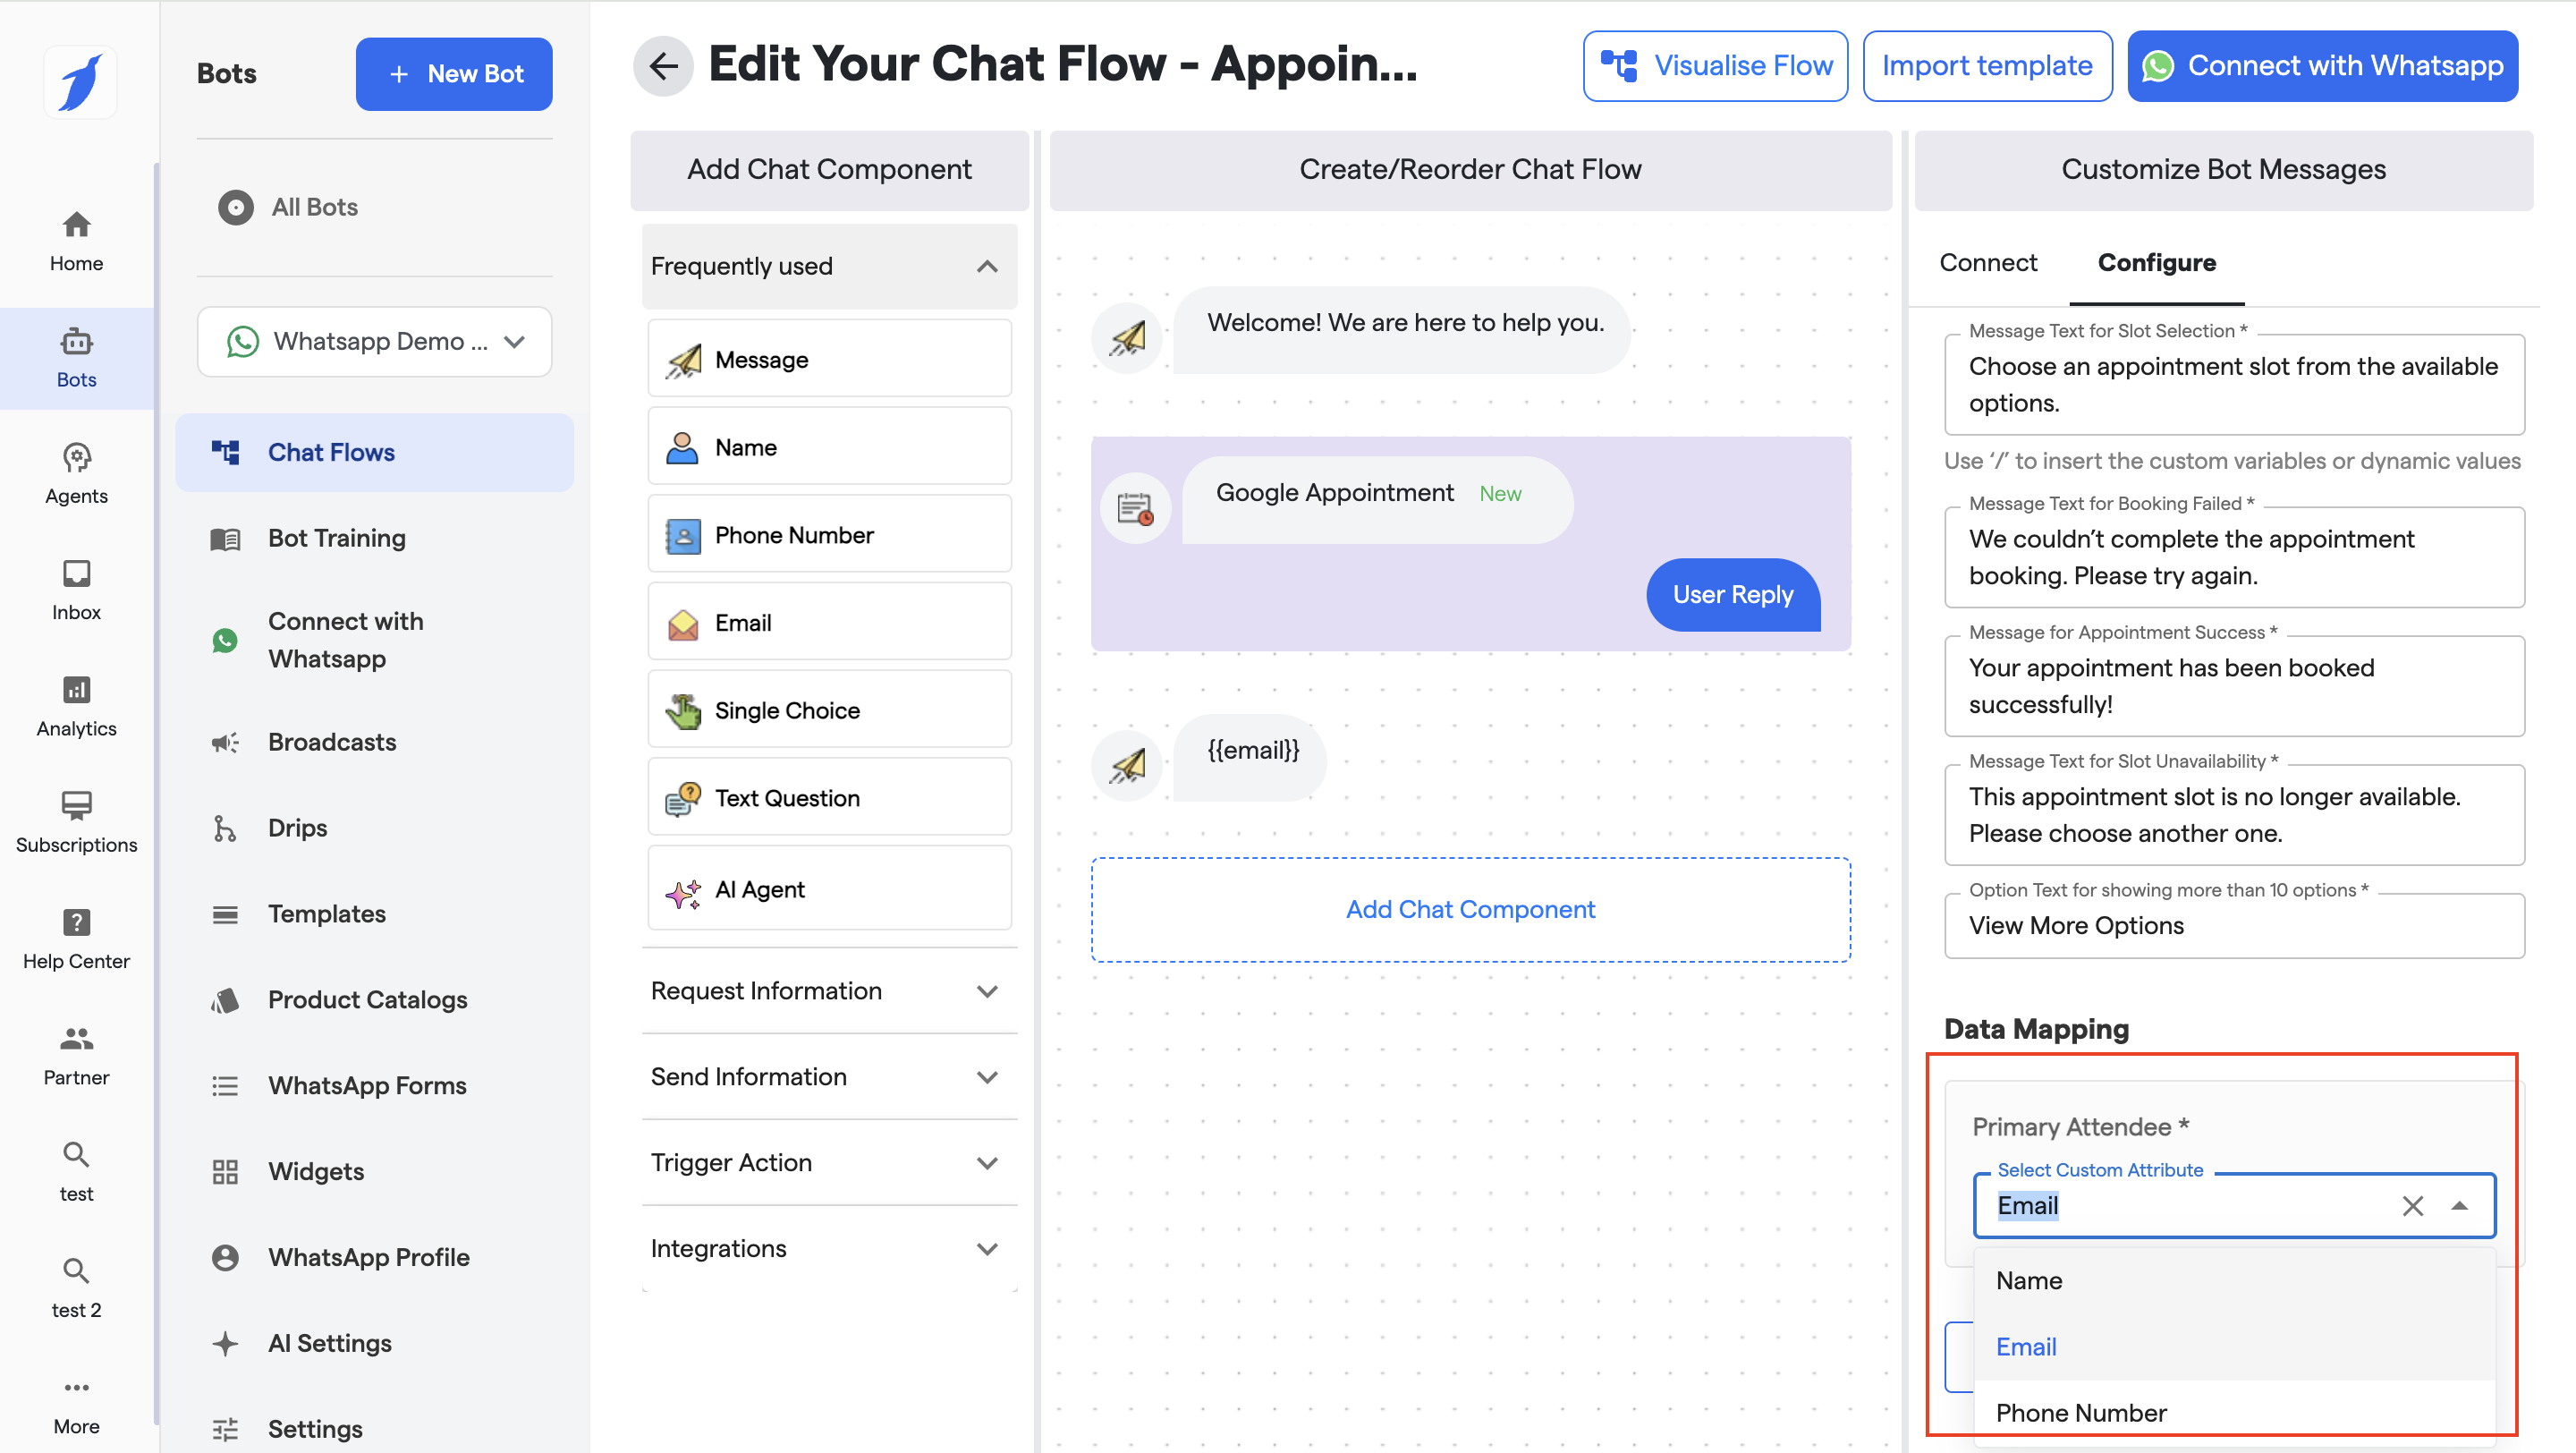
### 3. Data Mapping (Live)
* **Primary Attendee**
* Map appointment attendee to a **Custom Attribute** (e.g., Email)
***
### 4. Advance Options (Live)
Select the checkboxes to enable the permissions.
#### Booking & Meeting Controls
* **Include a Google Meet link with each appointment**\
Automatically adds a Meet link to the booked event.
* **Allow users to invite additional guests**\
Users can add extra attendees while booking.
* **Allow multiple bookings on the same appointment slot**\
Enables overlapping bookings for the same time slot (useful for group sessions).
#### Appointment Details
* **Allow users to add an agenda for appointment**\
Users can enter agenda/notes during booking.
#### Reliability & Retry
* **Retry booking once upon failure**\
Automatically retries booking if the first attempt fails.
#### Notifications & Messaging
* **Send notification for the user reply**\
Triggers notification when user responds.
* **Rephrase Messages**\
AI-assisted rephrasing of normal system messages.
* **Rephrase Error Messages**\
AI-assisted rephrasing specifically for error states.
#### Message Timing
* **Add delay before message is displayed**\
Set a delay (in seconds) before sending the next message (e.g., 1 second).
***
#### Actions
* **Back**: Go to previous step
* **Update**: Save advanced configuration
***
### 5. Actions Available
* **Update**: Save all configuration changes
* **Back**: Navigate to previous step
* **Test Live on WhatsApp Web**: End-to-end booking validation
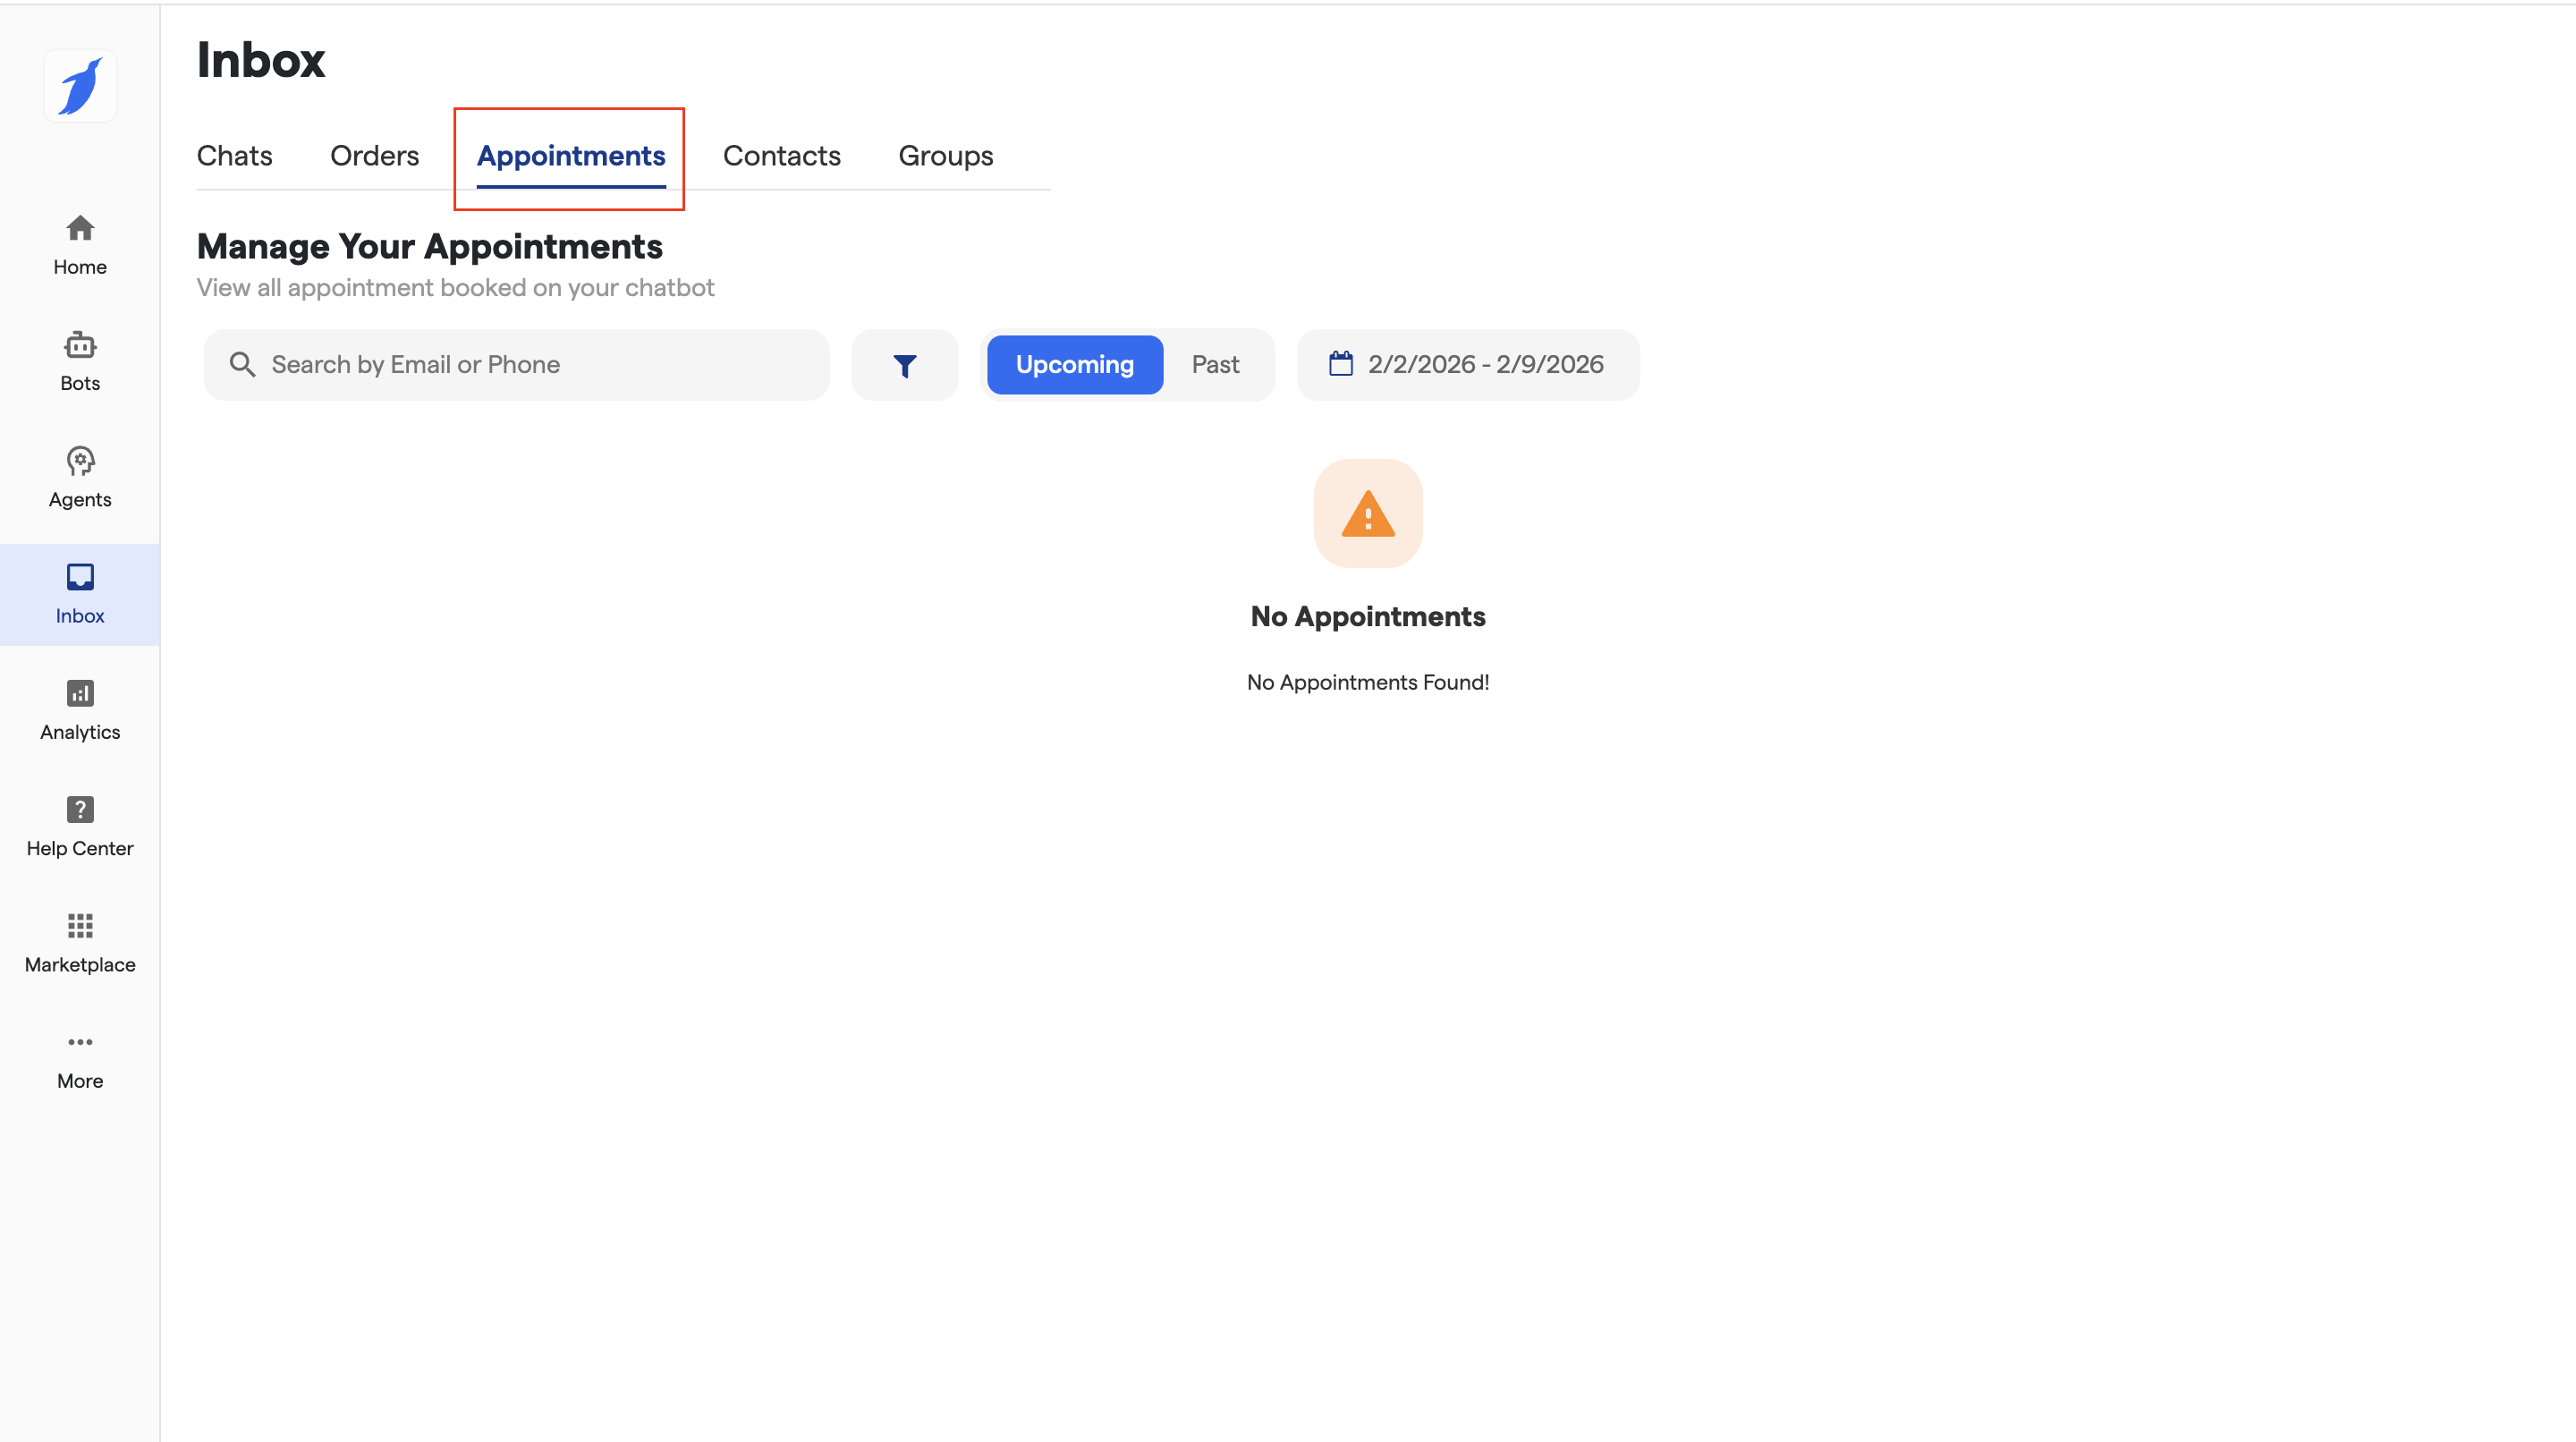
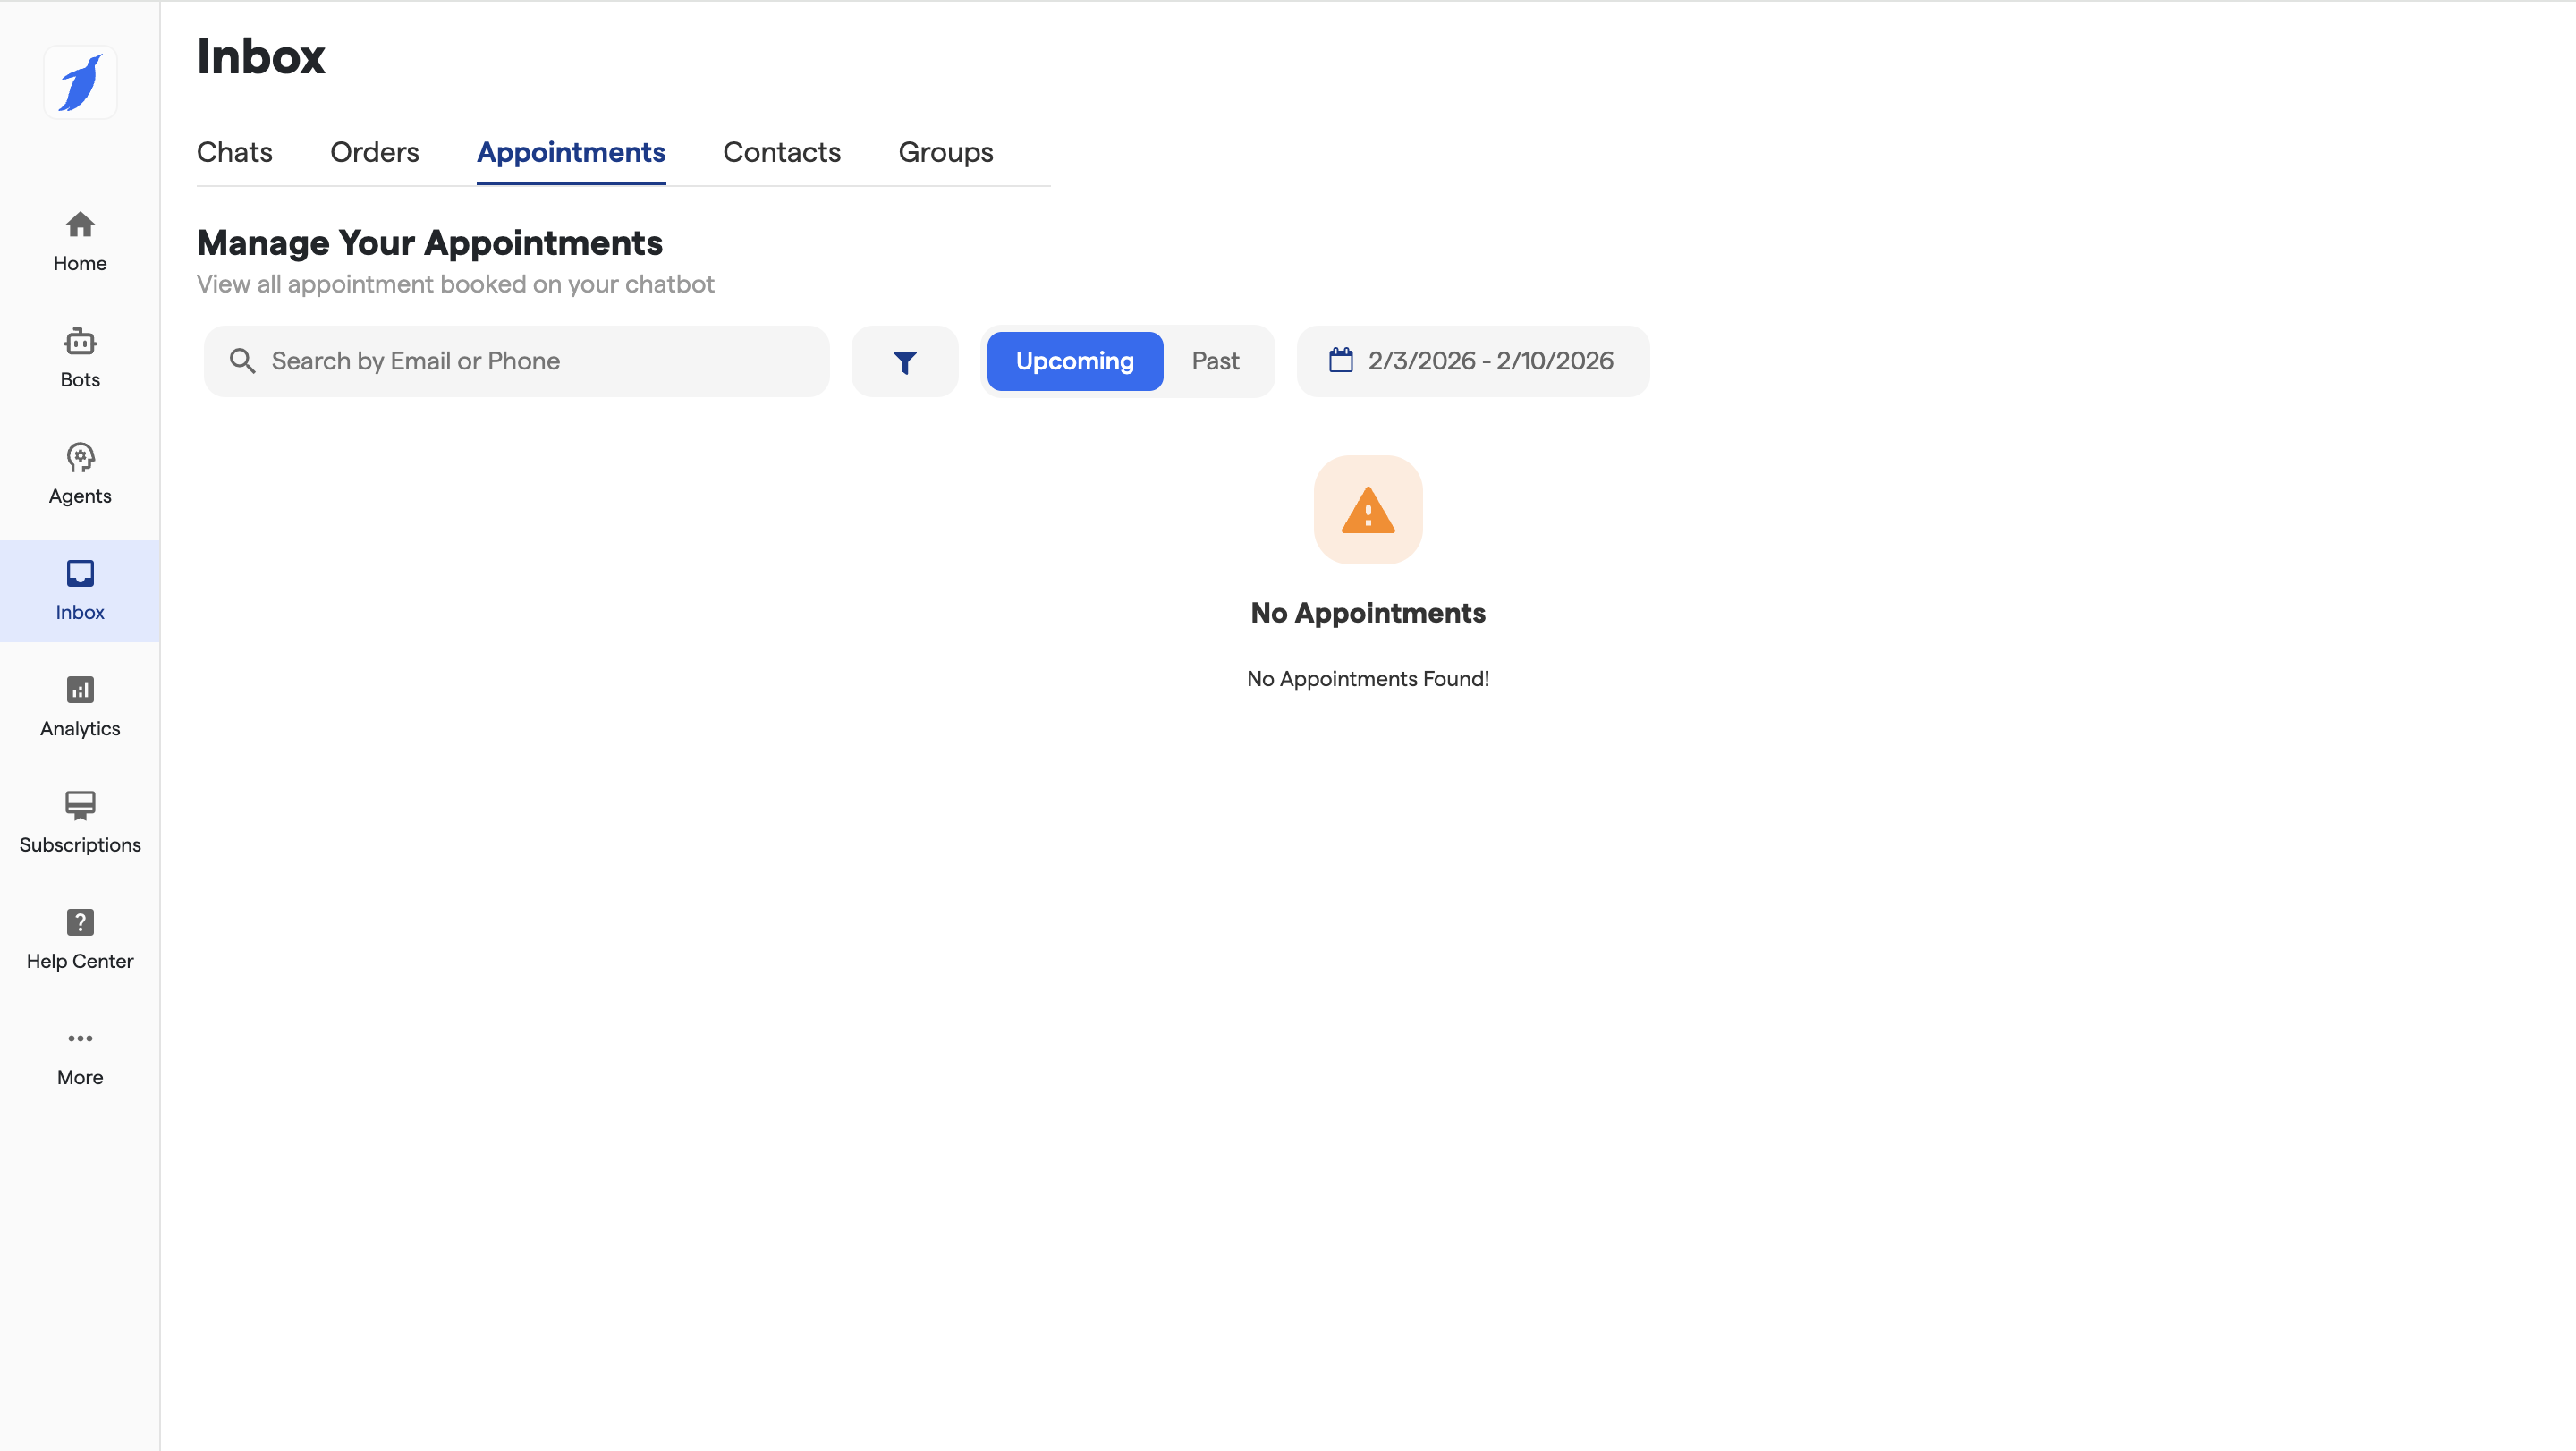
Whenever an appointment is booked via the chatbot, it will automatically appear in the **Inbox → Appointments** tab.\
This section lets you view and manage all upcoming and past appointments in one place
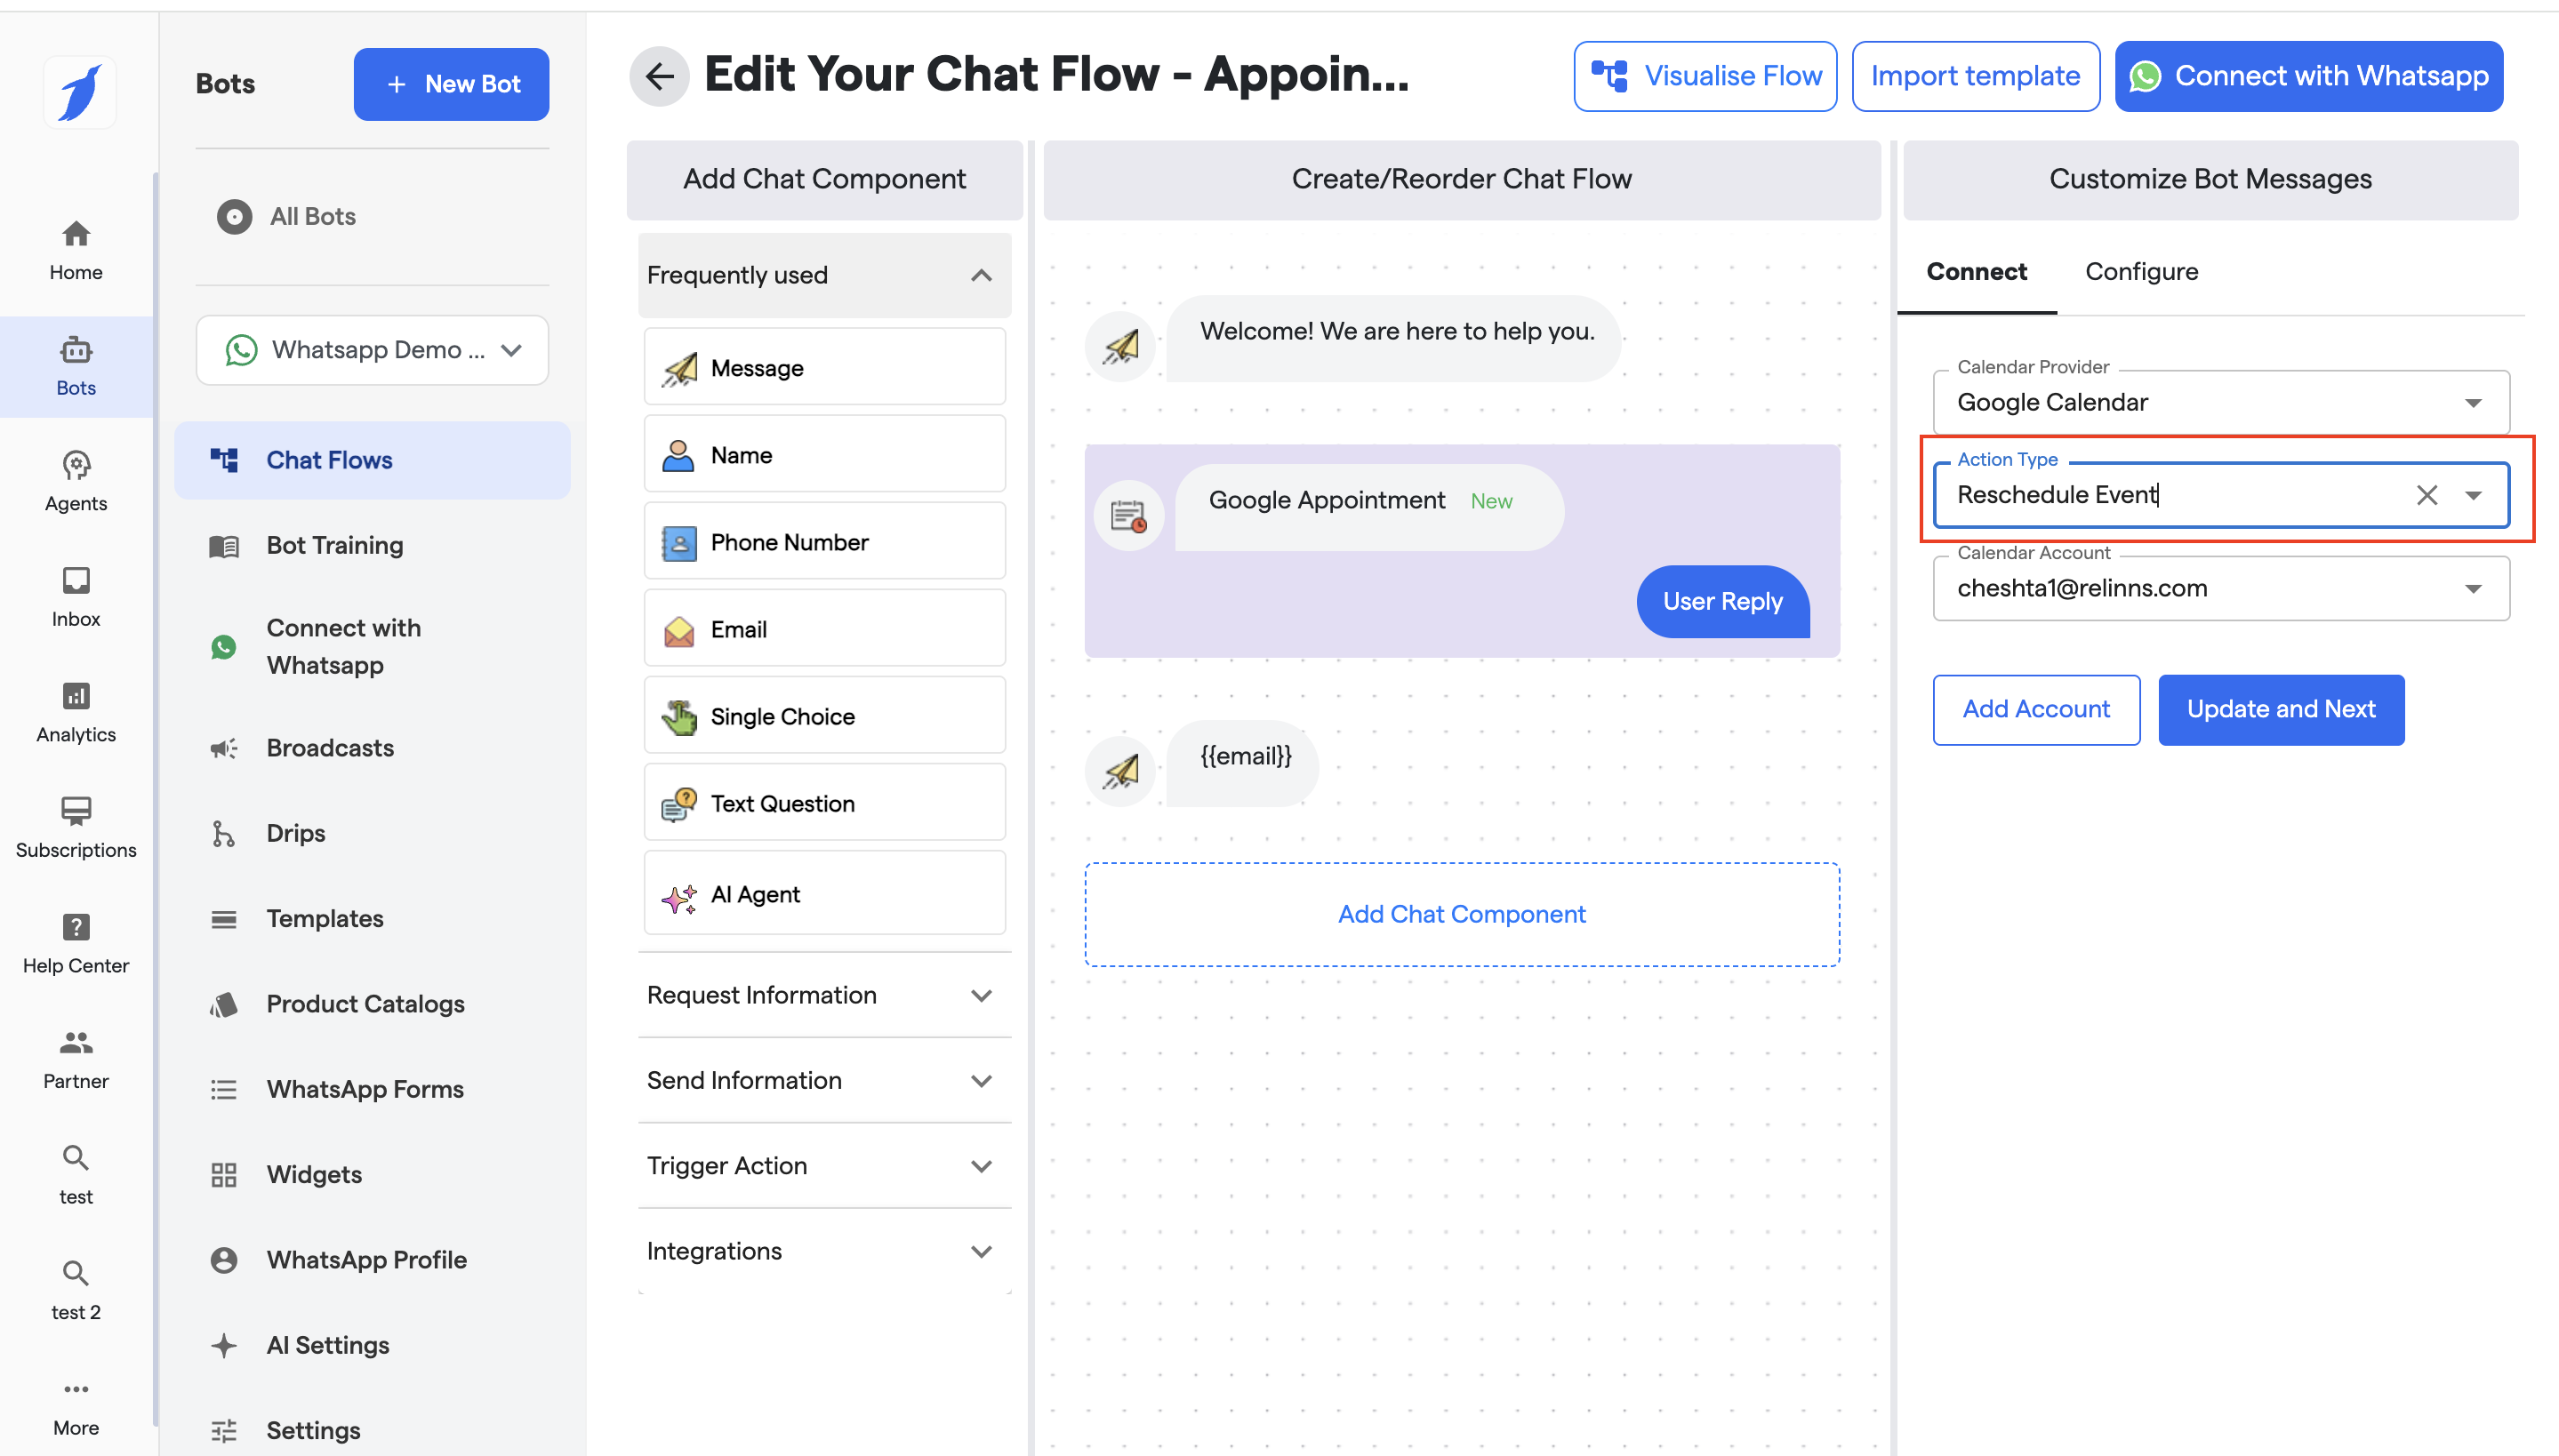
### 2. Reschedule Event
It Updates an existing appointment with a new date/time.
#### Connect Configuration (Google Appointment)
**Calendar Provider**
* Select **Google Calendar** to sync bookings with your Google account.
**Action Type**
* **New Appointment** → Creates a fresh calendar event.
* **Reschedule Event** → Updates an existing appointment with a new date/time (used for rescheduling flows).
* It allow the users to the reschedule the meeting
* Edit or keep the configure details same for the Reschedule flow.
**Calendar Account**
* Choose the connected Google account where appointments will be created or updated.
* If no account is connected, click **Add Account** to authorize Google Calendar.
**Behavior**
* On successful booking or reschedule:
* The event is created/updated in Google Calendar.
* Confirmation is sent to the user (email / chat message based on flow setup).
* Appointment details are stored internally.
**Post-Booking Visibility**
* All booked or rescheduled appointments are reflected in:
* **Inbox → Appointments** tab
* Allows filtering by **Upcoming / Past**, date range, email, or phone number.
***
### 3. Cancel Event
This flow Allows you to cancel the meeting Event.
#### 1. Entry Point
**Trigger**
* Keyword: `Cancel appointment`
* Button: *Cancel Appointment*
* Or from menu / fallback option
***
#### 2. Collect User Identity
**Message**
> “Sure 👍 I can help you cancel your appointment.\
> Please confirm your details to proceed.”
**Components (in this order – mandatory)**
* **Name**
* **Email**
* **Phone Number**
> These are required to identify the correct calendar event.
***
#### 3. Fetch Existing Appointment
**Appointment Component**
* **Calendar Provider:** Google Calendar
* **Action Type:** **Cancel Event**
* **Calendar Account:** Select connected Google account
**Configuration**
* **Count of Previous Scheduled Events:** `1`\
(Fetches the most recent upcoming appointment for this user)
***
#### 4. Confirmation Step (Recommended)
**Message**
> “I found your upcoming appointment scheduled on\
> 📅 {{date}} at ⏰ {{time}}.\
> Do you want to cancel this appointment?”
**Single Choice**
* ✅ Yes, cancel it
* ❌ No, keep it
***
#### 5. Cancel Event Action
**Condition**
* If user selects **Yes, cancel it**
**Appointment Component**
* Executes **Cancel Event**
* Removes the event from Google Calendar
* Updates internal appointment status
***
#### 6. Success Message
**Message**
> “✅ Your appointment has been successfully cancelled.\
> If you need to reschedule or book a new appointment, just let me know!”
***
#### 7. Failure / No Appointment Found
**Fallback Message**
> “⚠️ We couldn’t find any upcoming appointment with the provided details.\
> Please double-check your information or contact support.”
***
#### 8. Post-Cancellation Visibility
* Cancelled appointment will:
* Be removed from **Google Calendar**
* Appear as **Cancelled** in **Inbox → Appointments**
* Be available for audit/logs
***
### Optional Enhancements (Advanced Options)
* ⏱ Retry cancellation once on failure
* 🔔 Send cancellation confirmation email
* ✨ Rephrase success/error messages using AI
* ➕ Offer **Reschedule** CTA immediately after cancel
{% hint style="info" %}
All the Appointments will be visible in the Inbox Tab
{% endhint %}
#### FAQs
What is the Appointment Component?
The Appointment Component lets users book, reschedule, or cancel appointments directly inside the chatbot. It automatically creates or updates events in the connected Google Calendar.
Do I need to connect Google Calendar?
Yes. A Google Calendar account with write access is required. All appointments booked via the chatbot will be created, updated, or cancelled in this calendar.
What actions does the Appointment Component support?
The component supports three key actions:
* **Create Event** – Book a new appointment
* **Reschedule Event** – Change date or time of an existing booking
* **Cancel Event** – Cancel an upcoming appointment
What user details are required before booking?
Before using the Appointment Component, the flow must collect:
* **Name**
* **Email**
* **Phone number**\
These details are required to identify and manage appointments.
Where can I view and manage all appointments?
All booked, rescheduled, and cancelled appointments are available under\
Inbox → Appointments tab, where you can view upcoming and past appointments.