> For the complete documentation index, see [llms.txt](https://help.botpenguin.com/llms.txt). Markdown versions of documentation pages are available by appending `.md` to page URLs; this page is available as [Markdown](https://help.botpenguin.com/bots/whatsapp-bot/manage-chatflow/components-in-chatflow/integrations-component/google-calendar-appointment/appointment-drip-campaign-setup.md).
# Appointment Drip Campaign Setup
This guide explains how to create and manage an Appointment-based WhatsApp Drip Campaign in BotPenguin, using the Drip Campaign module.
### What Is an Appointment Drip Campaign?
An **Appointment Drip Campaign** lets you automatically send WhatsApp messages to users **before or after their scheduled appointments**.\
It’s ideal for:
* Appointment reminders
* Follow-up messages
* Reducing no-shows
* Post-appointment feedback or instructions
***
### 📍 Where to Find This
**Dashboard → Bots → Select Bot → Drips**
***
### 🛠️ How to Create an Appointment Drip Campaign
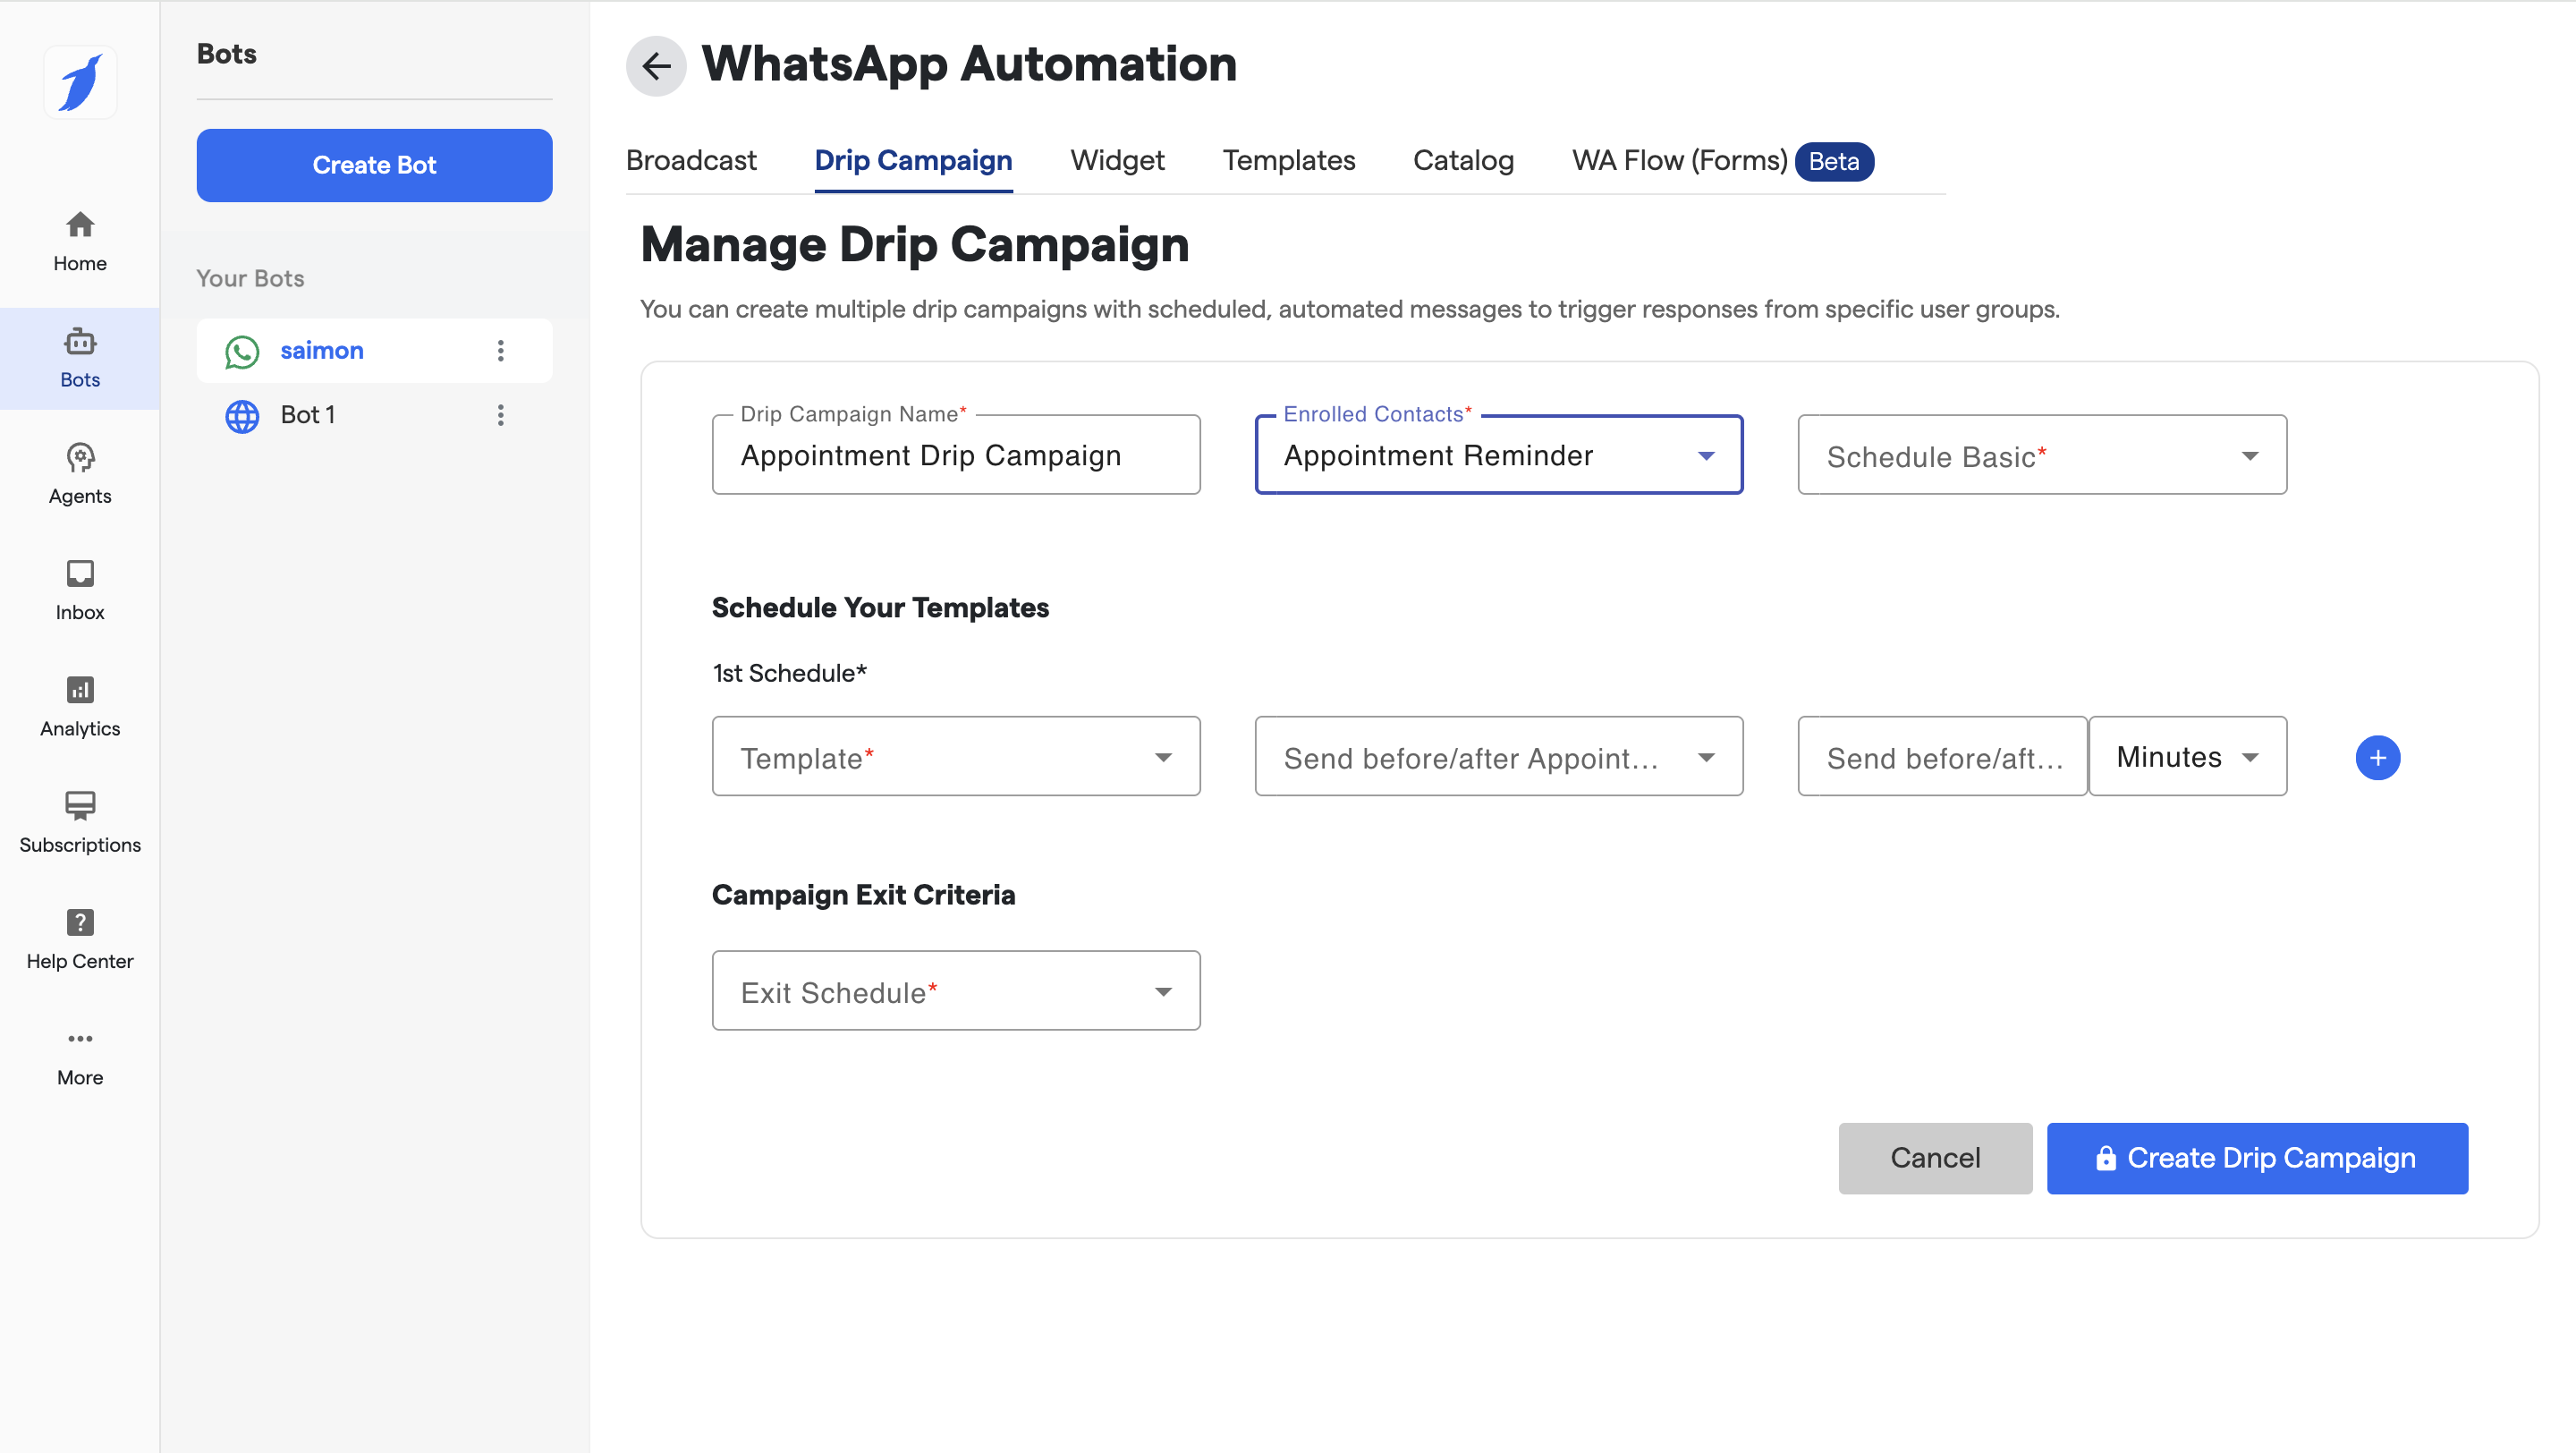
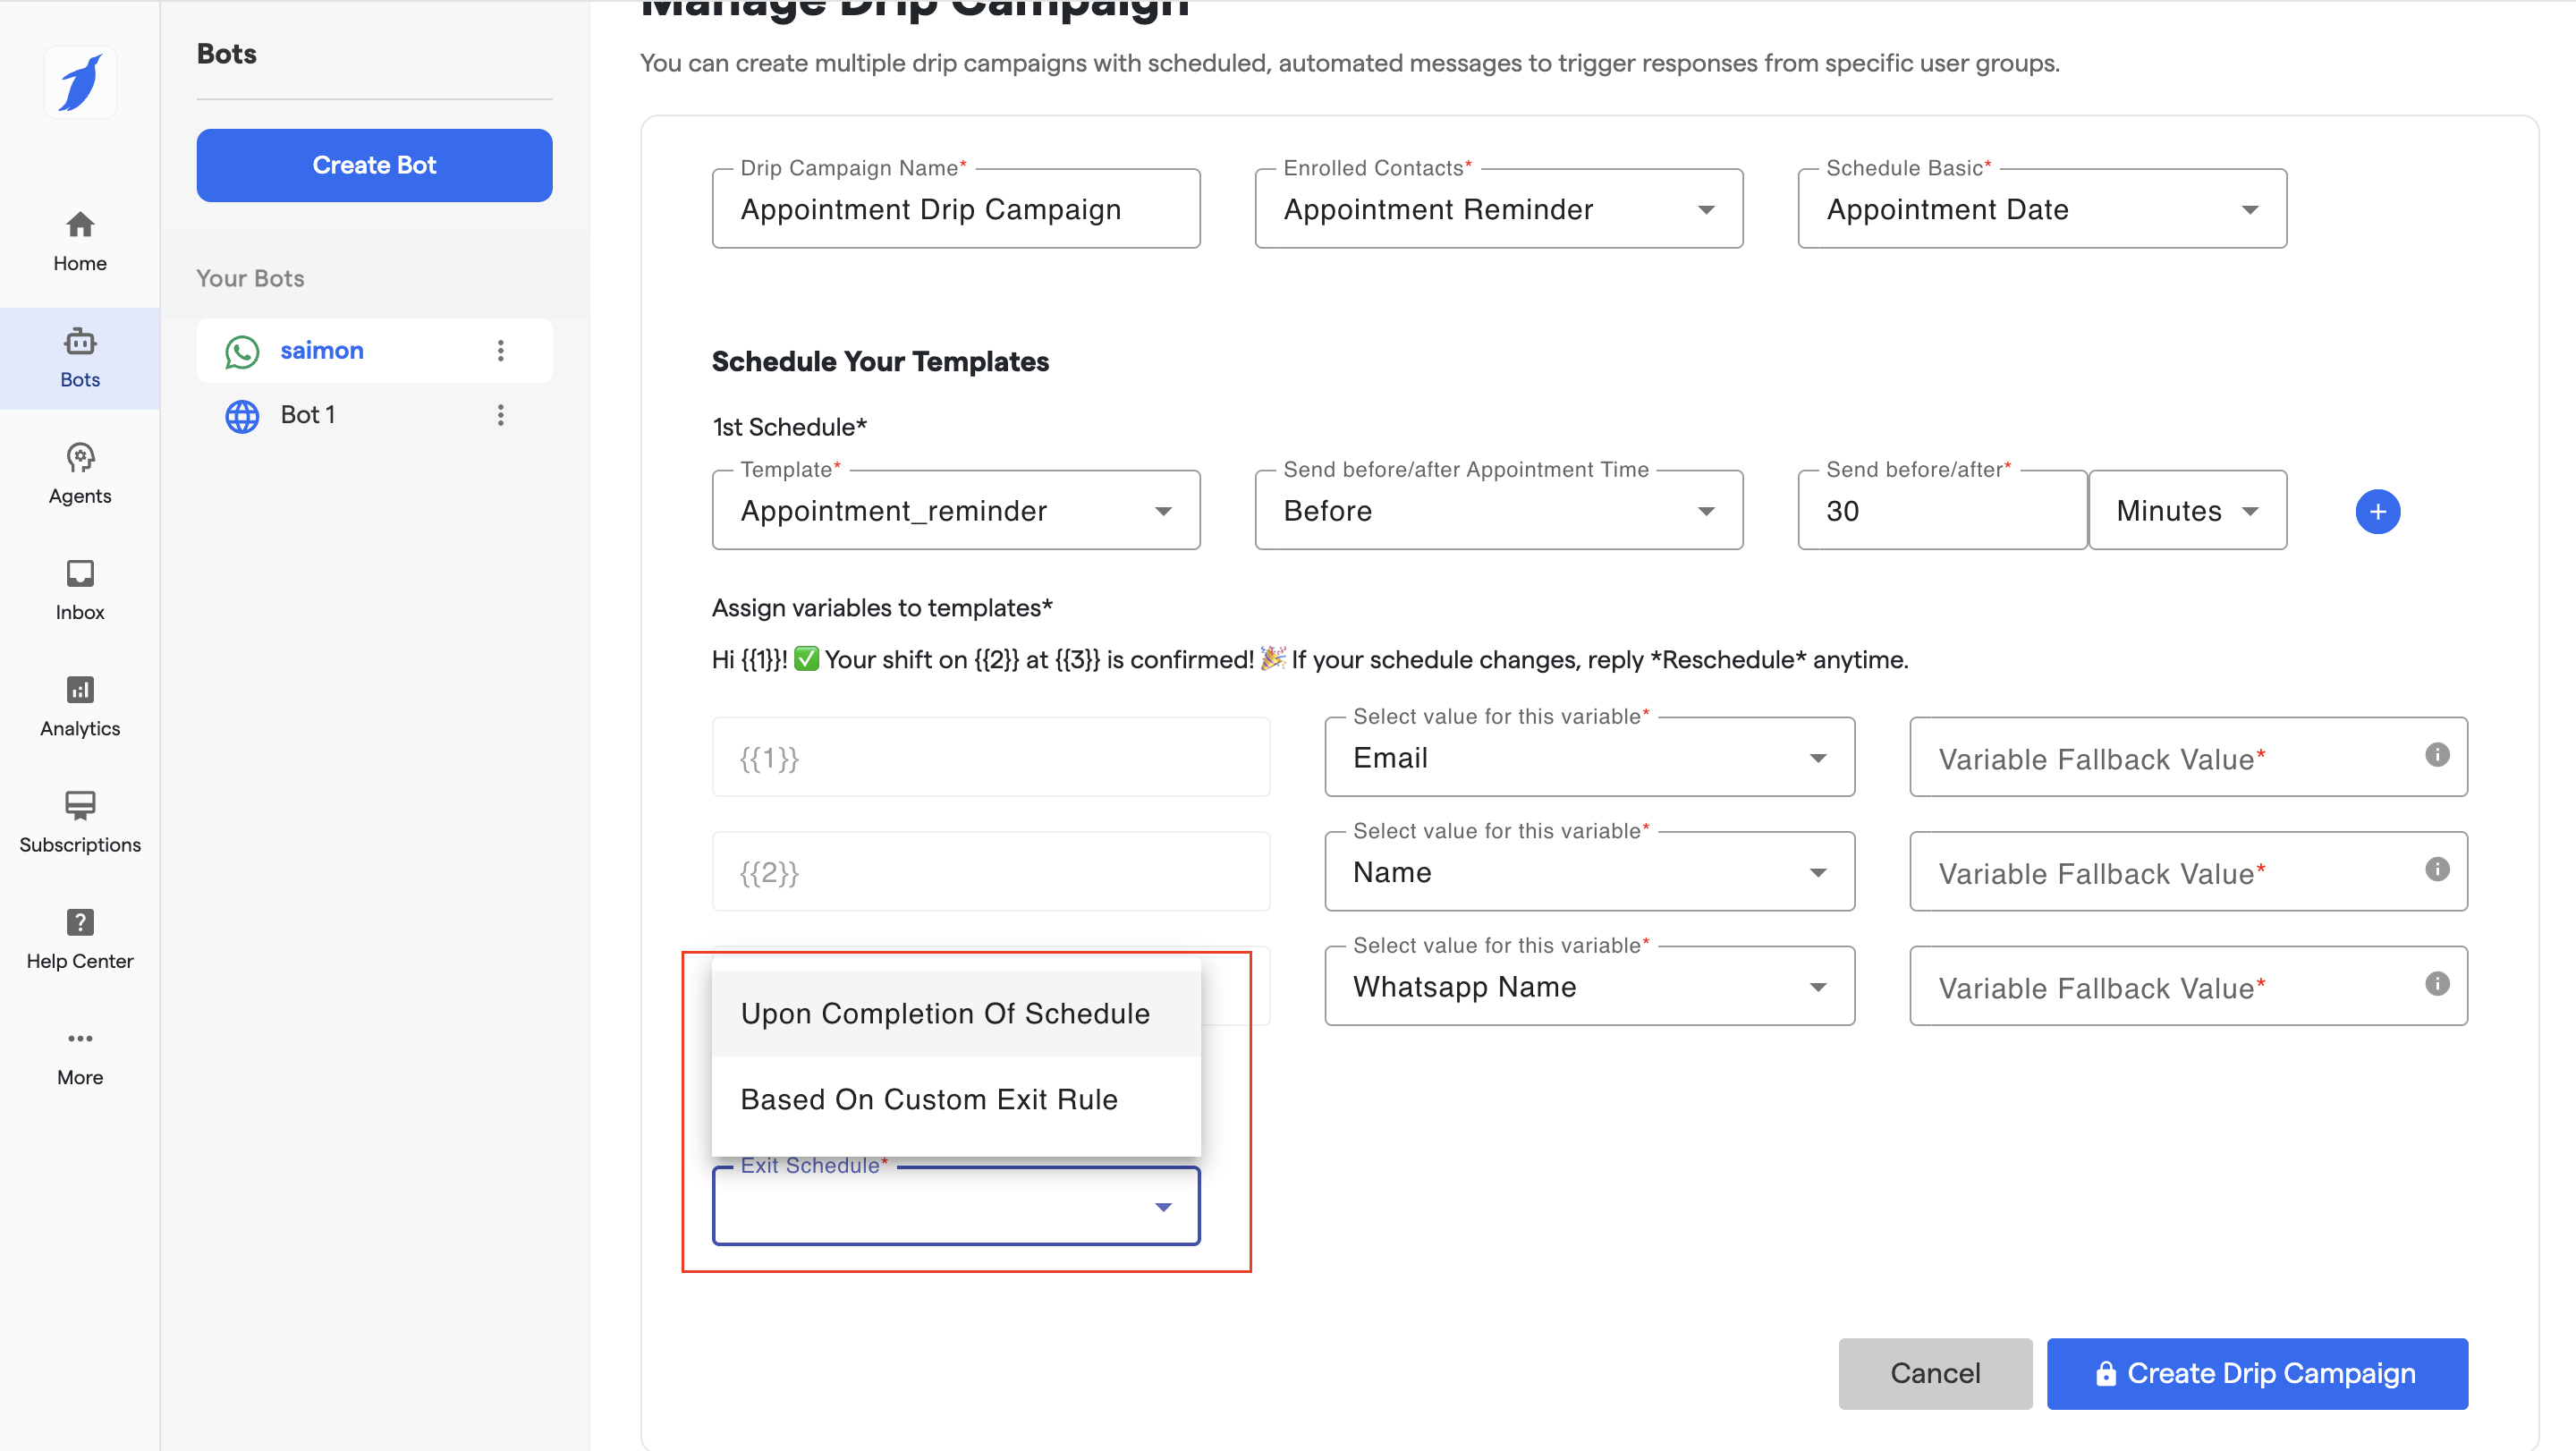
#### 1️⃣ Drip Campaign Name
**Field:** `Drip Campaign Name`\
Give your campaign a clear, descriptive name.
**Example:**\
`Appointment Drip Campaign`\
`Doctor Visit Reminder`\
`Consultation Follow-up`
***
#### 2️⃣ Enrolled Contacts
**Field:** `Enrolled Contacts`\
Select **Appointment Reminder**.
🔹 This ensures:
* Only users with booked appointments are enrolled
* Campaign triggers are linked to appointment events
***
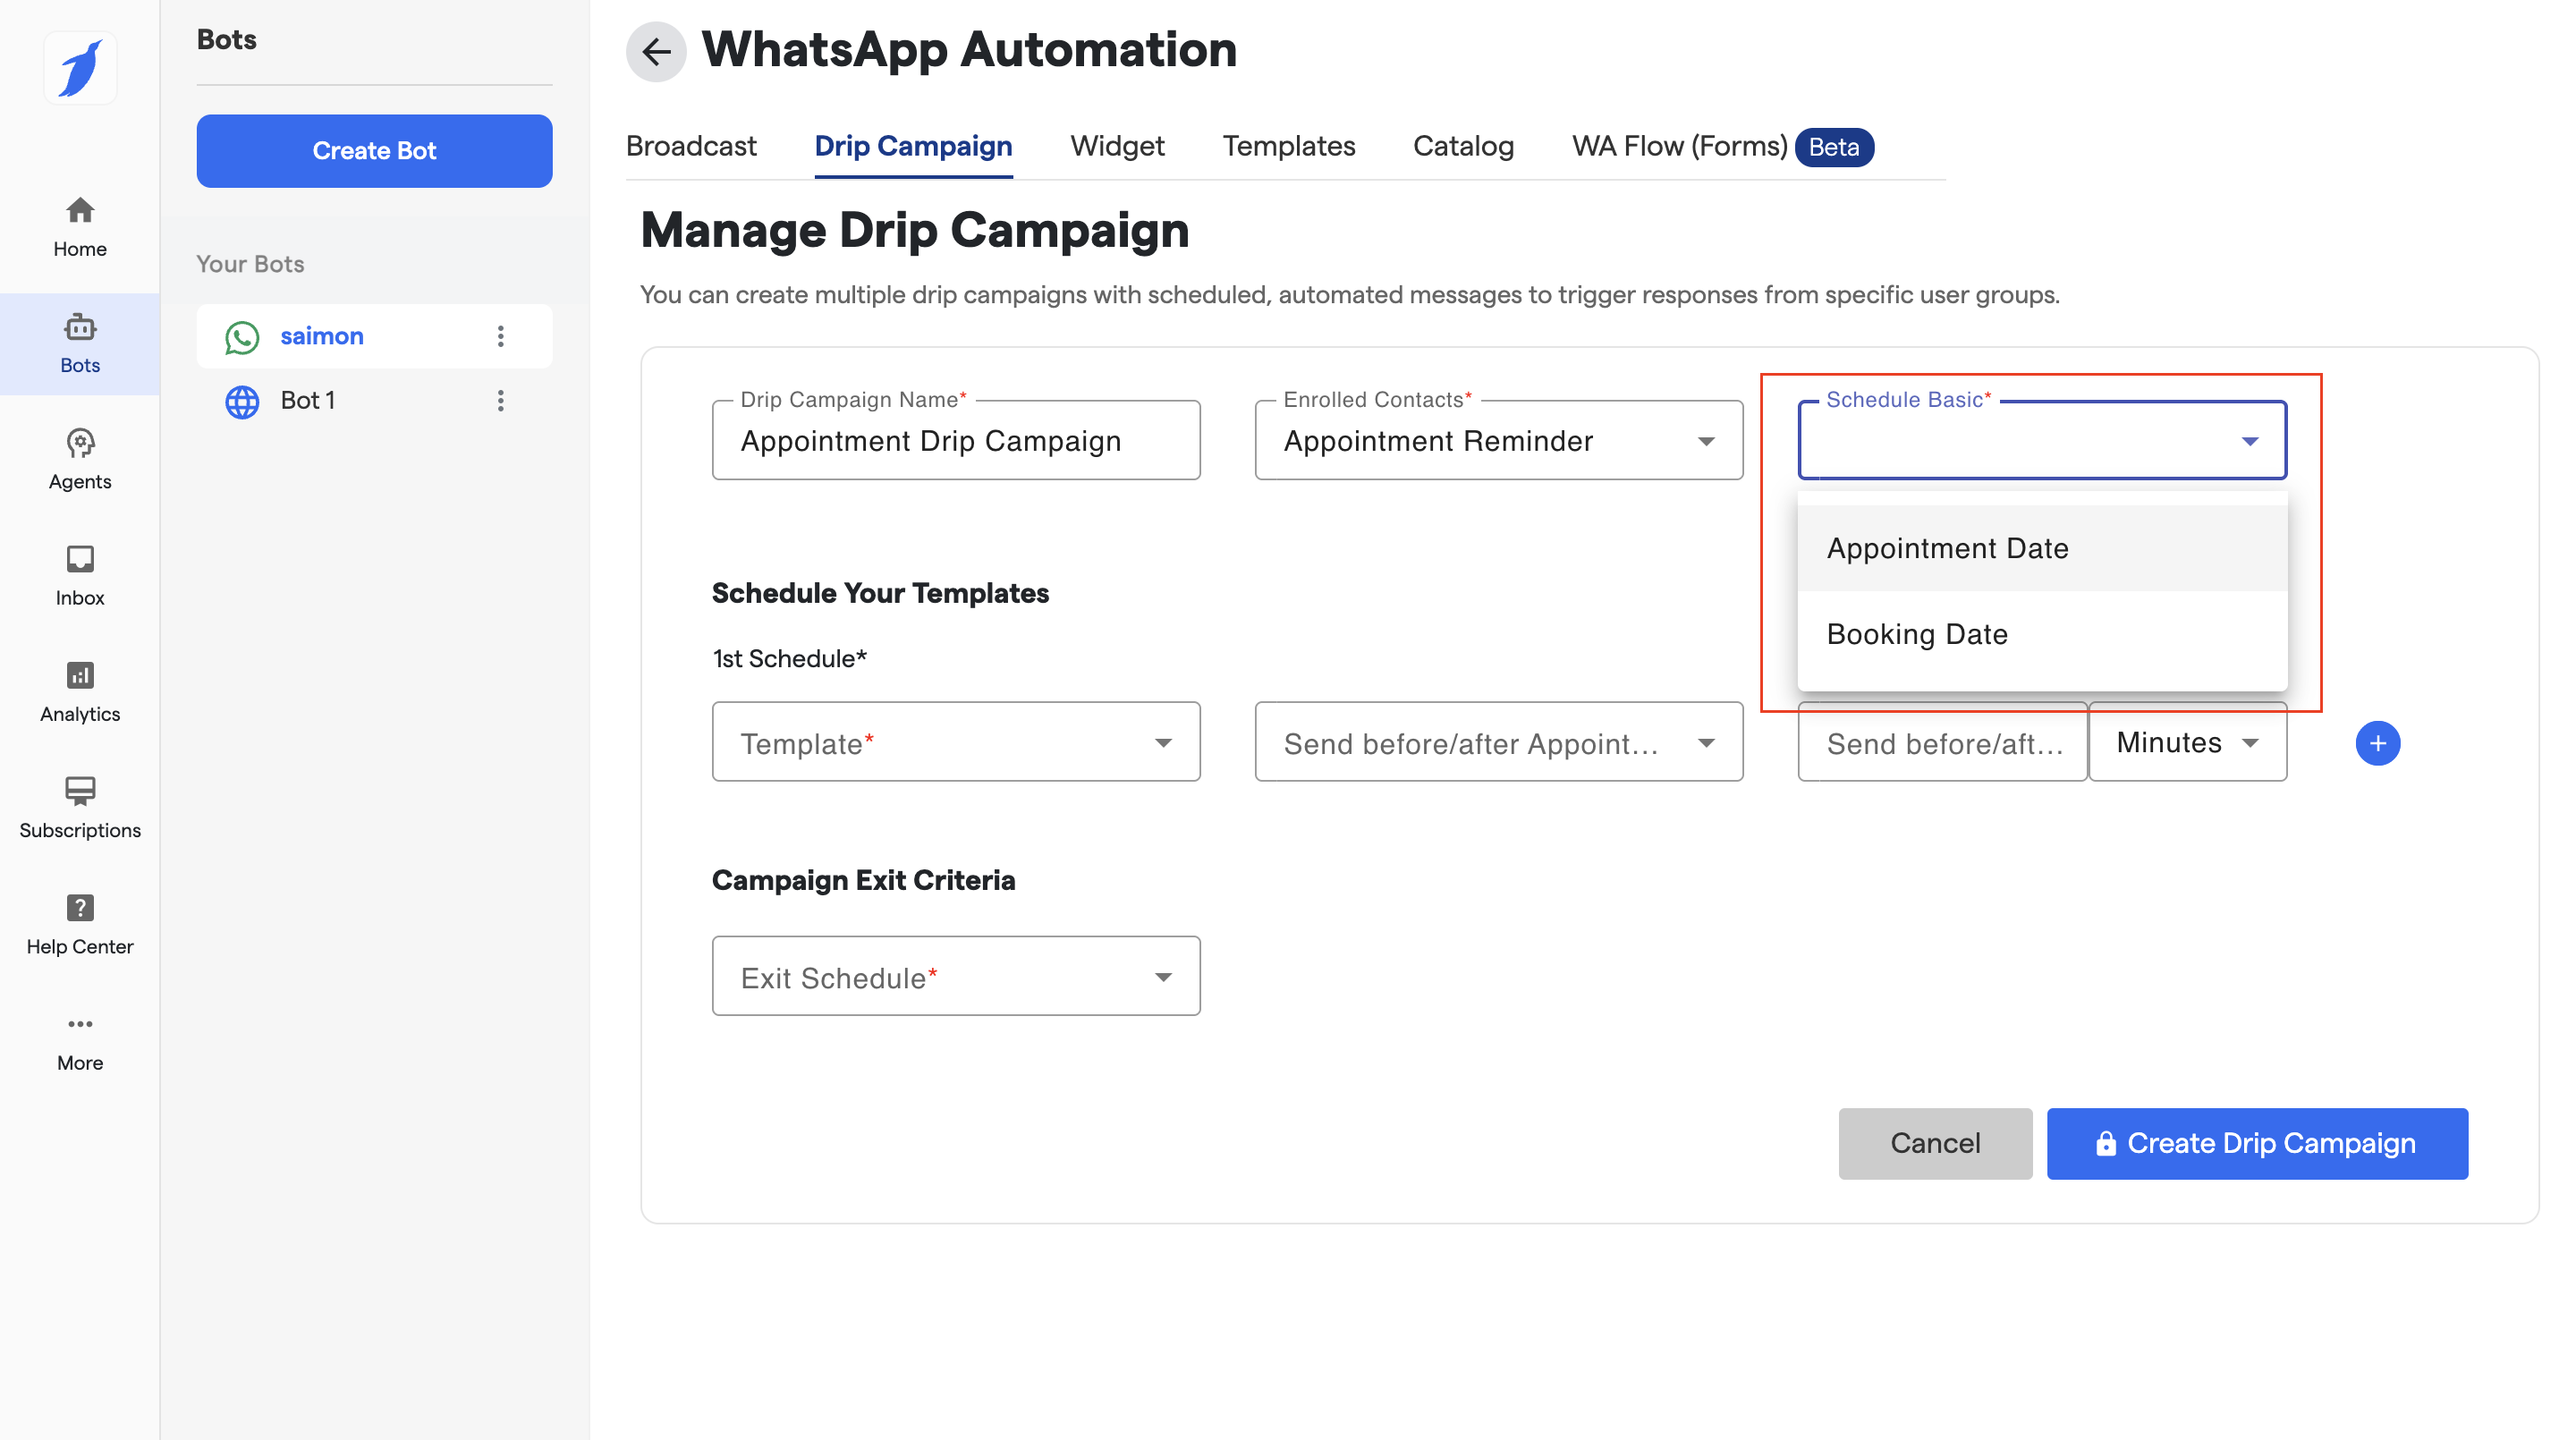
#### 3️⃣ Schedule Type
**Field:** `Schedule`\
Choose **Schedule Basic**.
This allows you to configure time-based messages relative to appointment time.
***
### ⏰ Schedule Your Templates
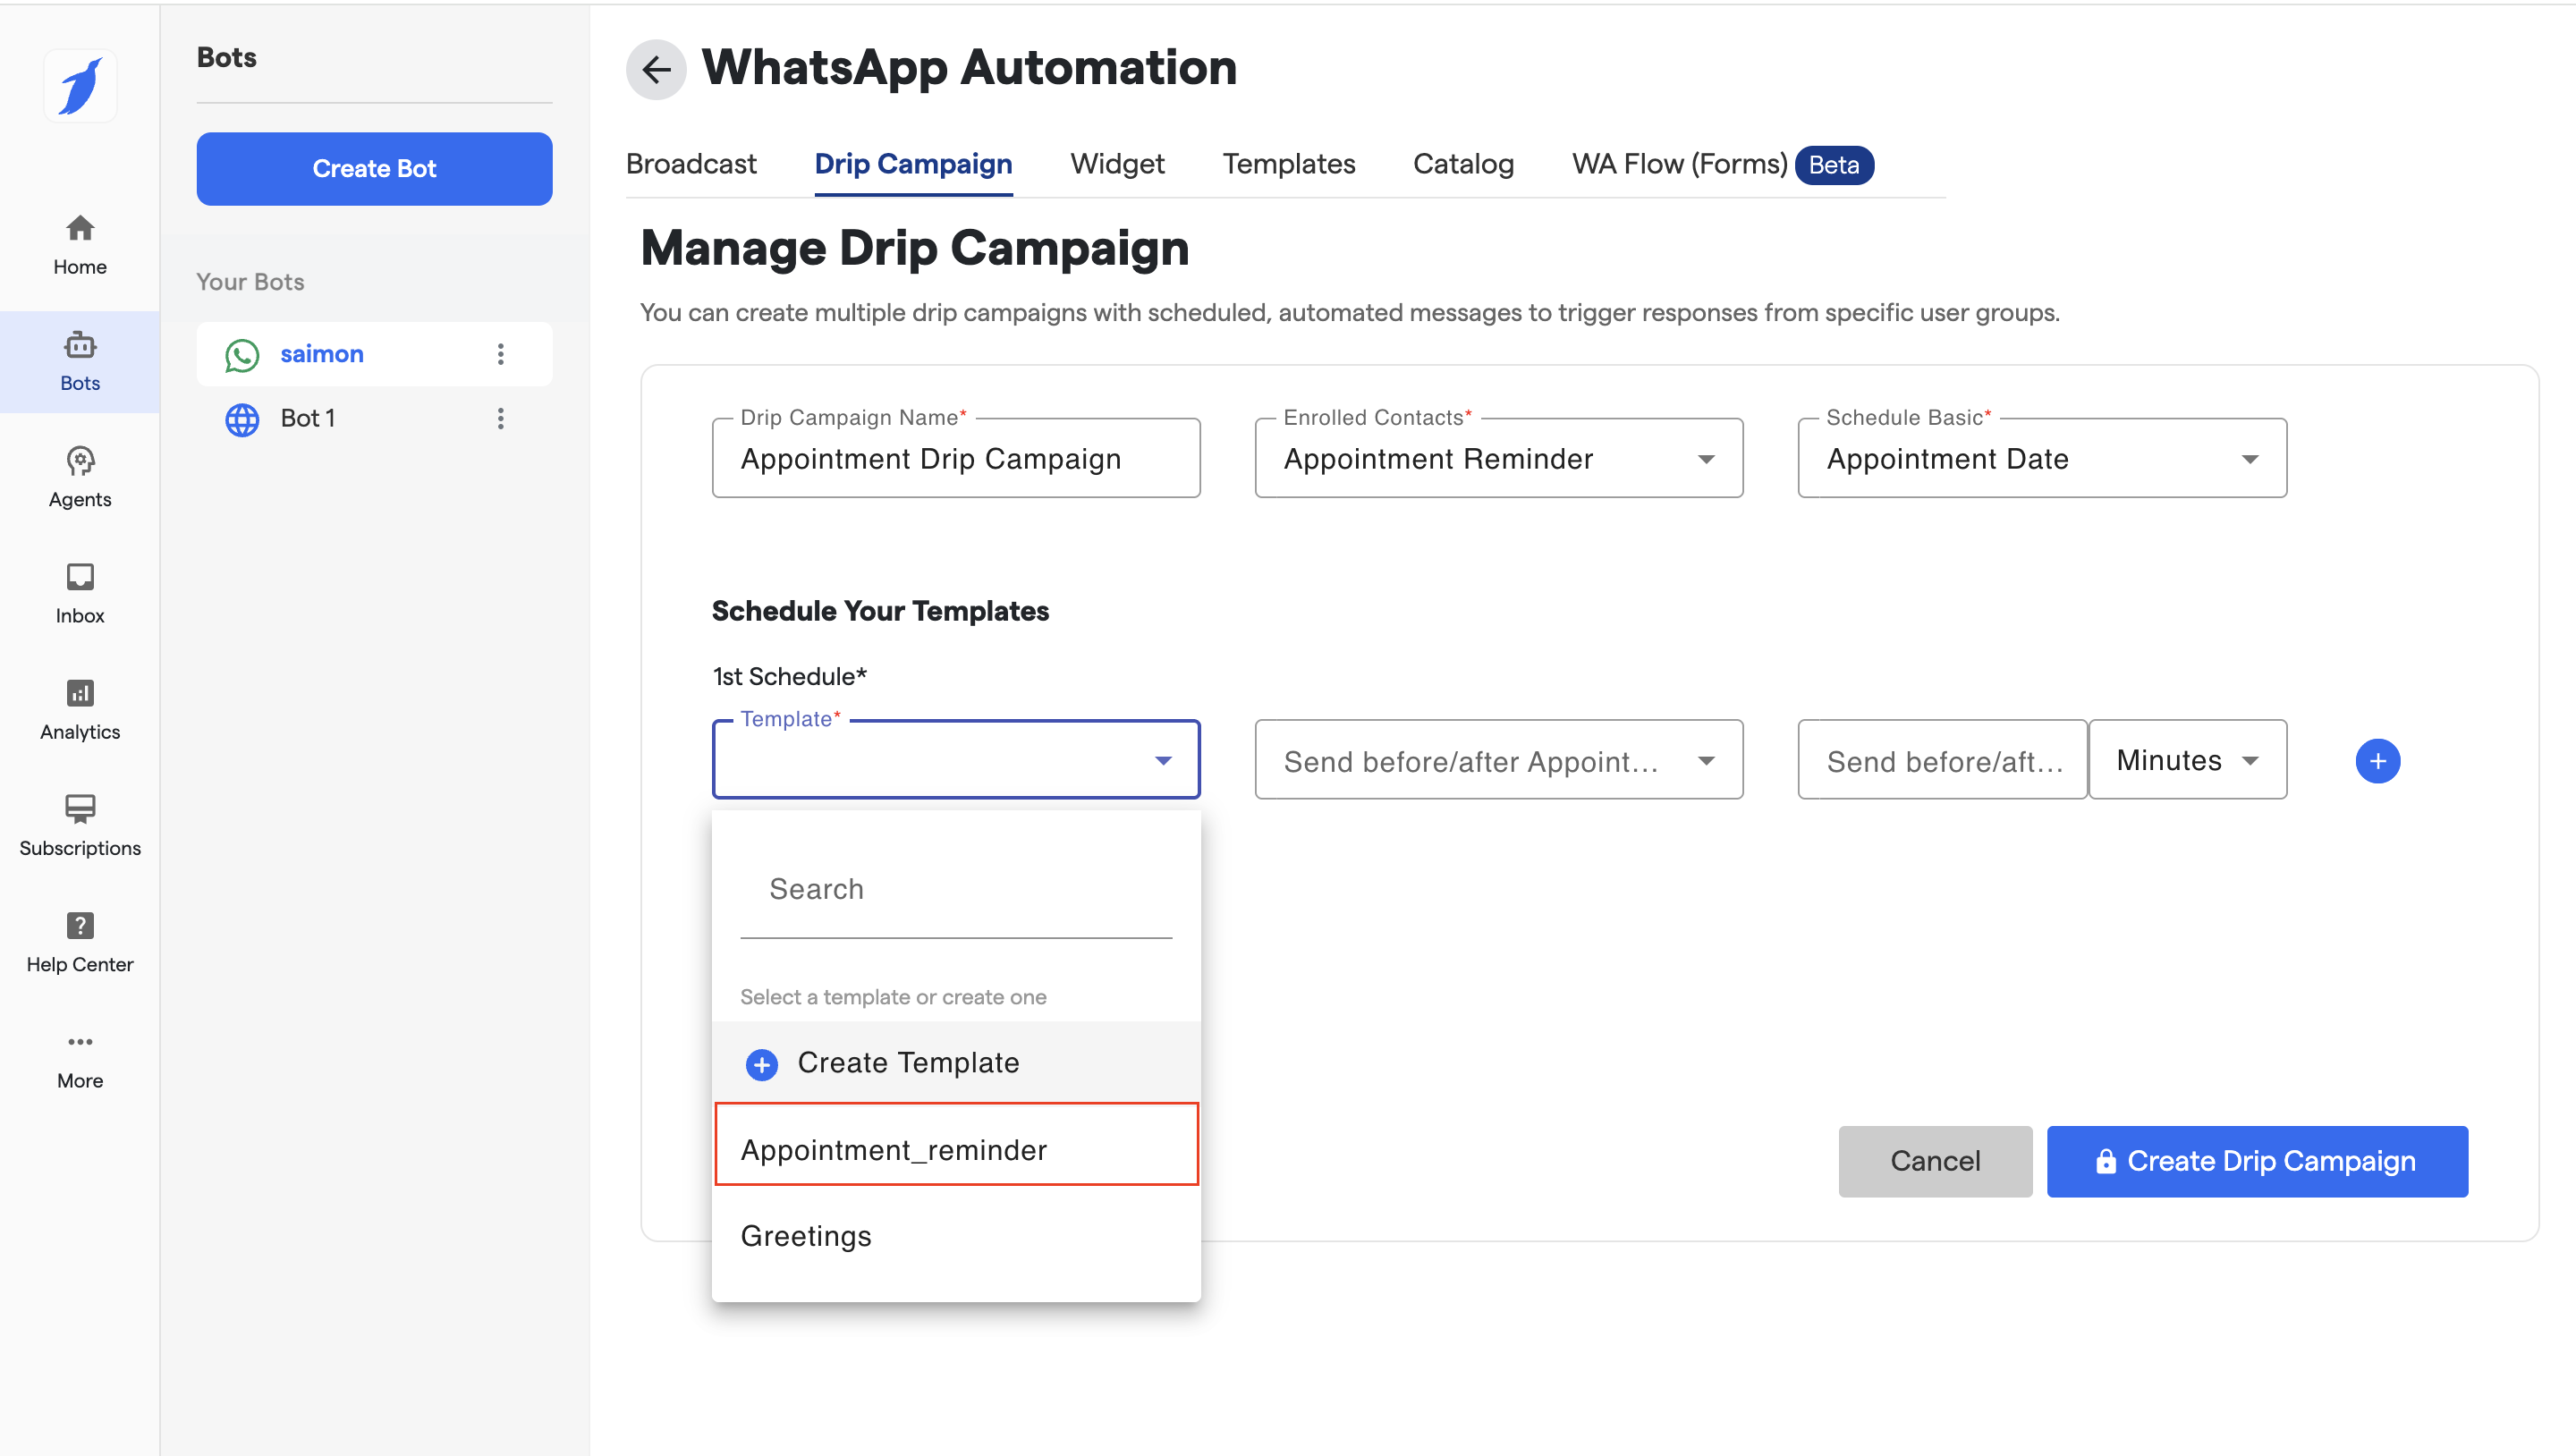
#### 4️⃣ Select Template
**Field:** `Template`\
Choose an approved WhatsApp template message.
💡 Tip:
* Use reminder-style templates
* Include variables like appointment date/time if available
***
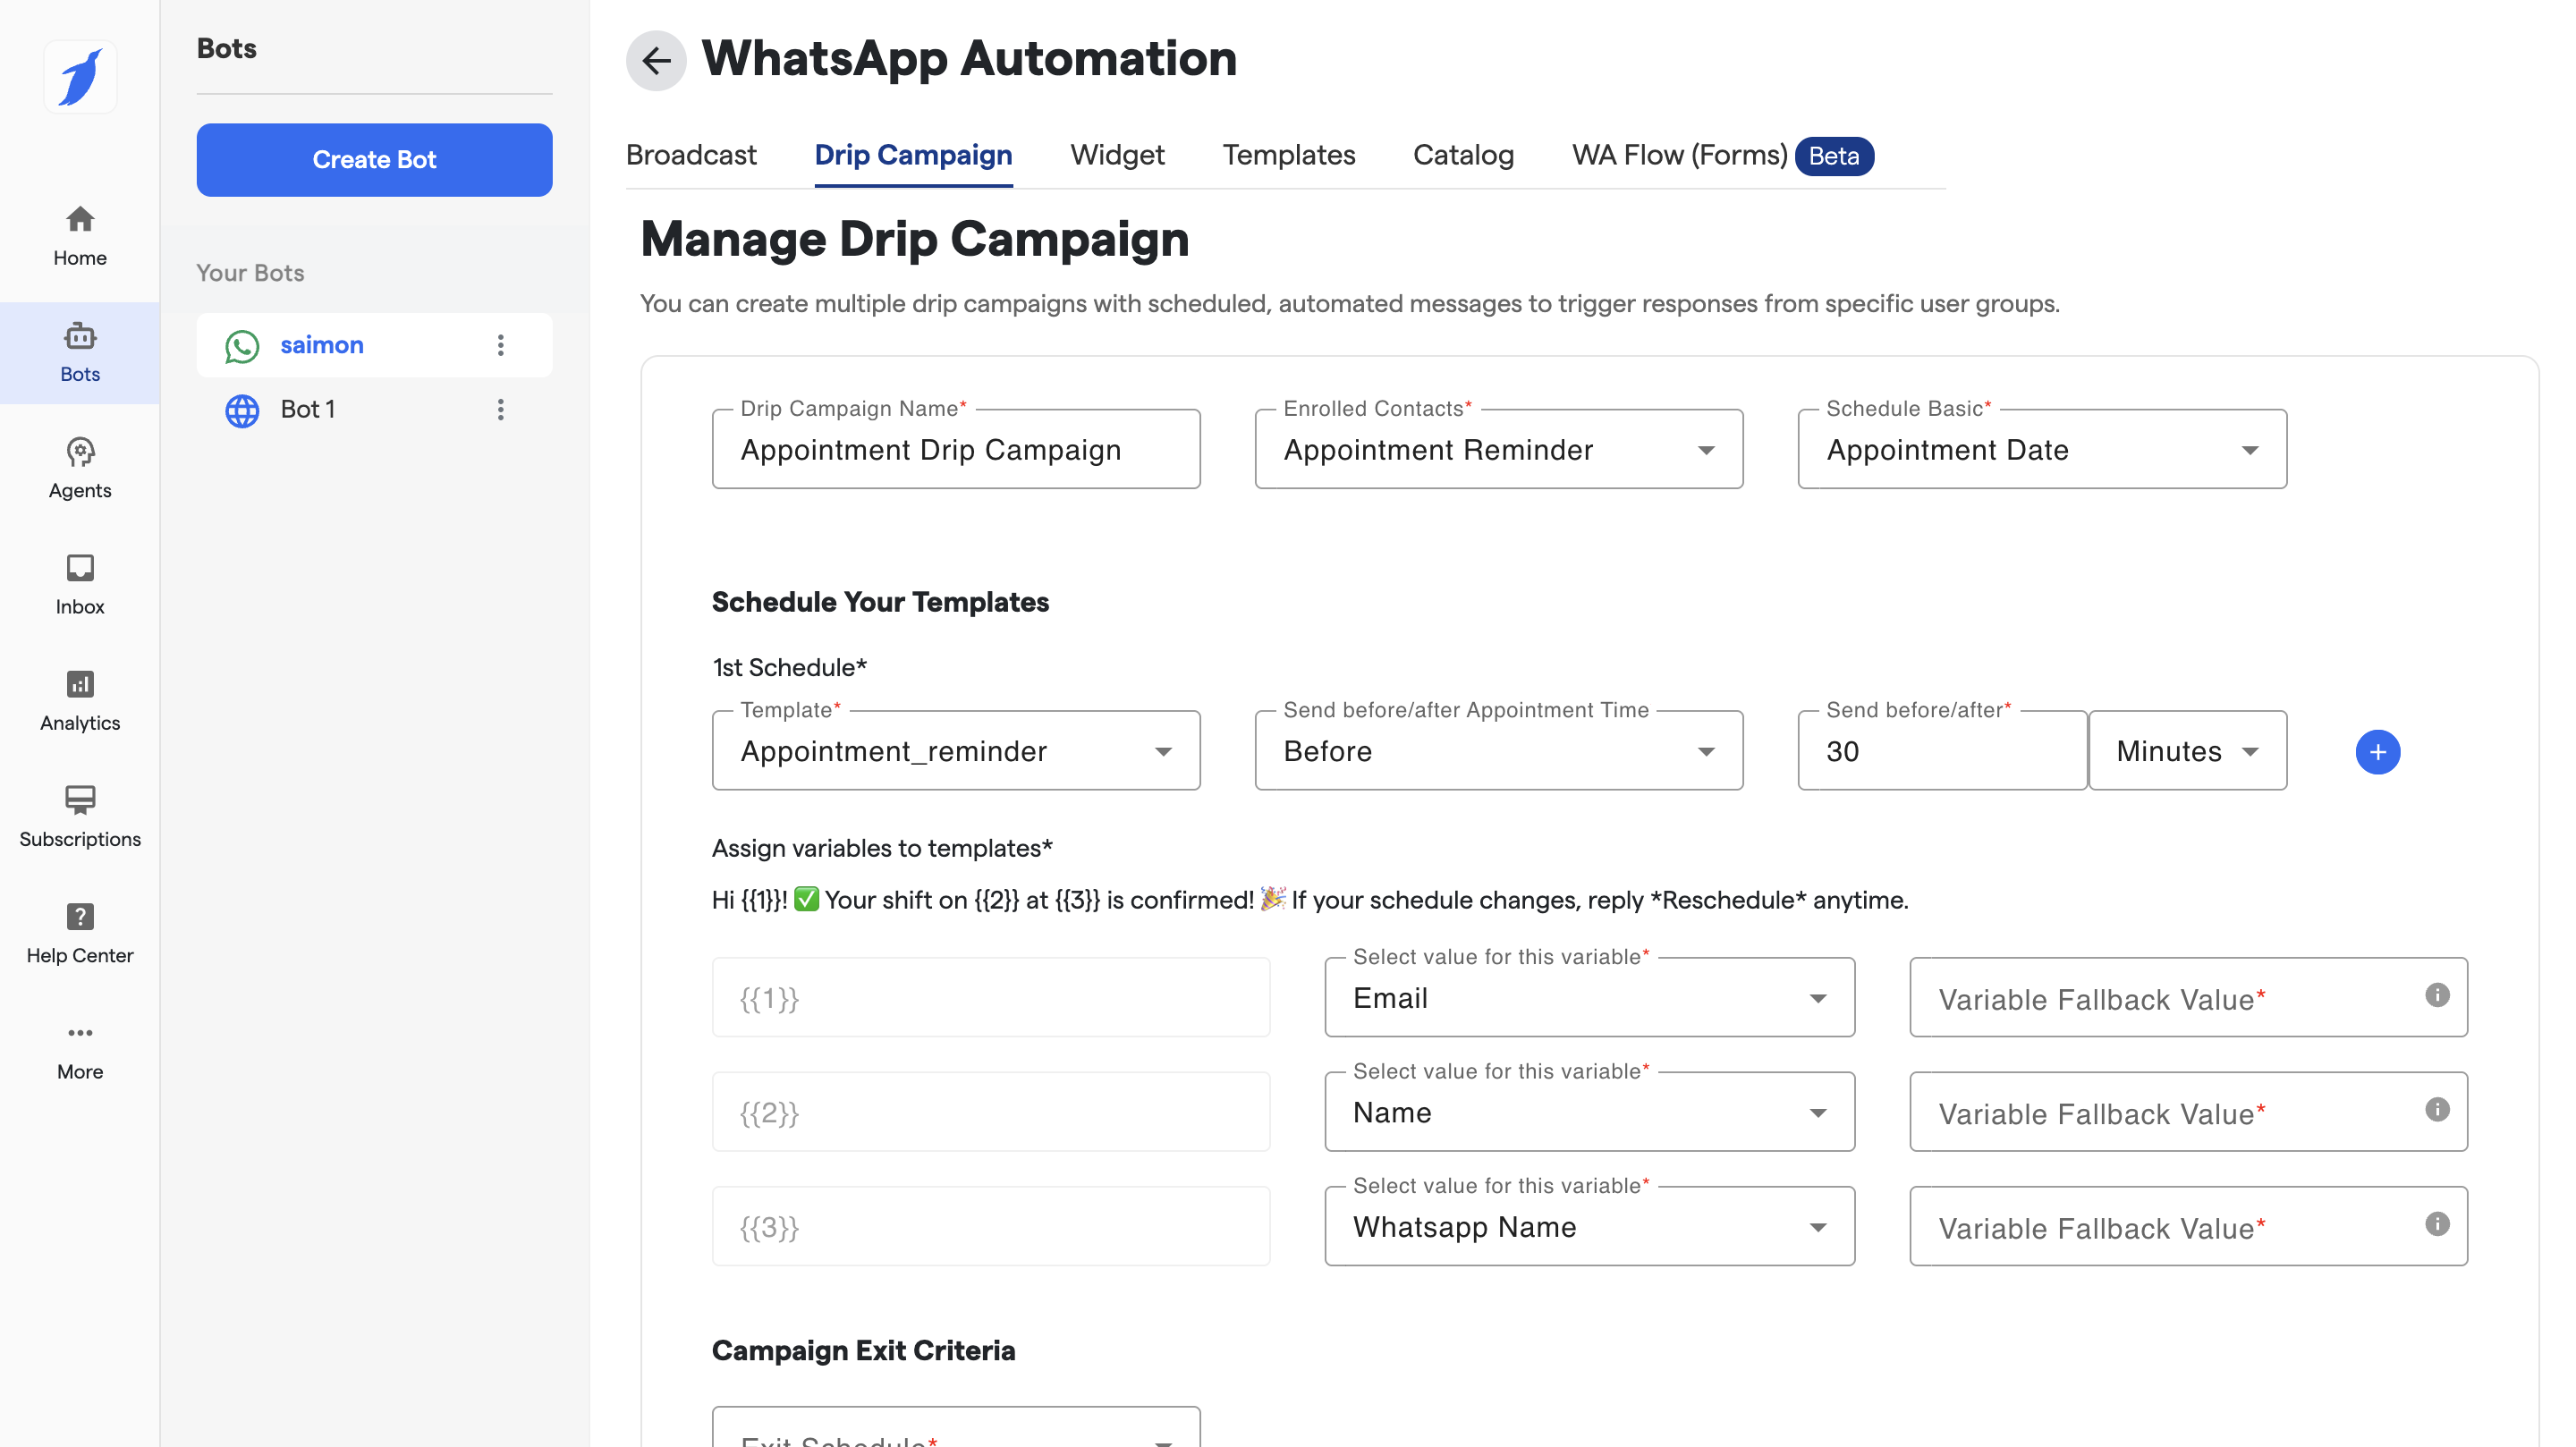
#### 5️⃣ Send Before / After Appointment
**Field:** `Send before/after Appointment`
Choose when the message should go:
* **Before Appointment** (e.g., reminders)
* **After Appointment** (e.g., follow-ups)
***
#### 6️⃣ Time Offset
**Field:** `Minutes / Hours / Days`
Define how long before or after the appointment the message should be sent.
**Examples:**
* 30 minutes before appointment
* 1 hour before appointment
* 1 day after appointment
***
#### 7️⃣ Add Multiple Schedules (Optional)
Click the **➕ (plus)** icon to:
* Add multiple reminder messages
* Combine before + after appointment messages in one campaign
***
### 🚪 Campaign Exit Criteria
#### 8️⃣ Exit Schedule
**Field:** `Exit Schedule`
Defines when a user should exit the drip campaign.
Common exit scenarios:
* Appointment completed
* Appointment cancelled
* Appointment rescheduled
✅ This prevents unnecessary messages once the campaign goal is achieved.
***
### ✅ Final Step: Create Campaign
Click **Create Drip Campaign** to activate your campaign.
Once created:
* Messages are sent automatically
* No manual follow-up required
* Campaign respects appointment status changes
***
### 📌 Key Things to Know
* Campaign works only for users with appointments
* WhatsApp templates must be **approved**
* Exit Flow ensures users don’t receive irrelevant messages
* All campaign activity is logged and trackable
***
### 🎯 Common Use Cases
* Appointment reminders (before visit)
* Post-appointment care instructions
* Feedback collection after appointment
* Cancellation or reschedule follow-ups